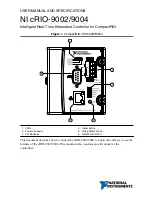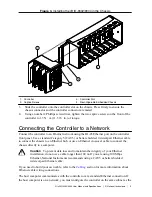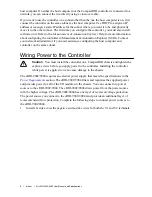
Figure 4.
Wiring Power to the cRIO-9002/9004
V1
V2
C
C
2.
Connect the positive lead of one of the power sources to the V1 terminal and the negative
lead to one of the C terminals.
3.
Connect the positive lead of the other power source to the V2 terminal and the negative
lead to one of the C terminals.
Note
The controller draws power from either V1 or V2 depending on which
terminal has a higher voltage. It does not draw power from both terminals.
Caution
The C terminals are internally connected to each other. Make sure to
use two power sources that have a common ground.
Powering On the cRIO-9002/9004
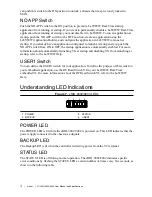
Plug in each power supply to the CompactRIO system. The controller runs a power-on self test
(POST). During the POST, the Power, Status, and User1 LEDs turn on. The User1 and Status
LEDs turn off, indicating that the POST is complete.
Boot Options
You can configure the controller to launch an embedded stand-alone application each time you
boot the controller. Refer to the
LabVIEW Help
for more information.
The following table lists the reset options available on CompactRIO backplanes, such as the
cRIO-910x devices. Use these options to determine how the CompactRIO controllers, such as
the cRIO-9002/9004 controllers, are reset in various conditions.
NI cRIO-9002/9004 User Manual and Specifications
|
© National Instruments
|
7

