Machine Maintenance
FIG. AC
LEAK MAINTENANCE
All
fi
ttings on this machine are O-ring style.
1. Disconnect machine from power.
2. If a leak is detected, tighten
fi
tting with the proper wrench size. DO NOT over
tighten. Over tightening could damage O-rings.
CHECK OIL LEVEL
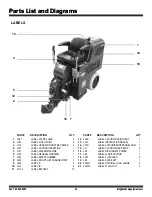
1. Remove Breather Dip Stick (G).
2. Check to see that Hydraulic Fluid is visible on Dip Stick.
OR
1. Remove Filler plug (H).
2. Oil should be visible 5 cm (2”) below hole.
3. Reinsert
plug.
OIL CHANGE OUT
1. Disconnect machine from power (charger or battery).
2. Drain
fl
uid by removing the drain plug from side of tank (I).
3. Replace drain plug (I).
4. Remove
fi
ller plug (H).
5. Add oil into the
fi
ller plug hole until visual 2” below hole.
HOSE CHANGE OUT/REMOVAL
1. Disconnect machine from power.
2. Remove
hood.
3. Using proper wrench size, remove hose from
fi
tting.
4. When replacing, make sure O-ring is properly seated on hose
fi
tting.
WHEEL MOTOR CHANGE OUT
1. Disconnect machine from power.
2. Block up machine to remove wheel. See wheel changing on page 28.
3. Remove
wheel.
4. Remove oil lines from wheel motor. A small amount of oil will run out of the lines.
Drain into a container. Wipe up spills immediately.
5. Remove four 1/2” wheel motor securing nuts.
6. Pull out on wheel motor to remove.
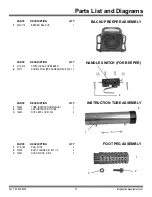
FOOT PEG REMOVAL/REPLACE
1. Insert a socket wrench into foot peg and secure bolt head.
2. Remove
nut.
3. Remove bolt and foot peg.
4. Replace foot peg before operating machine. DO NOT use machine without foot
pegs.
FIG. AD
Fax: 763-535-8255
27
G
H
I
CAUTION:
THIS UNIT CONTAINS 7 ½ GALLONS OF FLUID. MAKE SURE YOU
HAVE THE PROPER AMOUNT OF CONTAINERS CATCH FLUID.


