background image

10  

EN

www.napoleon.com

www.napoleon.com

N415-0578 Mar 24.20

N415-0578 Mar 24.20

Main Burner Use

:  When searing foods, we recommend preheating the grill by operating all main burn

-

ers in the high position with the lid closed for approximately 10 minutes.  Food cooked for short periods 

of time (fish, vegetables) can be grilled with the lid open. Cooking with the lid closed will ensure higher, 

more even temperatures that can reduce cooking time and cook meat more evenly. Food that has a cook

-

ing time longer than 30 minutes, such as roasts, can be cooked indirectly (with the burner lit opposite to 

the food placement). When cooking very lean meats, such as chicken breasts or lean pork, the grids can 

be oiled before pre-heating to reduce sticking. Cooking meat with a high degree of fat content can create 

flare-ups. Either trim the fat or reduce temperatures to inhibit this. Should a flare-up occur, move food 

away from the flames and reduce the heat. Leave the lid open.  Learn more grilling techniques and deli

-

cious recipes by acquiring Napoleon’s cookbooks.

Direct Cooking

: Place food to be cooked on the grill directly over the heat. This method is generally used 

for searing or for foods that do not require prolonged cooking times such as hamburgers, steaks, chicken 

pieces, or vegetables. The food is first seared to trap-in the juices and flavor, and then the temperature is 

lowered to finish cooking the food to your preference.

Indirect Cooking: 

With one or more burners operating, place food to be cooked on the grill over a burner 

that is not operating. The heat circulates around the food, cooking slowly and evenly. Cooking with this 

method is much the same as cooking in your oven and is generally used for larger cuts of meats such as 

roasts, chickens or turkeys, but can also be used for cooking foods that are prone to flare-ups or for smok

-

ing foods. Lower temperatures and slower cooking times result in tender foods.

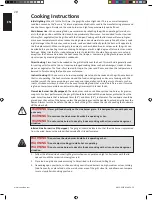
Cooking Instructions

Initial Lighting

: When lit for the first time, the gas grill emits a slight odor. This is a normal temporary 

condition caused by the “burn-in” of internal paints and lubricants used in the manufacturing process and 

does not occur again. Simply run the main burners on high for approximately one-half hour. 

Infrared Side Burner Use (If Equipped)

: The gas grill should be located so that the side burner is protected 

from the wind, because the wind will adversely affect its performance. 

WARNING!

 Do not close the side burner lid while it is operating or hot.

WARNING!

 Do not adjust cooking grid while hot or operating. 

WARNING!

 Do not use side burner to deep fry foods as cooking with oil can create a dangerous 

situation. 

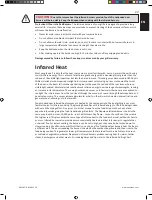
1. 

Follow the infrared side burner lighting instructions and operate on high for 5 minutes with the lid 

opened or until the ceramic burners glow red.

2. 

Place food on grills and cook according to times listed in the Infrared Grilling Chart.

3.  Depending upon your taste, continue cooking over infrared burners on high, medium or low, turning 

food frequently, or place food on the main burner area of the grill, close lid, and allow oven tempera-

ture to slowly finish cooking your food.

Flame Side Burner Use (if equipped): 

The side burner can be used like any stove top burner, for gravies, 

soups etc. For best performance, the gas grill should be located with the side burner protected from the 

wind. Select cookware that is between 16cm (6.3”) and 24cm (9.4”) in diameter. The cookware should be 

placed over the centre of the burner, unless this positioning causes the handle to extend directly over the 

flames. Always turn the handle to the side or back of the grill to reduce the risk of knocking the cookware 

off the side shelf.

WARNING!

 Never grill food directly on the side burner grate.  It is designed for use with pots and 

pans only.

WARNING!

 Do not close the side burner lid while it is operating or hot.

WARNING!

 Do not use side burner to deep fry foods as cooking with oil can create a dangerous 

situation. 

!

!

Summary of Contents for RXT425-1

Page 1: ...MELL GAS Shut off gas to the appliance Extinguish any open flame Open lid If odor continues keep away from the appliance and immediately call your gas supplier or fire department WARNING Do not try to...

Page 2: ...nsed authorized service technician or contractor in accordance with the installation instructions included with the product and all local and national building and fire codes has been properly maintai...

Page 3: ...onnected cylinders must not be stored in a building garage or any other enclosed area Natural gas units must be disconnected from the supply when being stored indoors The pressure regulator and hose a...

Page 4: ...LDED SIDE SHELF 32 82cm FOLDED SHELVES 36 92cm GRILL HEIGHT 25 64cm GRILL DEPTH RXT365SIB 1 NA GRILL 2 x 16 000 BTU H MAIN BURNER 1 x 9 000 BTU H SIDE BURNER IF EQUIPPED GRILL SIZE 18 X 20 1 4 365 in...

Page 5: ...5 89cm FOLDED SHELVES 36 92cm GRILL HEIGHT 25 64cm GRILL DEPTH RXT425SIB 1 NA GRILL 3 x 14 000 BTU H KW H MAIN BURNER 1 x 9 000 BTU H I R SIDE BURNER IF EQUIPPED GRILL SIZE 18 X 23 3 4 425 in 2 WARMIN...

Page 6: ...low until a positive seal has been achieved It is also equipped with an excess flow device In order to attain full flow to the grill the valves must be in the off position when the cylinder valve is t...

Page 7: ...igned for natural gas and certified for outdoor use The gas grill is designed to operate at an inlet pressure of 7 inches water column Piping and valves upstream of the quick disconnect are not suppli...

Page 8: ...If the leak cannot be stopped immediately shut off the gas supply disconnect it and have the grill inspected by a certified gas installer or dealer Do not use the grill until the leak has been correct...

Page 9: ...he off position and repeat step 2 several times 3 Press and hold igniter button until burner lights or light by match 4 If the pilot and burner will not ignite within 5 seconds turn the control knob t...

Page 10: ...times result in tender foods Cooking Instructions Initial Lighting When lit for the first time the gas grill emits a slight odor This is a normal temporary condition caused by the burn in of internal...

Page 11: ...glow red This glow emits the same type of infrared heat to the food as charcoal without its hassle or mess Infrared burners also provide a more consistently heated area that is far easier to regulate...

Page 12: ...o Napoleon s woodchip smoker Chicken pieces High setting 2 min each side then medium low to low setting 20 25 min The joint connecting the thigh and the leg from the skinless side should be sliced 3 4...

Page 13: ...is residue after cooking operate the grill on high for 5 10 minutes Do not clean the ceramic tile with a wire brush Grids And Warming Rack The grids and warming rack are best cleaned with a brass wire...

Page 14: ...to avoid grease buildup Grease and excess drippings pass through to the drip pan located beneath the gas grill and accumulate in the disposable grease tray below the drip pan To access the disposable...

Page 15: ...The following provides a few of the causes of cracks and the steps you can take to avoid them Damage caused by failure to follow these steps is not covered by your grill warranty 1 Impact with hard ob...

Page 16: ...justment Thoroughly clean burner by removing See general maintenance instructions Open air shutter slightly according to combustion air adjustment instructions This must be done by a qualified gas ins...

Page 17: ...osition when the tank valve is turned on Turn tank on slowly to allow pressure to equalize See lighting instructions Infrared burner if equipped flashes back during operation the burner abruptly makes...

Page 18: ...ss a claim the following information is required 1 Model and serial number of the unit 2 Part number and description 3 A concise description of the problem broken is not sufficient 4 Proof of purchase...

Page 19: ...areil Si ces instructions ne sont pas suivies la lettre un feu ou une explosion pourraient s ensuivre causant des dommages la propri t des blessures corporelles ou des pertes de vie SERIENNUMMER AUFKL...

Page 20: ...tel que le sel ou le chlore des alt rations des abus des n gligences ou des pi ces install es par d autres fabricants Dans le cas d une d t rioration des composants causant le mauvais fonctionnement d...

Page 21: ...ls au gaz naturel doivent tre d branch s de leur source d alimentation en gaz lorsqu ils sont entrepos s l int rieur Le r gulateur de pression et le tuyau fourni avec l appareil au gaz de cuisine en p...

Page 22: ...32 82cm PLATEAU PLI 36 92cm HAUTEUR DU GRILLE 25 64cm PROFONDEUR DU GRILLE RXT365SIB 1 NA GRILL 2 x 16 000 BTU H BR LEUR PRINCIPAL 1 x 9 000 BTU H BR LEUR LAT RAL SI QUIP DIMENSIONS GRILLE 18 X 20 1...

Page 23: ...PLATEAU PLI 36 92cm HAUTEUR DU GRILLE 25 64cm PROFONDEUR DU GRILLE RXT425SIB 1 NA GRILL 3 x 14 000 BTU H KW H BR LEUR PRINCIPAL 1 x 9 000 BTU H BR LEUR LAT RAL INFRAROUGE SI QUIP DIMENSIONS GRILLE 18...

Page 24: ...QCC1 Un cylindre QCC1 poss de un raccord qui emp che l coulement du gaz jusqu ce qu un joint tanche soit obtenu Il est aussi quip d un dispositif de contr le d coulement du gaz Afin d obtenir un d bi...

Page 25: ...e la maison suivez les instructions pour le branchement au gaz naturel Assurez vous que la pression d alimentation au gril soit de 11 pouces de colonne d eau Branchement au gaz naturel Ce gril gaz nat...

Page 26: ...n de gaz la bonbonne enlevez la et faites inspecter votre gril par votre fournisseur de gaz ou d taillant N utilisez pas l appareil jusqu ce que la fuite soit r par e ARR TEZ AVERTISSEMENT L installat...

Page 27: ...s rel chez le 2 Tournez le bouton de contr le du br leur lat ral sur lev 3 Si la veilleuse ne s allume pas tournez imm diatement le bouton de contr le en position arr t et r p tez l tape 2 plusieurs f...

Page 28: ...les l gumes etc La nourriture est d abord saisie afin d emprisonner les jus et la saveur puis la temp rature est r duite afin de terminer la cuisson selon vos pr f rences Cuisson indirect Avec un ou...

Page 29: ...eront rapidement Protection des br leurs infrarouges Les br leurs infrarouges de votre gril sont con us pour durer long temps Cependant vous devez respecter certaines consignes pour viter que leur sur...

Page 30: ...n le m me principe Le charbon de bois est la m thode traditionnelle de cuisson l infrarouge dont nous sommes les plus familiers Les briquettes incandescentes mettent de l nergie infrarouge l aliment q...

Page 31: ...ue c t ensuite r glage de moyen bas bas 20 25 min L articulation qui retient le pilon la cuisse doit tre coup e au 3 4 partir du c t sans peau afin de permettre la viande d tre plus plat sur la grille...

Page 32: ...x Ceci est important pour viter que de l humidit p n tre la fonte Entretien l aide d un linge doux appliquez une couche de SHORTENING V G TAL sur toute la surface de la grille en vous assurant de couv...

Page 33: ...in d viter une accumulation de graisse La graisse et les jus de cuisson tombent dans le tiroir d gouttement qui se trouve sous la cuve du gril et s accumulent dans le r cipient graisse jetable qui se...

Page 34: ...tefois le nettoyage sera plus facile si le br leur est retir du gril Ne pliez pas le foret en nettoyant les orifices car le foret casserait Ce foret doit tre utilis pour les orifices de br leur seulem...

Page 35: ...leur infrarouge sous la pluie iii Si vous d couvrez de l eau dans votre gril provenant de la pluie d arrosoirs etc v rifiez si elle est entr e en contact avec la c ramique Si la c ramique semble mouil...

Page 36: ...s flammes produites par les br leurs sont jaunes et vous d tectez une odeur de gaz Possibilit de toiles d araign e ou autres d bris ou d un mauvais ajustement des volets d air Retirez le br leur et ne...

Page 37: ...e la proc dure d allumage est suivie la lettre Tous les boutons de contr le du gril doivent tre ferm s lorsque vous ouvrez la soupape de la bonbonne Tournez la soupape de la bonbonne lentement pour as...

Page 38: ...suivante est n cessaire 1 Mod le et num ro de s rie de l appareil 2 Num ro de la pi ce et description 3 Description concise du probl me cass n est pas suffisant 4 Preuve d achat copie de la facture Da...

Page 39: ...10 mm ATTENTION Lors du d ballage et de l assemblage nous vous conseillons de porter des gants de travail et des lunettes de s curit pour votre protection Malgr tous nos efforts pour assurer que l as...

Page 40: ...r it may melt and leak causing a fire Branchement Ad quat Du Boyau AVERTISSEMENT Assurez vous que le boyau ne touche aucune surface haute temp rature sinon il risque de fondre de provoquer une fuite e...

Page 41: ...ced Do not smoke while performing this test and remove all sources of ignition See Leak Testing Diagram for areas to check Turn all burner controls to the off position Turn gas supply valve on Brush a...

Page 42: ...e du syst me de gaz est remplac e ou r par e Ne fumez pas et enlevez toutes sources d allumage lorsque vous faites ce test Consultez le sch ma de test de fuites pour voir les endroits tester 1 Fermez...

Page 43: ...e de cuve x x 7 N710 0062 grease tray aluminium aluminium ensemble r cpients graisse x x x 62007 grease tray liner r cipient graisse foil ac ac ac 8 N710 0107 drip pan tiroir d egouttement x N710 0094...

Page 44: ...ouvercle x x N010 1031 BK assembly lid black ensemble couvercle x x 28 S91003 temperature gauge jauge de temp rature x x x 29 N385 0307 SER NAPOLEON logo logo NAPOLEON x x x 30 N510 0013 black silicon...

Page 45: ...leur lat ral infrarouge x x 45 S83009 side burner grate grille de br leur lat ral x x 46 N240 0037 side burner electrode lectrode de br leur lat ral x x 47 N750 0016 electronic ignition lead fil allum...

Page 46: ...r leur et syst me jetfire x x x 69811 rotisserie kit ensemble de la r tissoire ac ac ac 61365 cover housse ac 61425 cover housse ac ac 61426 cover folded side shelves housse tablettes lat rales pli es...

Page 47: ...12 12 11 11 55 55 14 14 32 32 27 27 32 32 2 2 3 3 4 4 31 31 22 22 57 57 57 57 57 57 23 23 26 26 25 25 24 24 10 10 34 34 36 36 51 51 52 52 53 53 49 49 50 50 47 47 48 48 9 9 6 6 33 33 RXT425SIB 1 NA 43...

Page 48: ...www napoleon com N415 0578...

Reviews: