20
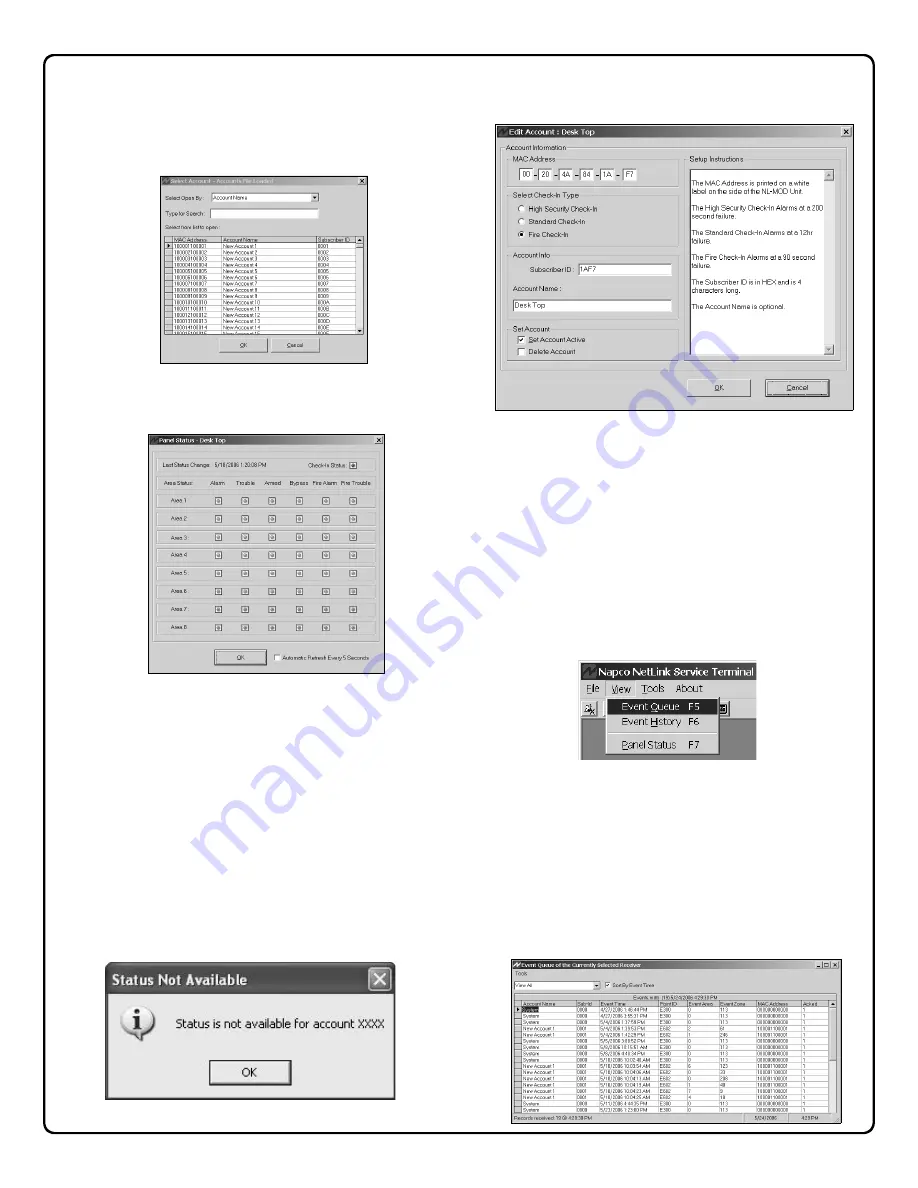
File, Select Account>>View Panel Status
Click
File
,
Select Account
,
View Panel Status
and the
Select Account
window opens:
Click to highlight an Account and click
OK
. The
Panel
Status
dialog appears (shown below) and the selected
Account now becomes the
active
Account:
The
Panel Status
dialog details a status of each area in
the system with respect to the following:
Alarm status,
Existing Troubles, Armed status, Bypassed zones, Fire
Alarm status
, and
Fire Troubles
, the current
Check In
Status
. The status of each of these items is presented via
a colored icon: (A
green
icon indicates all is OK. A
red
icon indicates the area specified is
in alarm
, is
armed
or is
in
trouble
. The
darkest
icon indicates the area specified
is inactive or does not exist). The date and time of the last
Status Change is also displayed. At the bottom of the dia-
log is a checkbox named Automatic Refresh Every 5 Sec-
onds, reloading data to the Panel Status screen.
The popup shown below will appear for new control panel
installations that have not yet sent any status packets:
File, Edit Active Account
Click
File
,
Edit Active Account
(or press
CTRL+E
) and
the following
Edit Account
dialog appears allowing the
current Account information to be changed.
The
Edit Account
dialog allows you to configure the
same Account data that was saved when the Account
was first created. For a description of each field, see
page 10.
VIEW MENU
As displayed in this image, the
View
menu allows you to
display the event queue, history, control panel status, as
well as text files containing the system log and error log.
View, Event Queue
Click
View
,
Event Queue
(or press
F5
on your keyboard)
and a grid appears--the
Event Queue
screen (shown be-
low). As events are received, they are added to this list--
with the most recent incoming events placed at the bot-
tom. The
Event Queue
screen displays all data that ap-
pears on the keypad LCD within 5 seconds for the cur-
rently selected Receiver. The
Event Queue
screen can
be minimized (or made floating) by the Windows
®
control
box located in the upper right hand corner of the window.
Using the Service Application (cont'd)
Summary of Contents for Net.Link NL-RCV-RMPCUL
Page 27: ...27 NOTES...


