4
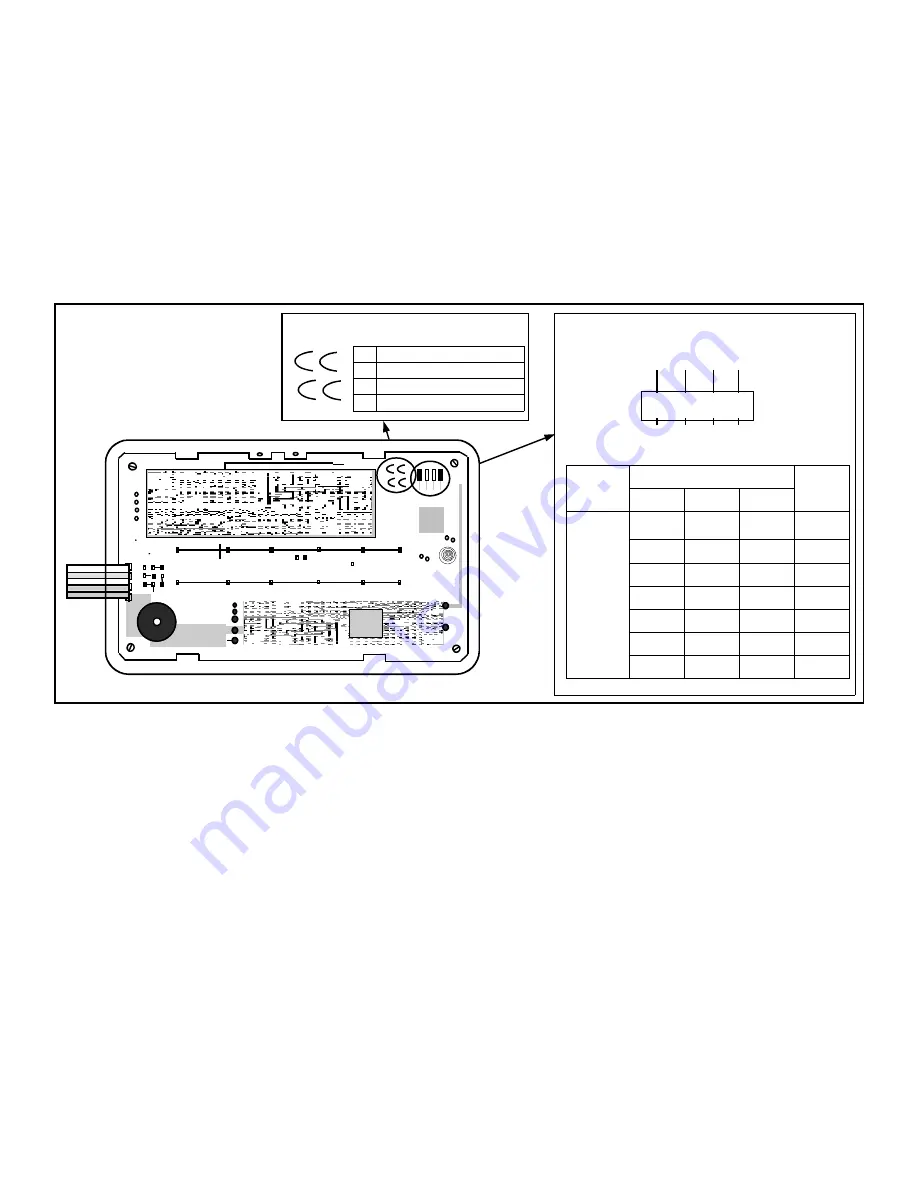
Keypads are configured by the proper selection of jumpers. Refer to the label on the keypad circuit board for jumper
locations and a summary of settings. The keypad may be configured to disable touchpad backlight and entry sounder.
KEYPAD OPTION JUMPERS
A: DISABLE PUSHBUTTON BACKLIGHT
Cut Jumper A to disable touchpad pushbutton back-lighting.
B: DISABLE LCD BACKLIGHT
Cut Jumper B to disable liquid crystal display back-lighting.
C: DISABLE KEYPAD SOUNDER
Cut Jumper C to disable the keypad sounder.
D: ENABLE KEYPAD TAMPER
Cut Jumper D to enable the keypad tamper switch.
GETTING UP AND RUNNING
(Use the GEM-DXK1 to program. For the LIBRA-DXK4RF series keypads, see page 12, "RF Transmitter
Points". Also see "Quick Method", which follows).
Using the GEM-DXK1 keypad
, for each transmitter, enter:
•
the zone number to which the transmitter will be mapped;
•
the 6-digit ID Code: 1-digit checksum number printed on the transmitter and box;
•
the wireless point number.
Note:
When programming the ID Code at the keypad
,
press
G0
for "A"
press
G1
for "B"
press
G2
for "C"
press
G3
for "D"
press
G4
for "E"
press
G5
for "F"
Press
u
to
save and
r
(
p
)
to continue.
Keyfob Transmitters.
Referring to the programming instructions for the control panel, enter the following:
•
an assigned Keyfob Transmitter number (1—16);
Address Jumpers
Left Jumper ("RX") determines Receiver Number.
If empty, default is “1”. Receiver number 2 if shorted.
Other three jumpers determine Keypad number, as per table
below:
RX 3 2 1
RX
Receiver
Number
Address Jumper
Keypad
Number
3
2
1
OFF
OFF
OFF or
ON
1
OFF
ON
OFF
2
OFF
ON
ON
3
ON
OFF
OFF
4
ON
OFF
ON
5
ON
ON
OFF
6
ON
ON
ON
7
Jum
per
ON
= Receiv
er #2
Jum
per
OF
F = R
eceiv
er #1
A
C
D
B
A
DISABLE PUSHBUTTON BACKLIGHT
B
DISABLE LCD BACKLIGHT
C
DISABLE KEYPAD SOUNDER
D
ENABLE KEYPAD TAMPER
Option Jumpers
(OPEN BACK OF KEYPAD


