


EN
Attach the included EPS extension cable on to your motherboard – do not connect it to the
power supply yet. Next you should mount the CPU cooler - for very large CPU coolers, the
attachment of the EPS extension cable after installation can be difficult.
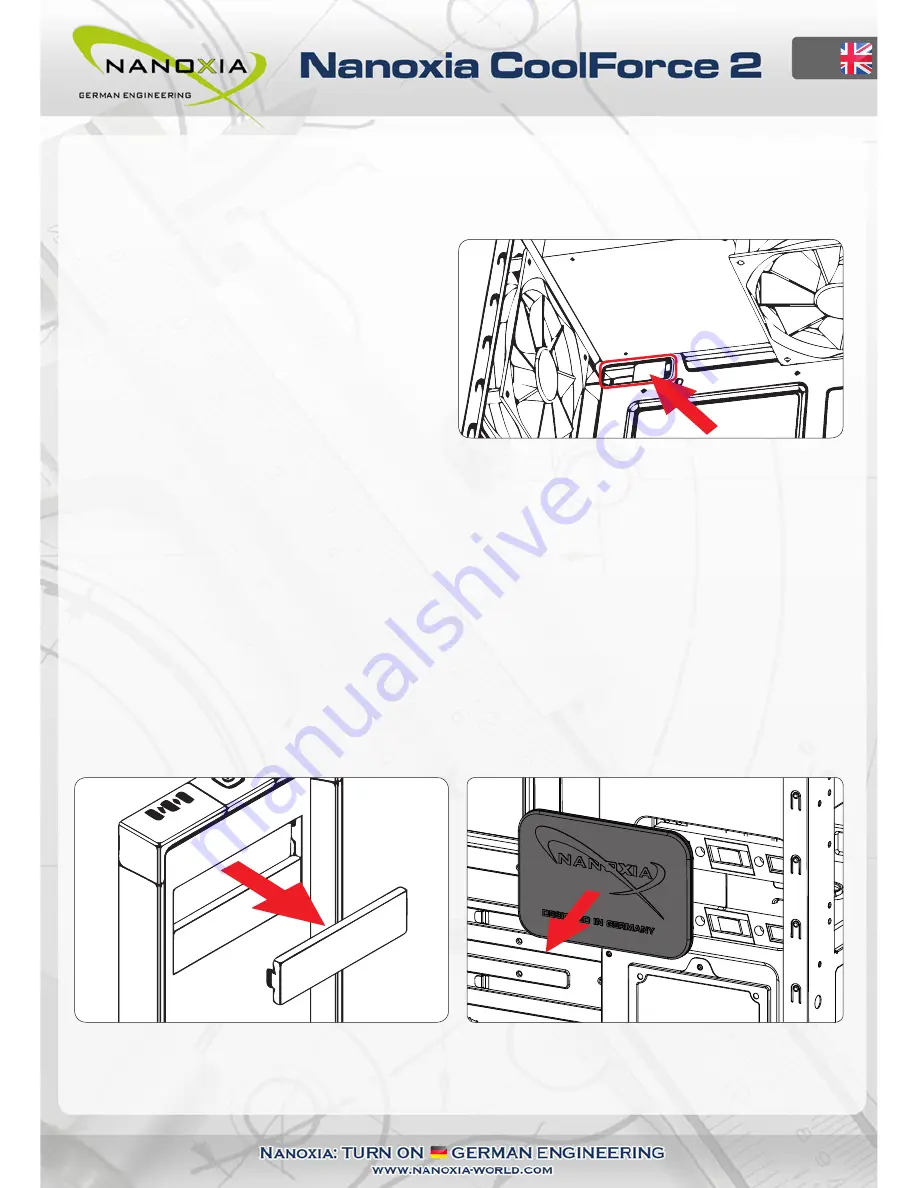
In the next step place the motherboard
gently inside the case and lead the EPS
extension cable through the opening
provided in the top left of the mainboard
tray. Fix the motherboard to the mother-
board tray. After the installation of the
power supply, you can connect the EPS
extension cable to the EPS-connector on the
PSU at the back of the motherboard-tray.
2. Installation of optical drives and removal of the 5.25 inch cage
You can install up to two external drives 5.25 inch drives in the CoolForce 2.
2.1 Installation of optical drives
To install optical drives, please remove both side panels. The installation of optical drives
requires neither screws nor tools.
Remove the 5.25 inch cover by pushing it
gently but steadily from the inside out
In order to reach the tool-free locks on the left
side of the case (as seen from the front), please
remove the cover inscribed with “Designed in
Germany” in front of the 5.25 inch cage.
Loosen the lock on both sides by dragging the black slider backwards. Then slide the drive into
the desired position. Lock the holder by pushing the slider back to its original position.
04
Summary of Contents for CoolForce 2
Page 1: ......
Page 17: ...Nanoxia...