14
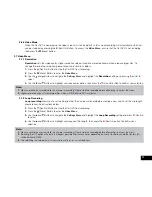
2.7.9 Shrink Video Files
The
Shrink Video Files
setting allows you to shrink the output size of the video files. To set your recording preferences,
please follow the instructions below.
1.
Press the (Rec/Ok) Button to stop the Car DVR from recording.
2.
Press the (Menu) Button to enter the
Video Menu
.
3.
Use the and Buttons to navigate the
Settings Menu
and highlight the
Shrink Video Files
setting and press (Rec/
Ok) to select.
4.
Use the and Buttons to select requred shrink size, then press the (Rec/Ok) button to confirm your selection.
Note:
1.
Menus cannot be accessed while the camera is recording. Please stop the recording before attempting to access the menu.
2.
Shrinking the video files does impact the video quality.
2.8.0 Park Mode
When activated,
Park Mode
will monitor the DVR's G Sensor after you have turned off your vehicle. If an impact is detected
the DVR will power up and record a 60 second clip. To set
Park Mode
, follow the instructions below.
1.
Ensure that the Car DVR is not recording.
2.
Press the (Menu) Button to enter the
Video Menu
.
3.
Use the and Buttons to navigate the
Settings Menu
and highlight the
Parking Mode
setting and press (Rec/Ok)
to select.
4.
Use the and Buttons to highlight either OFF or ON, then press the (Rec/Ok) button to confirm your selection.
Note:
1.
Menus cannot be accessed while the camera is recording. Please stop the recording before attempting to access the menu.
2.
Park mode
requires the DVR's internal battery to be fully charged.
3.
Park Mode
is activated when an impact is detected and will record from that point onward.
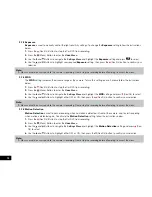
2.8.1 Number Plate
Number
Plate
will stamp your vehicles number plate onto the footage for reference. To set the
Number Plate
setting
please follow the instructions below.
1.
Press the (Rec/Ok) Button to stop the Car DVR from recording.
2.
Press the (Menu) Button to enter the
Video Menu
.
3.
Use the and Buttons to navigate the
Settings Menu
and highlight the
Number Plate
setting and press (Rec/Ok) to
select.
4.
Select ON and then press the (Rec/Ok) Button.
5.
Use the and Buttons to select cycle through numbers and letters. The (Menu) button is used to confirm and
proceed to the next character.
6.
When you have finished inputting your vehicles number plate, use the (Rec/Ok) button to save and exit.
Note:
1.
Menus cannot be accessed while the camera is recording. Please stop the recording before attempting to access the menu.
2.
For date stamp to be correct the time and date must be set first. To set the time and date please see section
Date/Time (3.2.1)
.
Summary of Contents for NCP-DVR1080
Page 1: ...USER MANUAL FULL HD DASH CAM DVR WITH 2 4 SCREEN NCP DVR1080...
Page 2: ......
Page 26: ...26...
Page 28: ...www nanocamplus com au www nanocamplus co nz NanoCam Plus 2016...


