3
Caution ....................................................................................................................................................................... 5
Battery warning .......................................................................................................................................................... 5
Notes on Installation ................................................................................................................................................... 5
1 Introduction .............................................................................................................................................................. 6
1.1 Features ............................................................................................................................................................. 6
1.2 Package Contents .............................................................................................................................................. 6
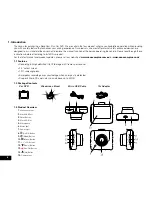
1.3 Product Overview ............................................................................................................................................... 6
2 Getting Started ......................................................................................................................................................... 7
2.1 Inserting the Memory Card.................................................................................................................................. 7
2.2 Installing Car DVR ............................................................................................................................................... 7
2.2.1 Adjust the device position ....................................................................................................................... 7
2.2.2 Connect to Power ................................................................................................................................... 7
2.3 Powering the Car DVR On / Off........................................................................................................................... 8
2.3.1 Auto Power On / Off ................................................................................................................................ 8
2.3.2 Manual Power On / Off and Reset ........................................................................................................... 8
2.3.2.1 Manual Power On ................................................................................................................................... 8
2.3.2.2 Power Off ................................................................................................................................................ 8
2.3.2.3 Reset the device ..................................................................................................................................... 8
2.4 Playing back Video on PC................................................................................................................................... 8
2.5 Initial Settings ..................................................................................................................................................... 8
2.5.1 Formatting Inserted Micro SD Card ......................................................................................................... 8
2.5.2 Set the Date / Time ................................................................................................................................. 9
2.6 Using the DVR .................................................................................................................................................... 9
2.6.1 Recording Video ..................................................................................................................................... 9
2.6.2 Locked Recording ................................................................................................................................... 9
2.6.3 Recording Screen ................................................................................................................................. 10
2.6.4 Video Mode .......................................................................................................................................... 11
2.7 Video Menu ...................................................................................................................................................... 11
2.7.1 Resolution ............................................................................................................................................. 11
2.7.2 Loop Recording .................................................................................................................................... 11
2.7.3 Exposure............................................................................................................................................... 12
2.7.4 WDR ..................................................................................................................................................... 12
2.7.5 Motion Detection ................................................................................................................................... 12
2.7.6 Recording Audio ................................................................................................................................... 13
Summary of Contents for NCP-DVR1080
Page 1: ...USER MANUAL FULL HD DASH CAM DVR WITH 2 4 SCREEN NCP DVR1080...
Page 2: ......
Page 26: ...26...
Page 28: ...www nanocamplus com au www nanocamplus co nz NanoCam Plus 2016...


