background image

3

9. HSI Key: For entering the HSI interface to set the hue, saturation and brightness intensity.

10. Dimmer Knob: For adjusting the brightness intensity, saturation and hue, etc.

11. Function Knob: For function selection and color temperature adjustment.

12. IN: Synchronous input interface.

13. Fixing Hole: For hanging the fixture with steel wire rope.

14. DC Power Socket: DC power input interface.

15. OUT: Synchronous output interface.

1. Power connection


Please switch off the power then connect the power adapter.

       Note: When connecting the power supply, please make sure that the power, voltage and frequency are consistent 

       with provided power supply.


The fixture was built-in lithium battery, it can supply power after charging by power adapter.

2. Light Fixture Installation

  ①

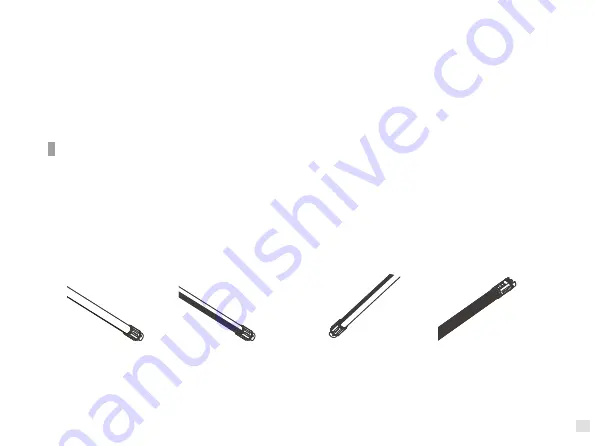
Common orientations & arrangements of PavoTube.

Usage

Upward in 90°

Upward in 60°

Downward in 30°

Downward in 0°

Summary of Contents for PavoTube 15C

Page 1: ...Guangdong NanGuang Photo Video Systems Co Ltd USER MANUAL PavoTube 15C RGBWW Tube Light...

Page 2: ...oTube 15C RGBWW Tube Light Product Show Color Temperature 2700K 6500K CRI Ra 98 LED Quantity 400PCS LED Power 16W x 5 DC Input Power 15V DC 3A ta 40 Lithium Battery 14 8V 2200mAh 32 5Wh Technical Data...

Page 3: ...ring the interface of RGB color cycle and switching different cycle modes 6 SPECIAL Key For entering the interface of special effects and switching from different special effects 7 MENU Key Menu funct...

Page 4: ...ire rope 14 DC Power Socket DC power input interface 15 OUT Synchronous output interface 1 Power connection Please switch off the power then connect the power adapter Note When connecting the power su...

Page 5: ...ed to work with a 2 4G remote controller or Nanguang WIFI APP via WIFI transfer device to control the light remotely NOTE 1 2 4G remote controller or WIFI transfer device should be bought additionally...

Page 6: ...SI 236 SAT 095 DIM 068 038 S Main Menu Second Level Menu Third Level Menu 1 Please make sure that the power switch on the fixture is in the off position then connect the fixture to the adapter with th...

Page 7: ...s 7 SOS 8 User Define 4 Cycle 5 Address Note The above menu interface would only display two lines just display two lines which near the option with as the figure shows and it need to rotate the funct...

Page 8: ...ger the storm mode which can be continuously tiggered by continuously pressing The function knob is used to select the option and the dimmer knob to adjust the brightness 3 Cop Car Select Cop Car to e...

Page 9: ...e Note Press ENTER key to tigger the Storm mode rotate the dimmer knob to adjust the brightness Note The function knob is used to select the option and the dimmer knob to adjust the brightness 8 User...

Page 10: ...mode Battery option is for checking the capacity of the battery Note Select the Battery option and press ENTER key to check the capacity of the battery 3 CCT Key Press the CCT key to enter the operati...

Page 11: ...b is used to adjust the brightness When under STORM MODE 1 and STORM MODE 2 should press the ENTER key to trigger the storm mode 8 When stop using the fixture turn off the switch 1 Please open the pac...

Page 12: ...le troubleshooting 7 When using the fixture for a long time the temperature of the fixture is high please pay attention to anti scalding Notice General Fault Detection and Diagnosis Fault Detection Di...

Page 13: ...rrying Bag 1 Clip 1 Power Adapter 1 Power Cable 1 User Manual 1 Steel Wire Rope 2 What s in the box Please kindly check The instruction was written according to the strict production test of our compa...

Page 14: ...www nanlite com 86 754 85300887 Zhanglin 324 Dongli Chenghai Shantou Guangdong China 86 754 85751187 service nanlite com Version V3 2019 11 12...

Reviews: