Page
5
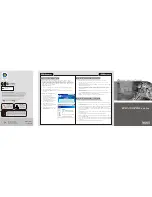
3-4 Test Mode
1.
Open the coin door for access to the service bracket, then slide the test
switch "ON". The "Test Menu Screen" will appear on the monitor display.
2.
Operating the 1 Player joystick up or down will step through the items.
3.
Pressing the 1 Player Punch button 1 switch will select an item.
4.
Operating the 1 Player joystick up or down will change the settings.
5.
Pressing the 1 player Punch button 1 switch will store the change.
6.
Pressing the 1 Player button 2 switch will return the display to the Test
Menu Screen.
The test switch must always be "OFF" during normal game mode.
SWITCH TEST .......................................... For testing switches
SOUND TEST ........................................... For testing the sound
COIN OPTIONS ........................................ For setting game pricing
GAME OPTIONS ...................................... For setting of difficulty etc.
UARTS TEST ............................................ Not Used
POLYGON TEST ...................................... For testing graphics
A.D.S ......................................................... Not Used
COLOR TEST ........................................... For monitor set-up
CONVERGENCE TEST ............................ For monitor set-up
RS-232C TEST ......................................... Not Used
Test Menu Screen
3-4-1
Switch Test
On entering the switch Test, the following screen appears on the monitor.
Operating the joysticks will cause the + to change to X for each of the
eight
positions.
When testing:
1P Punch 1 1P 0000 will change to 1P 1000
1P Kick 1
3P 0000 will change to 3P 1000
1P Kick 2
3P 0000 will change to 3P 2000
2P Punch 1 2P 0000 will change to 2P 1000
2P Punch 2 2P 0000 will change to 2P 2000
2P Kick 1
4P 0000 will change to 4P 1000
2P Kick 2
4P 0000 will change to 4P 2000
Pressing 1P Punch 2 will return the to Menu Screen
Summary of Contents for Tekken
Page 1: ...Page 1 Operators Manual Part No 90500023...
Page 10: ...5 SCHEMATIC...
Page 11: ...Page 1...