Page 39
5-5-2
Testing Sensor Sensitivity
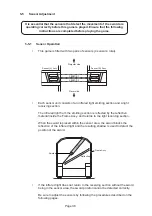
The following describes the method of testing the sensitivity of the four sensors.
Be sure to adjust the sensors so that the test results show “OK” for all four
sensors.
(see 5-5-3 page 40 for sensor adjustments.)
Note: If there is any obstruction within the sensor area, it will create a
shadow and prevent correct sensitivity testing. Ensure that there are
no obstructions, e.g. arm, sword or any other object within the
sensor area when conducting this test.
1.
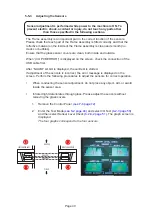
Open the Coin Door and set the Test Switch to the ON position. (see 6-1
page 45). The MENU screen is displayed.
2.
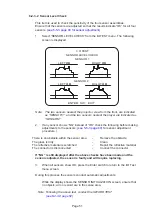
From the Menu screen, select “I/O TEST” and press the Enter switch. The
I/O TEST screen is displayed.
3.
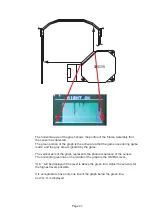
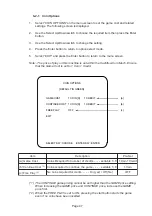
From the I/O Test screen, select “SENSOR LEVEL CHECK” and press the
Enter switch. The SENSOR LEVEL CHECK screen is displayed.
Note:
The two sensors nearest the projector, view from the front, are indicated
as “SENSOR 1”, and the two sensors nearest the player are indicated as
“SENSOR 2”.
4.
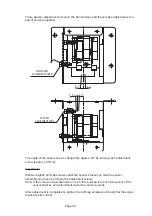
If any sensor shows “NG” instead of “OK” check the following before making
adjustments to the sensors. (see 5-5-3 page 40 for sensor adjustment
procedure.)
There is an obstacle within the sensor area
-
Remove the obstacle
The glass is dirty
-
Clean
The reflective material is scratched
-
Repair the reflective material
The connector is disconnected
-
Connect the connector.
If “NG” is still displayed after the above checks have been made and the
sensors adjusted, the sensor is faulty and will require replacing.
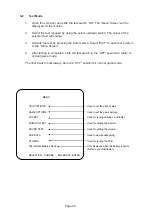
I / O TEST
SENSOR LEVEL CHECK
SENSOR 1
SENSOR 2
LEFT
OK
LEFT
OK
RIGHT
OK
RIGHT
OK
ENTER SW: EXIT


