background image

Contents

“Made for iPod” and “Made for iPhone” mean that an electronic 
accessory has been designed to connect specifically to iPod or iPhone 
respectively and has been certified by the developer to meet Apple 
performance standards. Apple is not responsible for the operation of this 
device or its compliance with safety and regulatory standards.
iPod and iPhone are trademarks of Apple Inc., registered in the U.S. and 
other countries.
Windows Media™ is a trademark of Microsoft Corporation.
UPnP™ is a trademark of the UPnP™ Forum.

Section 


Page 


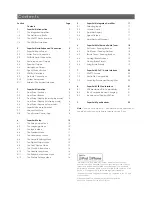
Contents 

1   

SuperUniti Introduction 

1

1.1  

The Integrated Amplifier 

1

1.2  

The Multi-mode Radio 

1

1.3  

The UPnP™ Audio Interface 

1

1.4  

The USB/iPod Interface 

1

2   

SuperUniti Installation and Connection 

2

2.1  

SuperUniti Rear Panel 

2

2.2  

Mains Power Connection 

2

2.3  

FM/DAB Aerial Connection 

2

2.4  

Audio Inputs and Outputs 

2

2.5  

Speaker Outputs 

3

2.6  

Headphone Output 

3

2.7  

Signal Ground Switch 

3

2.8  

USB/iPod Interface 

3

2.9  

Network Connections 

3

2.10  

System Automation 

4

2.11  

External Control and Interface 

4

3   

SuperUniti Operation  

5

3.1  

Front Panel Features 

5

3.2  

Front Panel Buttons 

5

3.3  

Front Panel Display (normal play mode) 

5

3.4  

Front Panel Display (list display mode) 

6

3.5  

Front Panel Display (setup mode) 

6

3.6  

SuperUniti Remote Handset 

7

3.7  

Handset Text Entry 

8

3.8  

The n-Stream Control App 

8

4   

SuperUniti Setup 

10

4.1  

The Setup Home Menu 

10

4.2  

The Language Menu 

10

4.3  

The Inputs Menu 

10

4.4  

The Speakers Menu 

11

4.5  

The Headphones Menu 

12

4.6  

The Network Settings Menu 

12

4.7  

The Digital Output Menu 

13

4.8  

The Front Display Menu 

13

4.9  

The Clock & Alarm Menu 

14

4.10  

The Handset Keys Menu 

14

4.11  

The System Automation Menu 

15

4.12  

The Factory Settings Menu 

16

5   

SuperUniti Integrated Amplifier 

17

5.1  

Selecting Inputs 

17

5.2  

Volume Control 

17

5.3  

Amplifier Display 

17

5.4  

Signal Outputs 

17

5.5  

Amplifier Fault Warnings 

17

6   

SuperUniti Multi-mode Radio Tuner 

18

6.1  

FM Tuner – Seeking Stations 

18

6.2  

DAB Tuner – Seeking Stations 

18

6.3  

iRadio Tuner – Seeking Stations 

18

6.4  

Adding iRadio Stations 

19

6.5  

Storing Radio Presets 

19

6.6  

Using Radio Presets 

19

7   

SuperUniti UPnP™ Audio Interface 

20

7.1  

UPnP™ Servers 

20

7.2  

Audio File Compatibility 

20

7.3  

Scanning Servers and Playing Files 

20

8   

SuperUniti USB/iPod Interface 

21

8.1  

USB Media and File Compatibility 

21

8.2  

iPod Compatibility and Charging 

21

8.3  

Browsing and Playing USB Files 

21

9   

SuperUniti Specifications 

22

Note:

 This manual is issue No. 1 and describes the operation of 

SuperUniti units running software release version 3.6.xx

Summary of Contents for SUPERUNITI -

Page 1: ...R E F E R E N C e M A N U A L S U P E R U N I T I A L L I N O N E A U D I O P L A Y E R E N G L I S H...

Page 2: ...Front Panel Display list display mode 6 3 5 Front Panel Display setup mode 6 3 6 SuperUniti Remote Handset 7 3 7 Handset Text Entry 8 3 8 The n Stream Control App 8 4 SuperUniti Setup 10 4 1 The Setup...

Page 3: ...lowing signal outputs An S PDIF digital audio output pre volume balance control A preamplifier output post volume balance control A subwoofer output post volume balance control A headphone output post...

Page 4: ...Digital Coaxial BNC dig 2 Digital Coaxial RCA phono dig 3 Digital Optical TosLink dig 4 Digital Optical TosLink dig 5 Digital Optical TosLink Note The front panel analogue digital jack socket can acce...

Page 5: ...nes and speakers 2 7 Signal Ground Switch SuperUniti is fitted on its rear panel with a Signal Ground switch offering two positions Chassis or Floating Select the Chassis position unless SuperUniti is...

Page 6: ...actory Reset operation Select Reset All Settings from the Factory Settings setup menu See Section 4 12 Note A SuperUniti switched on without a working wired network connection will only be able to con...

Page 7: ...a selected track or radio station Navigates up a menu or list input Sequentially selects SuperUniti inputs Returns to the previous display menu ok list Enters list display mode Confirms menu item sele...

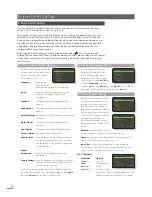
Page 8: ...ont Panel Display list display mode Setup mode is engaged by pressing the handset setup key or pressing and holding the front panel ok list button Setup mode provides access to all SuperUniti setup fu...

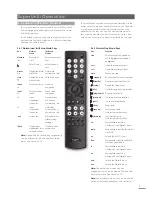
Page 9: ...alogue 1 and Digital 1 inputs radio Sequentially selects the iRadio FM and DAB pc Selects the UPnP input iPod Sequentially selects the USB iPod and front panel inputs tv Sequentially selects the Analo...

Page 10: ...h With the app installed and the iPad iPhone or iPod wirelessly connected to the same network as your SuperUniti start the app by touching its screen icon Selecting setup opens a menu that enables the...

Page 11: ...s and playlists available to UPnP players 3 8 2 Using n Stream The n Stream app is based on three main screens The Inputs screen the Playing screen and the Library screen These screens are selected by...

Page 12: ...that you gain a full understanding of SuperUniti s capabilities The following paragraphs describe each SuperUniti setup menu in turn starting with the setup home menu Enter SuperUniti setup mode by p...

Page 13: ...ally detect the audio signal format analogue or digital and configure the input appropriately Specifying Analogue or Digital will fix the front panel input format 4 3 7 Rear Panel Digital Inputs Param...

Page 14: ...External if an external power amplifier is to be used in place of the SuperUniti internal power amplifier The preamplifier and subwoofer outputs are enabled when External is selected Select All Output...

Page 15: ...4 7 The Digital Output Menu The Digital Output setup menu enables the SuperUniti digital output to be switched on and its signal format configured Parameter Options Enabled Yes No Output Native 96kHz...

Page 16: ...Alarm opens a menu that offers the following parameters and options Parameter Options Enabled Yes No Selecting Yes primes the alarm Selecting No disables the alarm Alarm Time 07 00 Selecting the time...

Page 17: ...wing paragraphs Selecting CD Player opens a menu that makes CD transport control available through the SuperUniti n Stream interface Select Enabled to enable CD control and select Input Used to specif...

Page 18: ...n to be reset and all settings to be returned to their defaults Parameter Options System Status Select to display Handset IR Mon Select to display Clear All Presets Yes No Reset Sys Auto Yes No Reset...

Page 19: ...If an input is not operational for example no USB memory stick is attached when selected SuperUniti will display a descriptive alert message 5 2 Volume Control SuperUniti volume control is achieved b...

Page 20: ...nected to a network with high speed internet access it will automatically download a list of available internet radio stations When the iRadio input is subsequently selected a list mode menu will be d...

Page 21: ...es the opportunity to rename a previously stored station Scroll to the preset to be renamed and press the ok list key to open a text entry screen Use the handset numeric text keys in text entry mode t...

Page 22: ...should incorporate a firewall If SuperUniti is already connected to a network begin by selecting the UPnP input 7 1 UPnP Servers UPnP servers incorporate a software application that allows SuperUniti...

Page 23: ...a stream info and track elapsed time SuperUniti USB iPod Interface 8 SuperUniti USB iPod Interface The SuperUniti can play audio files stored on USB memory hardware or iPod and iPhone models connected...

Page 24: ...Other Inputs Ethernet IR Input Front panel RC5 WiFi Compatibility 802 11b 802 11g and 802 11n 802 11n preferred Upgrade Interface Rear panel mini USB Mute Control Front panel touch logo Audio Formats...

Reviews: