NAD T 778 Owner'S Manual Download Page 13

ENGLISH

13

ARC Mode:

 Audio Return Channel (ARC) enables an ARC-enabled TV 

to send audio data “upstream” to T 778. 
This option has three choices: Off, Auto or Source Setup. 

Auto:

 When set to Auto, the T 778 will automatically attempt an 

ARC audio connection to the TV whenever the TV announces over 
CEC that it has become the active source. If an ARC connection can 
be established, the T 778 will output the ARC audio signal no matter 
what source is selected on the T 778 and will show “HDMI ARC” on 
the front panel display. The Auto option tends to work best when 
all your devices support CEC and the Source Switch option is set to 
“On”. 

Source Setup:

 When set to Source Setup, you can select “ARC” for 

the digital audio input in the source setup screen. When you select 
a source on the T 778 which is set for ARC, the T 778 will attempt 
to initiate an ARC connection with the TV. When using this option, 
you would probably also want to make sure Source Switch is off 
otherwise other CEC devices may keep changing the T 778 source 
when you want it to remain on the ARC source. 

IMPORTANT NOTES

•  “Audio System” must be set to “On” for “ARC Mode” to be configurable. 
•  “CEC/LAN/BluOS in Standby” must be set to “On” for audio and video 

to continuously stream from a CEC-enabled HDMI source to a CEC-
enabled TV (with both devices connected via T 778). 

IR CHANNEL

The T 778 has the capability to operate via alternate IR channel. This is 
useful if you have two NAD products that can be operated by similar 
remote control commands. With alternate IR Channel, two different NAD 
products can be controlled independently in the same zone by setting 
each one to a different IR channel. 

IR CHANNEL ASSIGNMENT 

The T 778 and the HTR 8 remote control must be set to the same channel. 

To change the Main Zone IR Channel on the T 778 
• 

While at “IR Channel” option under “Control Setup” OSD, use HTR 8’s 
[

D/F

] button to select IR Channel “1” or “2”. The default IR Channel is “IR 

Channel 0”. 

To change the IR Channel on the HTR 8 remote control 
• 

Include a channel number before the library code. For HTR 8, library 
code “100” is the default library table for “AMP” device. To select this 
“AMP” library table for “IR Channel 0”, retain the library code “100”. 

• 

If you want to load the “AMP” library table on “IR Channel 1”, prefix the 
library code with “1” to indicate association with “IR Channel 1”. Load 
then the “AMP” library table using the code “1100”. 

SAMPLE SETUP OF TWO NAD PRODUCTS ON THE SAME ZONE 

NAD T 778 and NAD C 368 are both defaulted to IR Channel 0. If [OFF] 
button is pressed on the HTR 8 remote control (or SR 9 remote control for 
the C 368), both products will go to standby mode. Press [ON] and both 
products will power up from standby mode. 

To prevent both products from simultaneously going in and out of standby 
mode along with other common commands, set each one to a different 
IR channel. In this setup, we will keep C 368 and SR 9 remote control 
defaulted to “IR Channel 0”. As for T 778, we will assign it to “IR Channel 1”; 
the same applies to HTR 8. 

Set T 778 and HTR 8 to “IR Channel 1” via the following procedure. 

T 778 
• 

While at “IR Channel” option under “Control Setup” OSD, use HTR 8’s 
[

D/F

] button to select IR Channel “1”.  

HTR 8 

Begin by ensuring that the T 778 is powered-up (“on”, not merely in 
standby). 

• 

To enter HTR 8’s library mode, press and hold both the [AMP] device 
and [A/V PSET] until the LEARN LED turns green. 

• 

While keeping the HTR 8 pointed towards the T 778, enter the library 
code “1100”. Press [OFF]. If the T 778 goes to standby mode, press 
[ENTER] to accept the library code number and exit library mode. 

With both T 778 and HTR 8 set to “IR Channel 1”, the C 368 can now be 
remotely controlled independent of the T 778. 

NOTE 


Performing Factory Reset for T 778 or HTR 8 will restore “IR Channel” to 
its factory default setting of “0”.
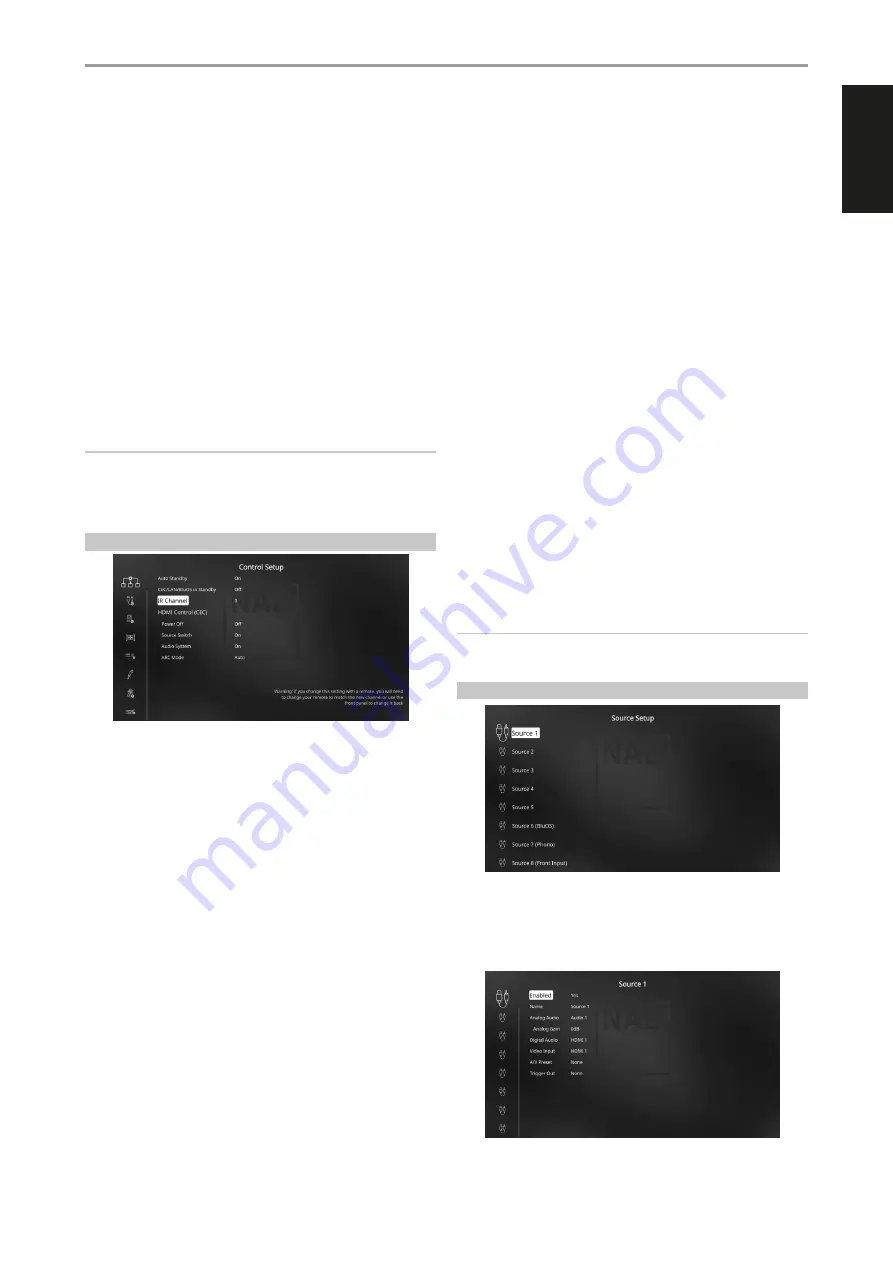
SOURCE SETUP 

The Source Setup menu makes it possible to set, allocate or change the 
Sources settings. 

The T 778 Sources are all configurable. Each Source can be configured with 
respect to the following settings. 

OPERATION

CONFIGURING T 778 - SETUP MENU VIA ON-SCREEEN DISPLAY

Summary of Contents for T 778

Page 1: ...Owner s Manual ENGLISH AV Surround Amplifier T778...

Page 2: ...urges and built up static charges Article 810 of the National Electrical Code ANSI NFPA 70 provides information with regard to proper grounding of the mast and supporting structure grounding of the le...

Page 3: ...measures Reorient or relocate the receiving antenna Increase the separation between the equipment and receiver Connect the equipment into an outlet on a circuit different from that to which the recei...

Page 4: ...NE SETUP 17 AMPLIFIER SETUP 18 TRIGGER SETUP 18 LISTENING MODE SETUP 18 LISTENING MODES 19 DOLBY SETUP 20 DTS SETUP 20 ENHANCED STEREO 20 FRONT PANEL DISPLAY SETUP 20 A V PRESETS 22 SYSTEM AND UPGRADE...

Page 5: ...es and behind and that will provide a clear line of sight within 25 feet 8 meters between the T 778 s front panel and your primary listening viewing position this will ensure reliable infrared remote...

Page 6: ...ndby mode NOTE In order to turn ON the T 778 from standby mode or back to standby mode the rear panel POWER switch must be in the ON position 3 DISPLAY TOUCH PANEL DISPLAY Display visual information a...

Page 7: ...nt Contact your ISP for policies charges content restrictions service limitations bandwidth repair and other related issues pertinent to internet connectivity USB Connect the USB connector of the supp...

Page 8: ...ware upgrade if any procedure available from the NAD website 11 IR IN IR OUT 1 3 These mini jacks accept and output remote controlled codes in electrical format using industry standard protocols for u...

Page 9: ...at A V Presets setting Refer also to the section about A V PRESETS DSP OPTIONS The following signal processing parameters can be setup under the DSP Digital Signal Processing Options menu LIP SYNC DE...

Page 10: ...l output via the surround back speaker terminals With this setup Zone 2 audio speaker level can be increased or decreased using the VOL Volume keys of the supplied ZR 7 zone remote control At the same...

Page 11: ...Info item in the Main Menu changes to System Info The beside System Info indicates that there is Software Upgrade available for your T 778 Select System Info to initiate the upgrade process START UPGR...

Page 12: ...C enabled HDMI source to a CEC enabled TV with both devices connected via T 778 LAN and BluOS connections are idle or inactive HDMI CONTROL CEC Consumer Electronics Control CEC is a set of commands th...

Page 13: ...el is IR Channel 0 To change the IR Channel on the HTR 8 remote control Include a channel number before the library code For HTR 8 library code 100 is the default library table for AMP device To selec...

Page 14: ...t HDMI HDMI 1 HDMI 2 HDMI 3 HDMI 4 HDMI 5 HMDI Front Optical Optical 1 Optical 2 Coaxial Coaxial 1 Coaxial 2 BluOS NOTE An incoming digital signal present at the assigned digital input will always tak...

Page 15: ...st be set to On at the Speaker Configuration menu to power up the additional Height speakers ENHANCED BASS Enhanced Bass option becomes available when Front is set to Large The Enhanced Bass option al...

Page 16: ...ity and surround sound ambience Enter your dimensions with precision within about 1 foot 30 cm SETTING SPEAKER DISTANCE While at Speaker Distance menu use the D F keys to individually set each speaker...

Page 17: ...surround and subwoofer outputs without having to go into the Speaker Levels menu This is very convenient in circumstances like increasing or tone down a film s dialog level by raising lowering the cen...

Page 18: ...to 0s Otherwise one can select through a delay time of 1s to 15s AUTO TRIGGER IN Auto Trigger IN allows external system controllers to toggle the associated section of the T 778 from Standby to On and...

Page 19: ...et it to Preset 1 Thus whenever Source 1 is selected the associated source will always be directly played back at its native audio format EARS Two channel recordings whether stereo or surround encoded...

Page 20: ...is more than just adjusting center channel level as the center channel may also contain other sound elements that get raised or lowered along with the dialog NOTE Dialog control applies only for play...

Page 21: ...a 4 j Play or pause current media 9 Skip back to previous media m Repeat and random mode controls are also available for selection 8 Volume level BluOS Source front panel display contents and layout c...

Page 22: ...e Setup Speaker Setup and Front Panel Display Setup configurable through Setup Menu Scroll to A V Presets using the D F keys to save a collection of said parameter settings to a Preset Select a Preset...

Page 23: ...press ENTER to confirm selection and move on to the next setting While at Save Current Setup to Preset menu line use S to save the above settings to Preset 1 Below OSD will be shown affirming that the...

Page 24: ...Preset 2 The Speaker Setup settings that will be applied at Preset 2 will be the last or current Speaker Setup settings which in this sample are the same Speaker Setup settings shown above in Step 1 7...

Page 25: ...select Factory Reset to start factory reset process IMPORTANT Restoring BluOS or System to factory default settings will delete all applicable configured or saved settings SELECT LANGUAGE Select Langu...

Page 26: ...3 Display Play Queue that was setup via the BluOS App Play Queue is a list of songs or tracks that are populated and put on queue via the BluOS App MENU OPTIONS SOURCES Select preferred Source to acce...

Page 27: ...front panel display Control Setup Source Setup Speaker Setup Zone Setup Amplifier Setup Trigger Setup Listening Mode Setup Front Panel Display Setup A V Presets System and Upgrade Select Language CON...

Page 28: ...Pad iPhone and iPod Android devices Kindle Fire and Windows or Mac desktops Launch the BluOS Controller App and explore everything from your streaming music services internet radio stations networked...

Page 29: ...nction on the component All the remaining keys are function keys that can learn control codes from virtually any infrared remote controller allowing you to teach the codes of your equipment regardless...

Page 30: ...opy a key function after entering the Learning Mode and pressing the desired key to be copied to simply press the device key from which you wish to copy having first pressed its DEVICE SELECTOR key if...

Page 31: ...ably turning it off altogether set it to 0 seconds will lengthen it still further CONFIGURING KEY ILLUMINATION Keys to Press for 3 seconds Mode DISP Digit Key 0 9 Set key illumination timeout to numbe...

Page 32: ...ne of the codes from the table when entered turns on the component and if you are quite sure you have followed the above procedure completely and carefully you may want to try the search method as fol...

Page 33: ...until Sleep Off displays on the VFD Switching the T 778 to standby from either the HTR 8 s OFF or the T 778 s STANDBY button will also cancel the sleep mode USING THE ZR 7 REMOTE CONTROL The ZR 7 is...

Page 34: ...services Spotify Amazon Music WiMP Qobuz IDAGIO Deezer Murfie nugs net TIDAL Napster Bugs KKBOX Taihe Music ZONE SOUNDMACHINE Supported operating systems Music playback from network shares on the fol...

Page 35: ...ENGLISH 35...

Page 36: ...onal a division of Lenbrook Industries Limited No part of this publication may be reproduced stored or transmitted in any form without the written permission of NAD Electronics International While eve...

Reviews: