ENGLISH
OPERATION
10
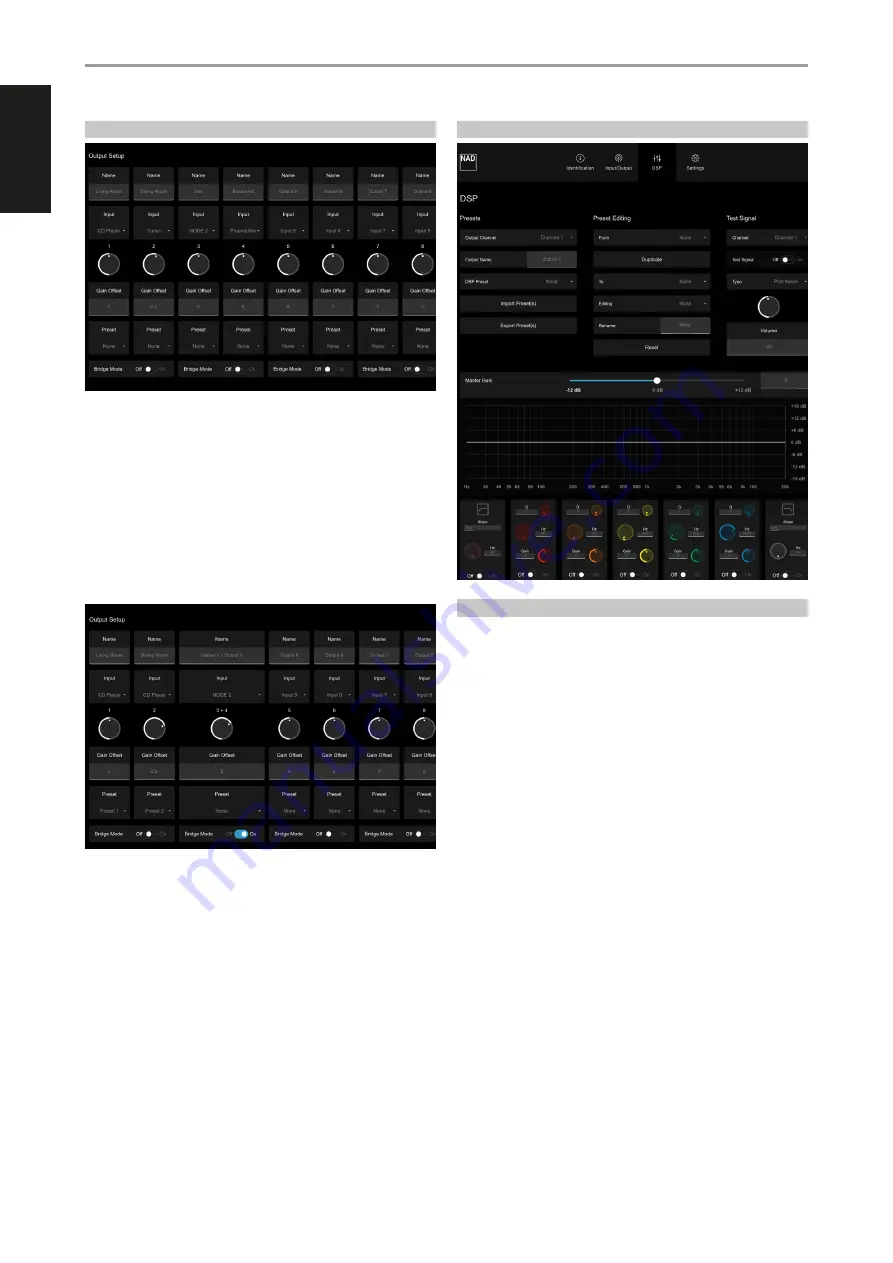
OUTPUT SETUP
NAME
•
The factory default names of the eight OUTPUT channels are Output
1 up to Output 8. Each OUTPUT channel can be renamed by directly
typing over the specific OUTPUT. For example, type over “OUTPUT 1”
with the desired name or label like “Living Room”.
•
The eight OUTPUT channels correspond to the SPEAKERS 1 to 8
respectively.
INPUT
•
Each OUTPUT channel can be assigned any of the INPUT channels.
Assign a particular OUTPUT channel with a source INPUT by selecting
preferred line INPUT number from the drop down tab.
GAIN OFFSET
•
Gain offset allows output channel levels to be adjusted independently.
•
Grab the pointer of the GAIN OFFSET knob icon and rotate to adjust
gain level within ± 6 dB range at 0.5 dB increments. The corresponding
numerical value of adjusted gain offset level is reflected below the
knob icon. You can also type directly desired gain offset value in the
section below the GAIN OFFSET knob icon.
PRESET
•
Designate a DSP Preset number for the particular Output Channel.
Ensure that the DSP Preset number you allocate has been previously
setup and saved.
BRIDGE MODE
•
Combine both adjacent output channels into Mono output by setting
“Bridge Mode” to “On”. Set “Bridge Mode” to “Off” to maintain stereo
output.
•
Refer also to item about “SPEAKERS (1 - 8)” for further information and
guideline about Bridge Mode.
DSP
PRESETS
OUTPUT CHANNEL/OUTPUT NAME/DSP PRESET
•
Output Channel, Output Name and DSP Preset are combination
settings that can be modified at the PRESETS section of DSP menu or
OUTPUT SETUP in the INPUT/OUTPUT menu.
•
Assign an Output Channel with an Output Name that can either be the
default name or by typing over desired Output name. Designate a DSP
Preset number for the particular Output Channel. Ensure that the DSP
Preset number you allocate has been previously setup and saved.
•
Any changes in Output Channel, Output Name and DSP Preset settings
at the PRESETS section of DSP menu will also be reflected in the
OUTPUT SETUP section of INPUT/OUTPUT menu and vice-versa.
SAVE PRESET(S)
1
Adjust, set and save Slope, Q, Frequency and Gain settings as desired.
2
Select “Save Preset(s)”. Select which Preset number (Preset 1 to Preset 9
or All Preset) the current Preset settings will be saved.
3
Depending on your web browser, the Preset settings will be saved in
your Downloads folder or may be prompted to save to a directory of
your preference. Remember the Preset file name and location.
4
Repeat above process if you are going to set, allocate and save different
Preset settings (up to 9 Preset settings).
LOAD PRESET(S)
1
Select “Load Preset(s)”. Find and select from the Preset file’s location/
directory the Preset number you would like to load.
2
Selected Preset number’s applicable Slope, Q, Frequency and Gain
settings are recalled and loaded upon selection of the Preset file. These
settings will be reflected in the frequency response graph.
3
Repeat above process if you are going to load and allocate different
Preset settings (up to 9 Preset settings) to all 8 output channels.


