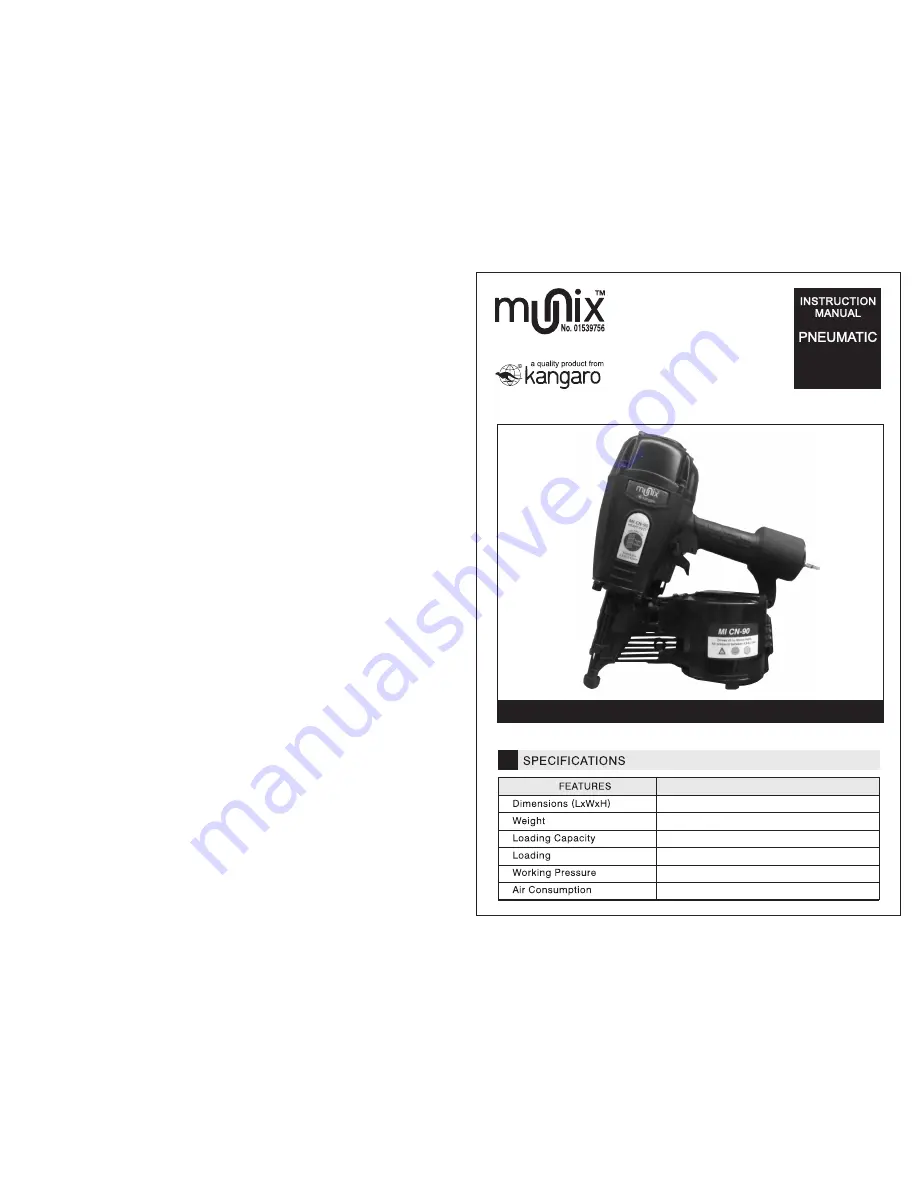
355x368x130mm
3.5 kgs
225 - 300pcs
70-120PSI (4.9-8.3bar)1/4’’ N.P.T.
45-90mm
MI CN-90mm
Thank you very much for purchasing our MI CN-90mm Pneumatic Coilnailer
COILNAILER
Page 1: ...355x368x130mm 3 5 kgs 225 300pcs 70 120PSI 4 9 8 3bar 1 4 N P T 45 90mm MI CN 90mm Thank you very much for purchasing our MI CN 90mm Pneumatic Coilnailer COILNAILER MI CN 90mm ...
Page 2: ...nder Cap 59 HCN041 O ring 9 5x1 9 9 HCN093 Gasket 60 HCN142 O ring 10 3x1 9 10 HCN094 Spring 61 HCN143 Trigger Valve Seat 11 HCN095 Valve Seat 62 HCN044 O ring 12 8x1 9 12 HCN096 O ring 48 8x2 5 63 HCN144 Spring 13 HCN097 Valve 64 HCN145 O ring 5 5x1 5 14 HCN098 O ring 67x3 65 HCN146 Trigger Valve Stem 15 HCN099 Collar 66 HCN147 Tirgger Valve Guide 16 HCN100 Cylinder Seal 67 HCN148 Spring Pin 3x26...
Page 3: ...sion rust or in a having heavy powder environment 11 DISONNECT TOOL FROM AIR SUPLY HOSE before doing tool maintenance clearing a jammed fastener leaving work area moving tool to another location or handing the tool to another person 12 ONLY DISCONNECT THE QUICK CONNECTOR with the connector of the body tail portion air inlet no compressed air can be guaranteed when disconnecting If operation is not...
Page 4: ...rs between the small piston and small cylinder 2 O ring on the small piston is worn and damaged 3 Tool dry and lacks lubrication 4 The spring on the small piston is damaged 5 Air pressure is lower 6 Connecting screw of nose and body is loose 7 Stopped hook can t stop the fasteners 8 Bent fasteners 9 Wrong size fasteners 10 Gasket is damaged 11 Dry small piston 12 Small piston bumper is worn and da...
Page 5: ...ten screw recheck 2 Check replaceO ring lubricate 3 Replace the bumper 4 Disassemble and clean Air leaking at the upper portion and nose body 1 Screw is loose at the connecting port ion of the cylinder and body 2 O ring is damaged 3 Gasket is damaged 1 Tighten the screw and recheck 2 Check replace0 ring lubricate 3 Replace the gasket 23 GRIP TOOL FIRMLY TO MAINTAIN CONTROL while allowing tool to r...
Page 6: ...ep to achieve desired results See Fig 20 CLEARING A JAMMED FASTENER 1 CAUTION Disconnect tool from air supply 2 Open latch rotate lower housing and remove the nails of the lower housing 3 Use a slender soft steel rod to drive the drive blade to its uppermost position Use needle nose pliers to remove the jammed fastener see Fig 21 4 Follow instructions in PREPARING THE TOOL BEFORE DRIVING to reload...
Page 7: ...ing the tool to another person Clean and inspect tool daily Carefully check for proper operation of trigger and safety mechanism Do not use the tool unless both the trigger and the safety mechanism are functional or if the tool is leaking air or needs any other repair FASTENER SPECIFICATIONS Only use recommended fasteners They may be screw ring and smooth fasteners OPERATING INSTRUCTIONS FOREWORD ...
Page 8: ...9 16 nails 4 Rotate to the side of the body Place a coil of nails over the Lower Nail Housing Uncoil enough nails to reach the Feed Hook and place the second nail between the teeth on the Feed Hook 5 Close the latch see Fig 17 6 Adjust directional exhaust deflector see Fig 18 so that the exhaust air blast will be directed away from the operator Grasp the deflector and rotate it to the desired posi...