Multicom MUL-HDENC-C-100-NA User Manual
(800) 423-2594
All Rights Reserved © 2019 Multicom, Inc.
(407) 331-7779
5
3.0 HD Encoder Programming/Setup
To setup and program the MULTICOM HD Digital Encoder you can use either the device’s LCD Front
Panel and buttons or the Web Interface. The programming of the settings is easiest by using the Web
Interface in Section 3.3.
3.1 Using the HD Encoder Front Panel:
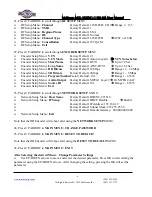
Press UP/DOWN ARROW buttons to scroll through the display information.
Main Menu:
Input information and Output Name
>> Short and long name, Bitrate
Main Menu:
VCN information
>> VCN, Channel, and Frequency
Main Menu:
Management IP
>> IP Address
3.2 Using the HD Encoder Front Panel for Setup:
When the unit is powered up it will first go through an internal booting and short self-test and then be
ready for operation or initial setup.
The factory Default is for J.83B:STD output. If ATSC RF output
is desired (example: for Mexico installation) then the RF Setup Menu > Channel Type must be
changed to ATSC, etc.
Press “OK” Button to enter the setup MAIN MENU system.
The front panel LCD password is: 0000
Enter the password by adjusting each digit by using the UP/DOWN ARROW buttons – then press “OK”
when the digit is correct. Press “OK” to enter Main Menu. For security purposes the HD Encoder will
timeout and return to a password protected mode if no buttons are pressed for about 10 seconds.
FRONT PANEL:
Login:
Press “OK” button
Enter Password
Use UP/DOWN arrows to change digit, Press OK to set it and go to next until all 4 digits are
entered – the unit will now be in setup MAIN MENU. Pressing the UP/DOWN ARROWS will scroll
through the menus/settings. Pressing the OK will select/execute the Menu Item or Setting.
Press UP/DOWN ARROW to scroll through
MAIN MENU
and use
OK
to select a Menu:
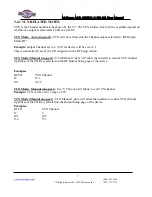
Main Menu:
RF Setup
Main Menu:
Encoder Setup
Main Menu:
Network Setup
Main Menu:
Change Password
Main Menu:
Reset to Default
Main Menu:
Exit


