FREEDOM UNIVERSAL 2.0
10
Attaching & Removing the Disc Sensor
Always attach sensor head to an area of the product that
depresses the security switch. Do not attach it to moving parts,
buttons, parts that can be easily removed (such as sliding cov-
ers and battery doors), or on the edge of products.
To Attach:
1
Set keyswitch to
DISABLE ALARM
.
2
Plug sensor cable into the alarm module.
Note: Connect cables in sequence, starting with position 1.
3
Clean the mounting surface on the product using rubbing
alcohol.
4
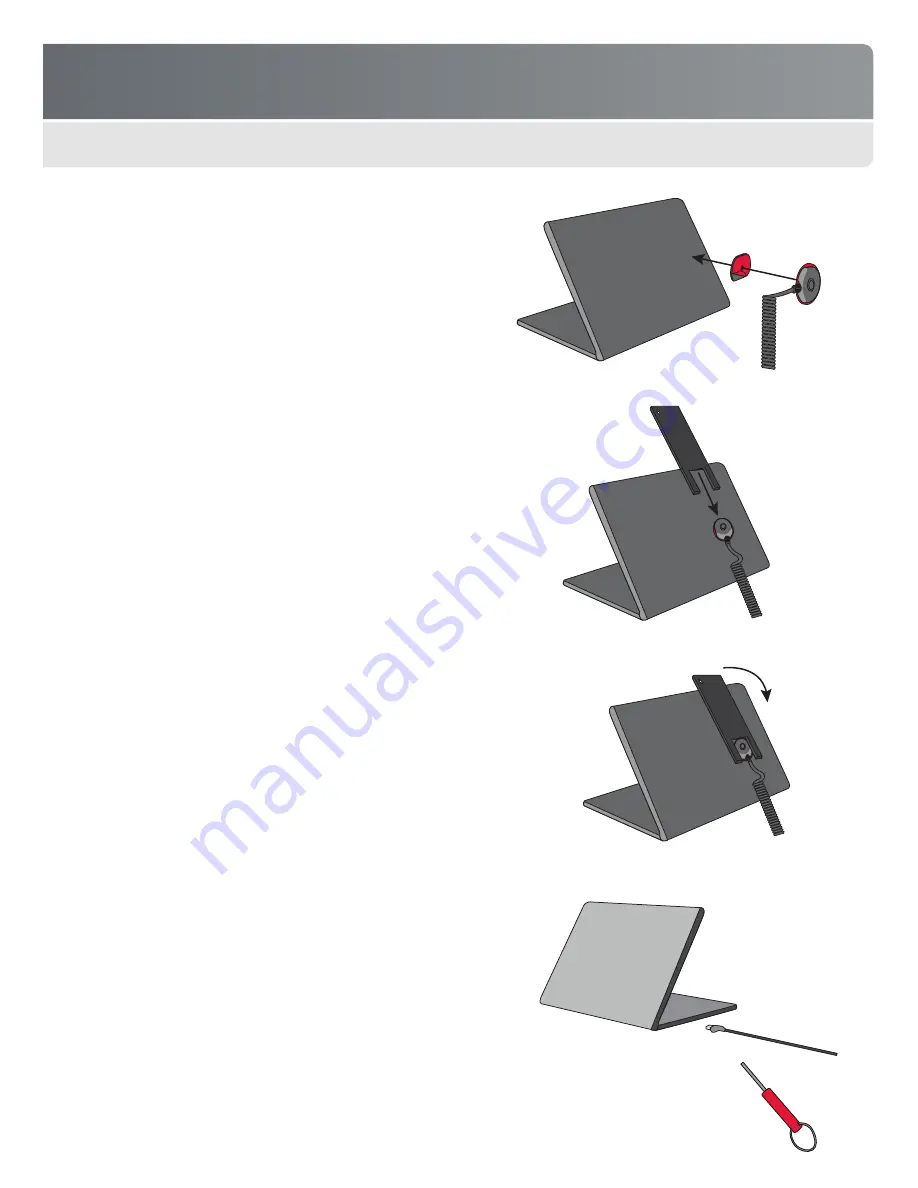
Attach VHB tape to sensor head (if not already attached).
Remove backing and attach sensor head to product. Press
firmly to attach. Make sure security sensor if fully depressed.
5
Verify that all sensor cables with products have a solid red LED.
The system is now armed and ready for use.
Note: Leave zip ties on at least 24 hours so adhesive bond can
gain full strength. You can then remove the ties or leave them on
(recommended) to provide additional product security and help
eliminate false alarms.
To Remove:
Attaching & Removing the Locking RJ Sensor:
1
Set keyswitch to
DISABLE ALARM
.
2
Plug RJ sensor into side port on laptop until it snaps.
3
Using the Security Screw Wrench, tighten the Security Screw
on the underside of the RJ connector head.
4
To remove, unscrew the Security Screw with the Wrench and
unsnap the RJ connector head from the side port.
1
Slide the removal tool slots over the disk sensor head, down
the straight edge sides, so it fits snugly. See the illustration
on the right for proper orientation.
2
Wiggle the tool back and forth until the VHB tape releases
from the back of the device.
FREEDOM CORE


