Appendix B
B-5
Intel RAID
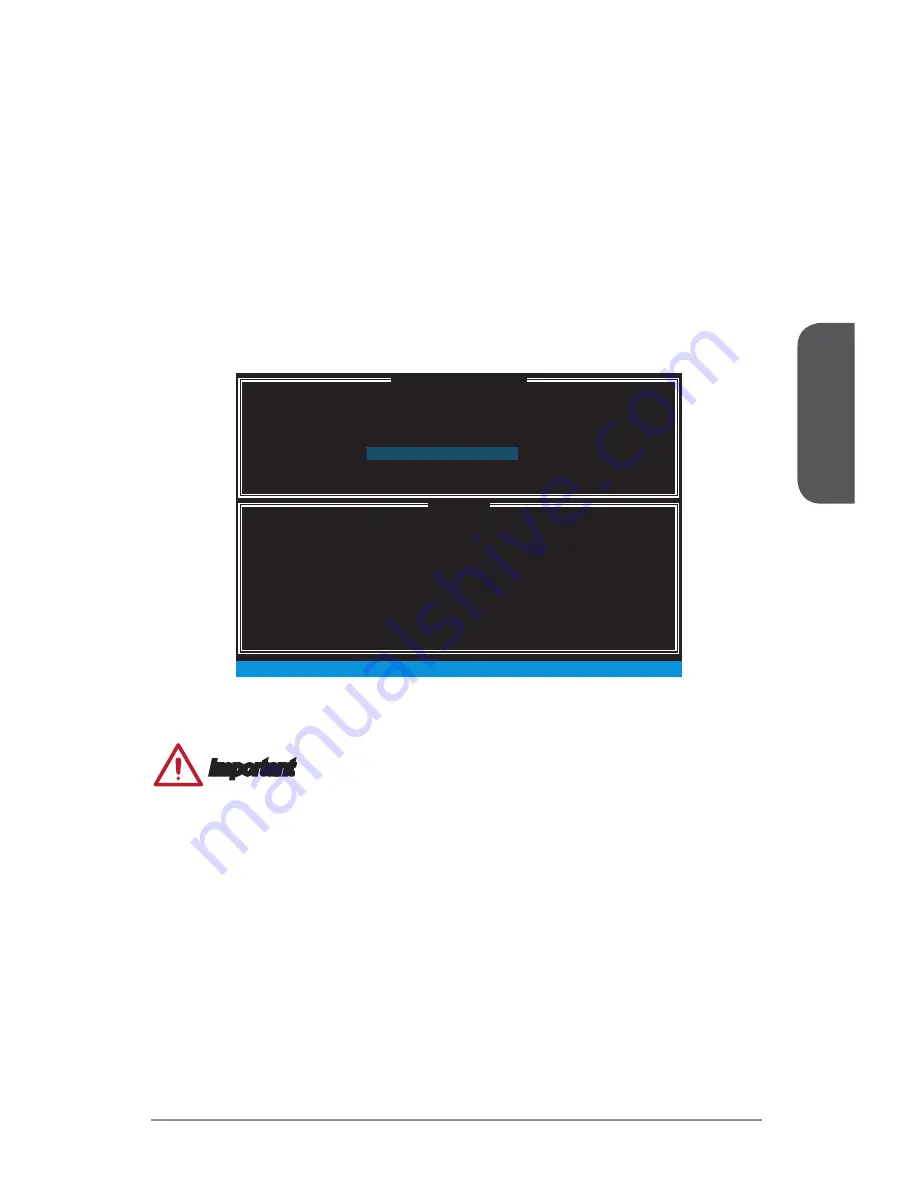
3. In the Disk field, press <Enter> key and use <Space> key to select the disks you
want to create for the RAID volume, then click <Enter> key to finish selection. This
field will become available according to the selected RAID level.
4.
Then select the strip size for the RAID array by using the “upper arrow” or “down
arrow” keys to scroll through the available values, and pressing the <Enter> key
to select and advance to the next field. The available values range from 4KB to
128 KB in power of 2 increments. The strip size should be chosen based on the
planned drive usage. Here are some typical values:
RAID0 -128KB / RAID10 - 64KB / RAID5 - 64KB. This field will become available
according to the selected RAID level.
5.
Then select the capacity of the volume in the Capacity field. The default value is
the maximum volume capacity of the selected disks.
[ ]
CREATE VOLUME MENU
[ ]
HELP
Name :
The default value indicates the maximum capacity using the selected
disks. Entering a lower capacity allows you to create a second
volume on these disks.
[ ↑↓] - Change [TAB] - Next [ESC] - Previous Menu [ENTER] - Select
RAID Level :
Disks :
Strip Size :
Capacity :
Sync :
Volume0
RAID1(Mirror)
Select Disks
N / A
XXX.X GB
N / A
Create Volume
Important
Since you want to create two volumes, this default size (maximum) needs to be
reduced. Type in a new size for the first volume. As an example: if you want the
first volume to span the first half of the two disks, re-type the size to be half of what
is shown by default. The second volume, when created, will automatically span the
remainder of two hard drives.
Summary of Contents for X99A SLI PLUS
Page 1: ...X99A SLI PLUS Motherboard G52 78851XG Preface ...
Page 14: ......
Page 50: ...Chapter 2 2 2 Quick Installation CPU Installation 1 2 3 4 5 6 http youtu be WPhyn2C5mgs ...
Page 51: ...Chapter 2 2 3 Quick Installation 7 8 9 10 11 12 ...
Page 52: ...Chapter 2 2 4 Quick Installation Memory Installation 1 2 3 http youtu be T03aDrJPyQs ...
Page 53: ...Chapter 2 2 5 Quick Installation Motherboard Installation 1 2 ...
Page 54: ...Chapter 2 2 6 Quick Installation 3 ...
Page 58: ...Chapter 2 2 10 Quick Installation M 2 module Installation 1 30 2 3 http youtu be JCTFABytrYA ...
Page 61: ...Chapter 2 2 13 Quick Installation Graphics Card Installation http youtu be mG0GZpr9w_A 1 2 ...
Page 62: ...Chapter 2 2 14 Quick Installation 3 4 5 ...
Page 94: ......


