11
Rear I/O Panel
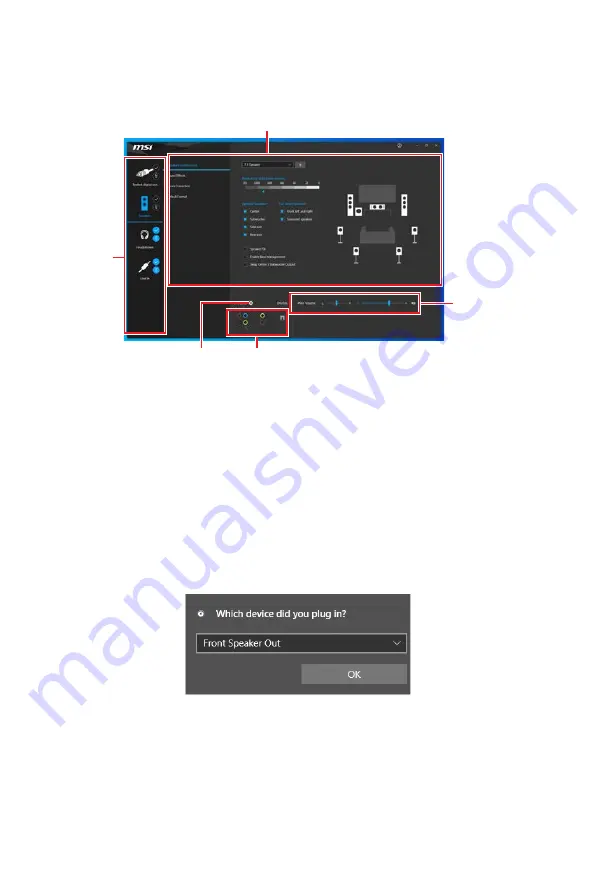
Realtek Audio Console
After Realtek Audio Console is installed. You can use it to change sound settings to get
better sound experience.
∙
Device Selection
- allows you to select a audio output source to change the related
options. The
check
sign indicates the devices as default.
∙
Application Enhancement
- the array of options will provide you a complete
guidance of anticipated sound effect for both output and input device.
∙
Main Volume
- controls the volume or balance the right/left side of the speakers
that you plugged in front or rear panel by adjust the bar.
∙
Jack Status
- depicts all render and capture devices currently connected with your
computer.
∙
Connector Settings
- configures the connection settings.
Auto popup dialog
When you plug into a device at an audio jack, a dialogue window will pop up asking you
which device is current connected.
Each jack corresponds to its default setting as shown on the next page.
⚠
Important
The pictures above for reference only and may vary from the product you purchased.
Jack Status
Connector Settings
Device
Selection
Main Volume
Application Enhancement
Speed LED
Status
Description
Off
10 Mbps
Green
100 Mbps
Orange
1 Gbps
Summary of Contents for TRX40 PRO 10G
Page 5: ...V Quick Start Installing the Motherboard マザーボードの取り付け 메인보드 설치하기 安裝主機板 安装主板 2 3 1 ...
Page 9: ...IX Quick Start Connecting Peripheral Devices 周辺機器の接続 주변 장치 연결하기 連接周邊設備 连接外围设备 Optional ...
Page 10: ...X Quick Start Power On 通電 전원 켜기 啟動電源 开机 4 3 1 2 ...
Page 75: ...13 リアI Oパネル アンテナの取り付け TRX40 PRO WIFI 1 下図のようにアンテナをしっかりとアンテナコネクターに固定します 2 アンテナを正しい位置に置きます 1 2 ...
Page 179: ...13 背板 I O 安裝天線 TRX40 PRO WIFI 1 將天線鎖緊至 WiFi 天線接頭上 如圖所示 2 調整天線角度 1 2 ...
Page 231: ...13 后置 I O 面板 安装天线 TRX40 PRO WIFI 1 将天线拧紧到天线接口上 如下图所示 2 定向天线 1 2 ...


