Page 5 of 15
3. Remote Control Information
•
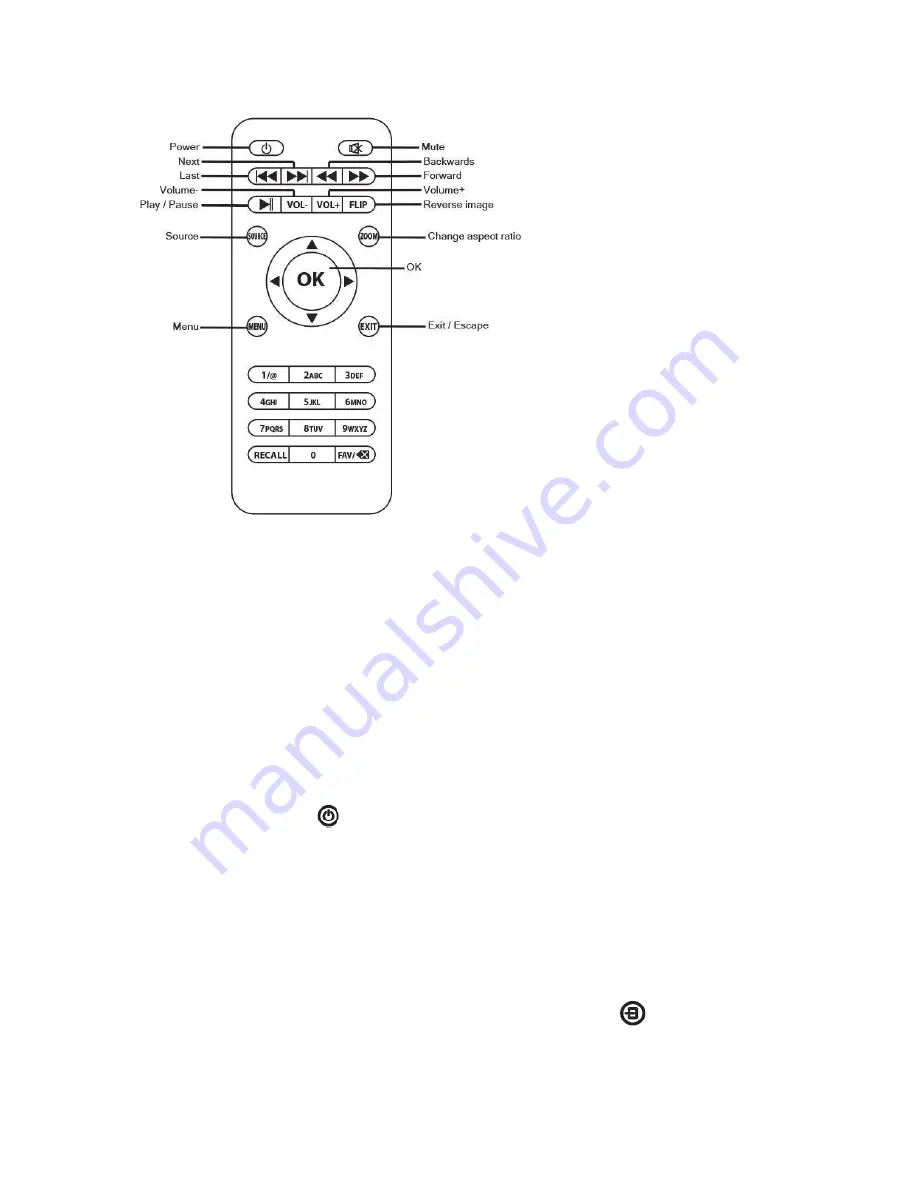
Always point the remote to the “Remote Control Detector” and the back of the projector
housing (see fig. 4) making sure there is nothing in between that and the projector.
•
The remote works up to a distance of 4 meters or 13 feet.
•
Remove the batteries if the projector will not be used for a long time.
•
Replace with new batteries once current batteries are exhausted.
•
Store the remote in a cool and dry environment.
4. Operation
•
The projector is intended to be used in both Indoor/Outdoor areas.
•
Insert the adaptor into the projector and the plug into a wall socket (see fig. 6).
•
The projector should be placed 2.5 meters or 8 feet from the screen and at a height of 1.2
meters or 4 feet in order to fill up the screen.
•
Press the power
button on the remote or unit to turn on.
•
Focus by turning the focus wheel at the front of the projector (see fig. 1).
•
Turn the keystone wheel at the front of the projector to get the desired projected image
angle,
+/- 15 degree (see fig 1).
•
Loosen the screw at the front of the projector housing to angle up.
•
To select the desired input:
1. Please note: The external input, such as Media Browser (USB), VGA, HDMI etc.,
must be connected to the projector before the input on the projector can be selected.
2. Press the “Source” button on the remote control or
button on the top of the
projector.
3. Using the arrow buttons on the remote or projector, scroll over the desired input.
4. Press the “OK” button to select.
Fig. 11


