


U S I N G M I C R O E X P R E S S C O N S O L E
36
Naming ports
Naming the MIDI input and output ports is easy.
Simply select the desired port and press Enter or
directly click on the current name with the mouse.
A pop-up edit field will appear containing the
current name. Edit the name and either press Enter
again to save it or Esc to abort the changes. The
names you enter for the ports will be displayed and
remembered in the Console.
MIDI routing
Routing is as simple as dragging a source icon with
the mouse and dropping it on a destination icon.
When making port-to-port connections, the
Console will route all 16 MIDI channels from the
source to the destination (as is the case in
Figure 6-7 on page 35). You can freely edit the
routed channels later by altering the Channels
routed check boxes while the source and
destination are selected (see “Selecting individual
sources and destinations” on page 36).
☛
Note, however, that channel routing, as well as
event filtering and channel mapping, only apply to
the MIDI input port sources and not the Sync or
Transport sources.
☛
When routing with the mouse, the connected
source and destination will automatically become
selected allowing you to instantly adjust the routed
channels or access the other windows.
You can also quickly route a single source to more
than one destination. Do this by holding down the
Shift key while you drag. Each destination you
move the mouse over will automatically be
connected with the dragged source. The last
connected source and destination will remain
selected.
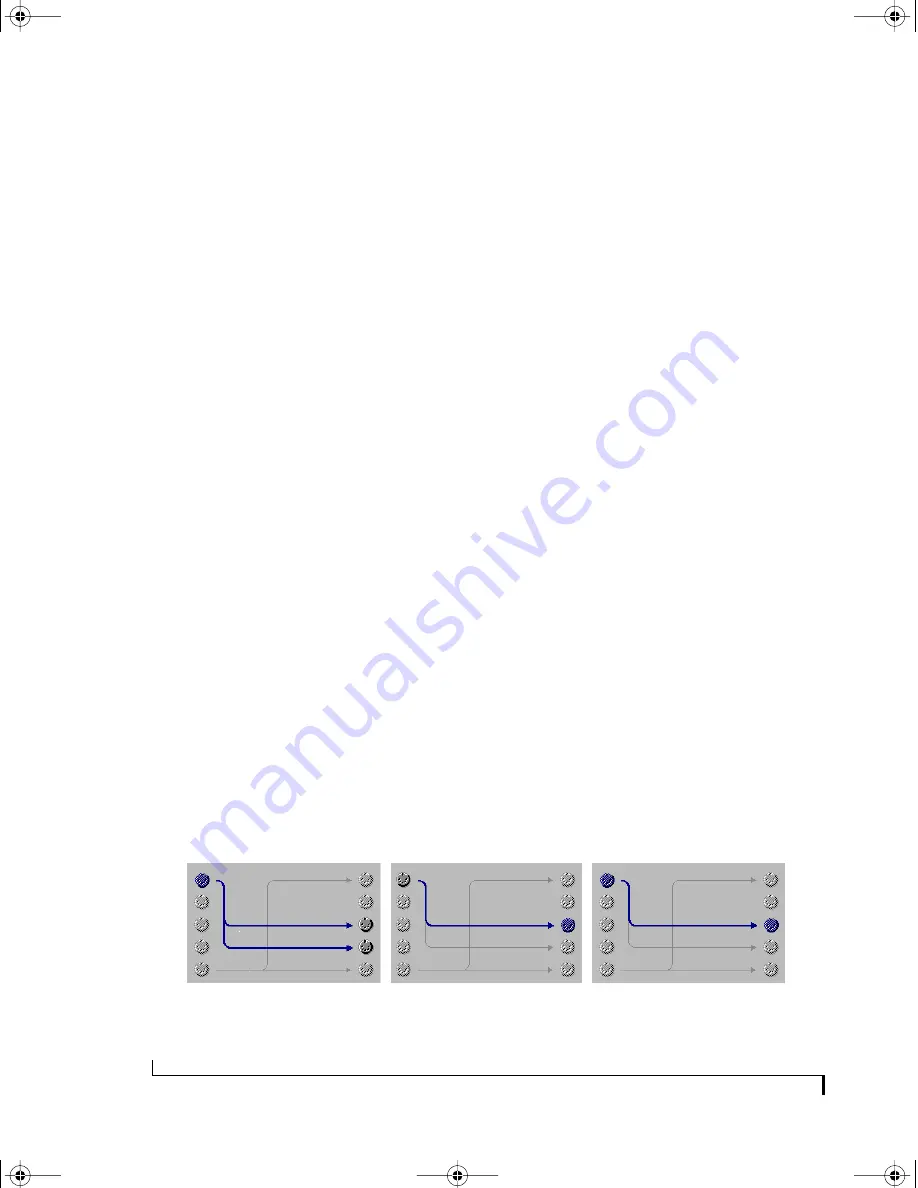
Selecting individual sources and destinations
To select a source, click on it using the mouse. You
may also select a source by pressing keys 1 through
4, S, P or T. To select a destination, click on it using
the mouse while holding down the Ctrl key (you
can also simply click with the right mouse button
instead of using Ctrl). You can also select a
destination by holding down the Alt key and
pressing keys 1 through 6, Alt+S, or Alt+T. When a
source and destination are selected, the routing
connection between them, if any, will become
highlighted. The examples in Figure 6-8 illustrate
the various source/destination selection possibil-
ities.
Note that when you use the keyboard interface for
source and destination selection, selecting a source
and then a destination that are not connected
automatically connects them. Selecting and source
and destination that are already connected simply
allows you to edit the Channels routed check boxes
or to completely remove the routing.
A selected source.
A selected destination.
An isolated source/destination
connection.
Figure 6-8: Working with routings in the MIDI Routing window.
!USB Interfaces Manual Book Page 36 Tuesday, October 10, 2000 12:43 PM
Summary of Contents for micro express-USB
Page 1: ...C M Y CM MY CY CMY K...
Page 6: ...IV USB Interfaces Manual Book Page iv Tuesday October 10 2000 12 43 PM...
Page 7: ...All Users PartI ForAllUsers USB Interfaces Manual Book Page 5 Tuesday October 10 2000 12 43 PM...
Page 8: ...All Users USB Interfaces Manual Book Page 6 Tuesday October 10 2000 12 43 PM...
Page 28: ...XT Micro Users USB Interfaces Manual Book Page 26 Tuesday October 10 2000 12 43 PM...
Page 84: ...MPT AV Users USB Interfaces Manual Book Page 82 Tuesday October 10 2000 12 43 PM...
Page 142: ...Appendices USB Interfaces Manual Book Page 140 Tuesday October 10 2000 12 43 PM...


