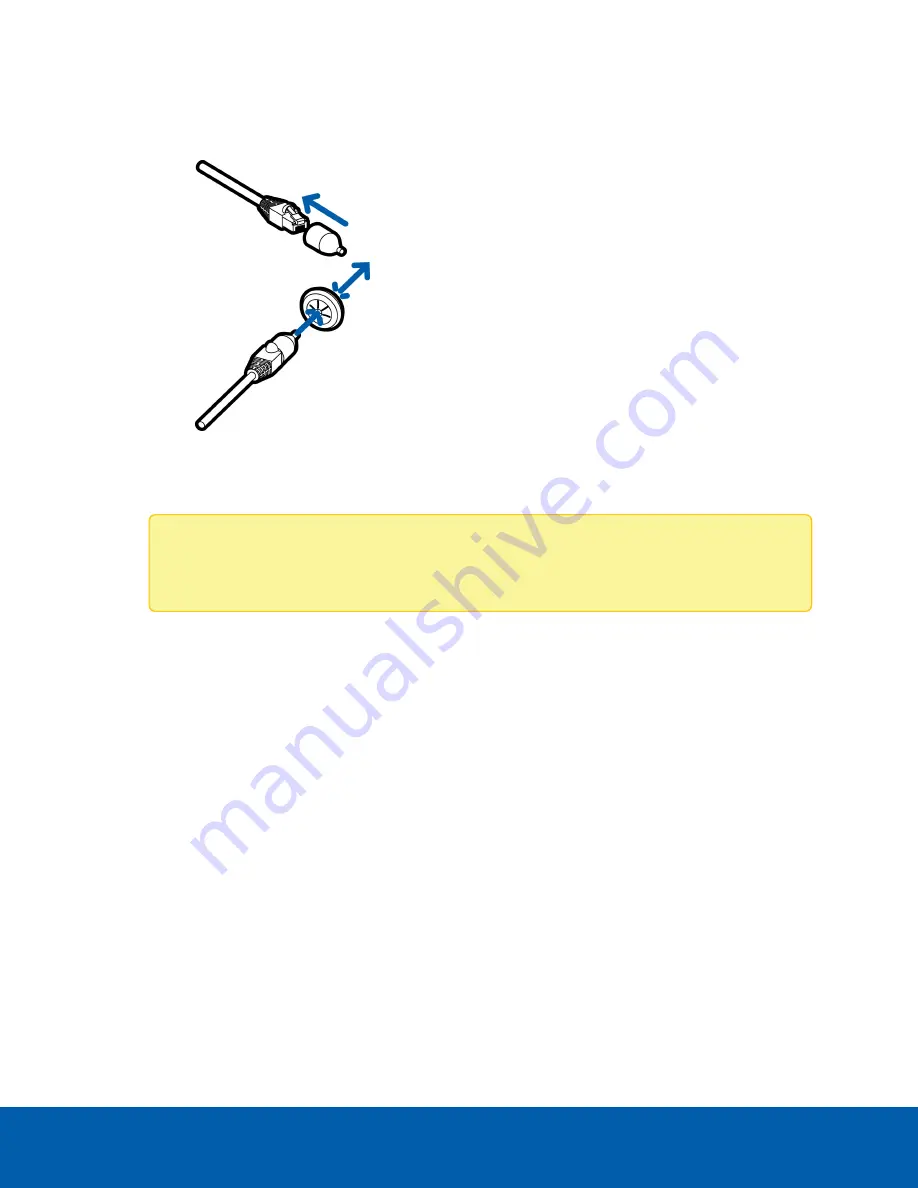
a. If the Ethernet cable is uncrimped, push the cable through the grommet.
b. If the Ethernet cable is already crimped, place the grommet piercing cap on the Ethernet
connector then push the cable through the grommet.
Ensure that the orientation of the cable and grommet matches the one shown in the image.
3. Push any other required cables through the grommet.
Note:
If you pull multiple cables through the sealing grommet, apply silicone sealant to seal
any gaps in the grommet.
Using the Surface Mount Adapter
The dome camera is provided with a surface mount adapter that can be mounted to a wall, ceiling or
electrical box.
If the dome camera needs to be installed in a different way, use one of the other mounting adapter options
and refer to their sections in this manual for more information.
l
In-ceiling mounting adapter (H4SL-MT-DCIL). For more information, see
l
Pendant NPT mounting adapter (H4SL-MT-NPTA). For more information, see
.
o
Pendant wall mounting adapter (CM-MT-WALL) — must be used with NPT mounting adapter.
Mounting the Dome Camera Using the Bottom Cable Entry
Perform the following steps if the required cables will be coming from inside the mounting surface and the
camera will be mounted immediately over the cable hole. Use this procedure on surfaces that can be easily
drilled into, and when the cables should be kept out of sight.
Perform the following steps to mount the dome camera to a ceiling or wall:
Using the Surface Mount Adapter
14


