9-6
Debugging Fixture:
Board Assembly on Debugging Fixture
9.6
Board Assembly on Debugging Fixture
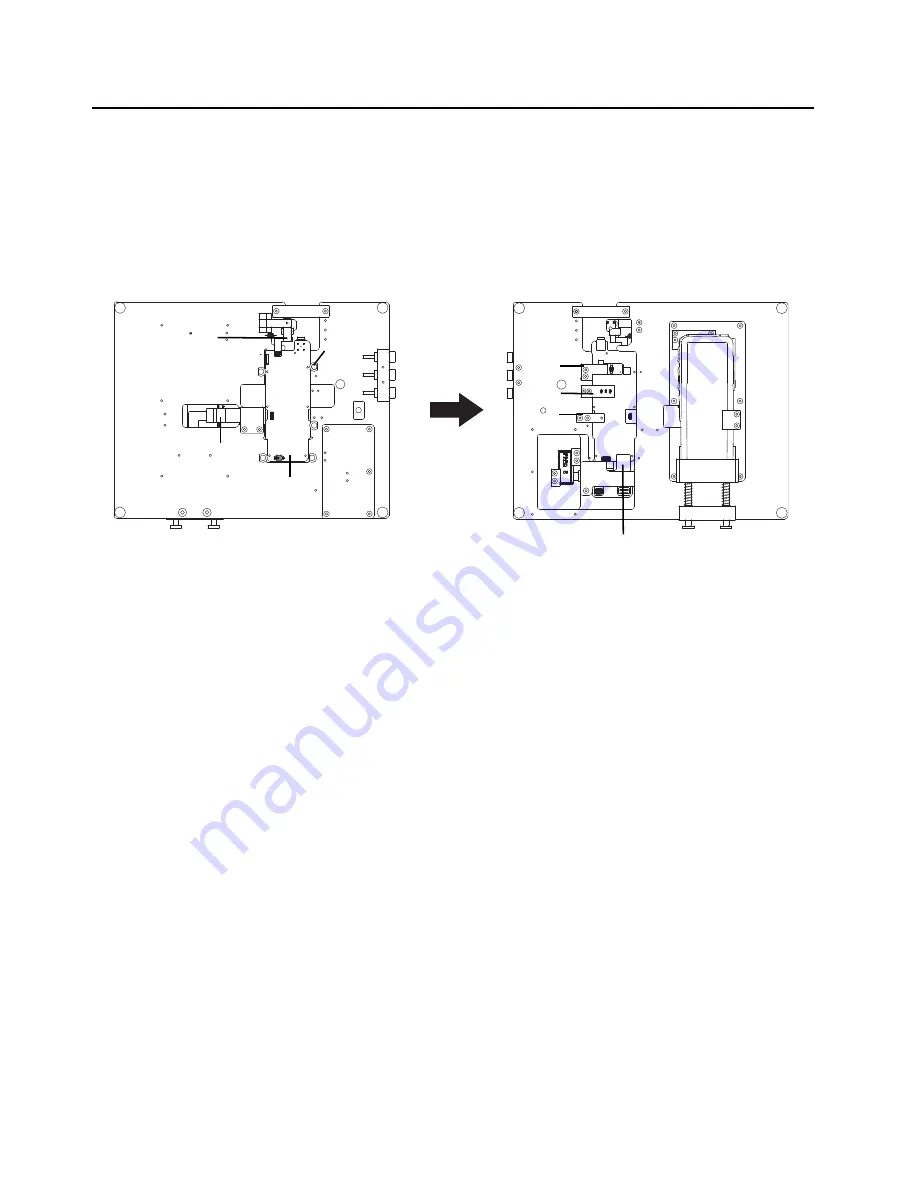
1. Turn the fixture to the bottom plane and assemble the RF board on the fixture, then secure it
by turning the PCB clamp. Connect the NFC flex connector and the extended flex connector
to the RF board.
2. Turn the fixture to the front side and connect the connector on the debugging flex to the RF
board connector. Ensure that the heat sink press plate is touching the thermal pad . Ensure
the power connection bracket is pressing the battery contact and ensure the press pin is
pressing on the temper switch.
Figure 9-10. Board assembly
RF Board
Extended Main Flex
(0104055J18)
NFC Flex
(0104052J74)
Heat Sink
Press Plate
Power
Connection
Bracket
Press
Pin
Debug Flex
(0104055J17)
PCB Clamp
Summary of Contents for Astro APX 3000
Page 1: ...APXTM TWO WAY RADIOS APX 3000 DETAILED SERVICE MANUAL ...
Page 2: ......
Page 4: ...Notes ...
Page 6: ...vi Document History Notes ...
Page 10: ...x Table of Contents Notes ...
Page 12: ...xii List of Tables Notes ...
Page 18: ...xviii List of Figures Notes ...
Page 22: ...xxii CommercialWarranty Notes ...
Page 46: ...3 20 Theory of Operation Main Board Notes ...
Page 84: ...3 58 Theory of Operation Bluetooth Notes ...
Page 208: ...6 64 Troubleshooting Waveforms LF CW on Spectrum Analyzer Notes ...
Page 222: ...7 14 Troubleshooting Tables List of Board and IC Signals Notes ...
Page 282: ...8 60 Schematics Boards Overlays and Parts Lists Main Board Block UHF1 84012513001_A Notes ...
Page 390: ...8 168 Schematics Boards Overlays and Parts Lists Main Board Block VHF 84012512001_A Notes ...
Page 456: ...9 8 Debugging Fixture Powering up Covert Board Notes ...
Page 468: ...Glossary 10 Glossary Notes ...
Page 472: ...Index 4 Index Notes ...
Page 473: ......


