Chapter 2
Using your R12
Using the cameras 38
Sending, printing, and copying your photos
1. To send your photo via email, tap the Gallery icon
in the upper left-hand corner of
the screen to open the directory where your photos are stored.
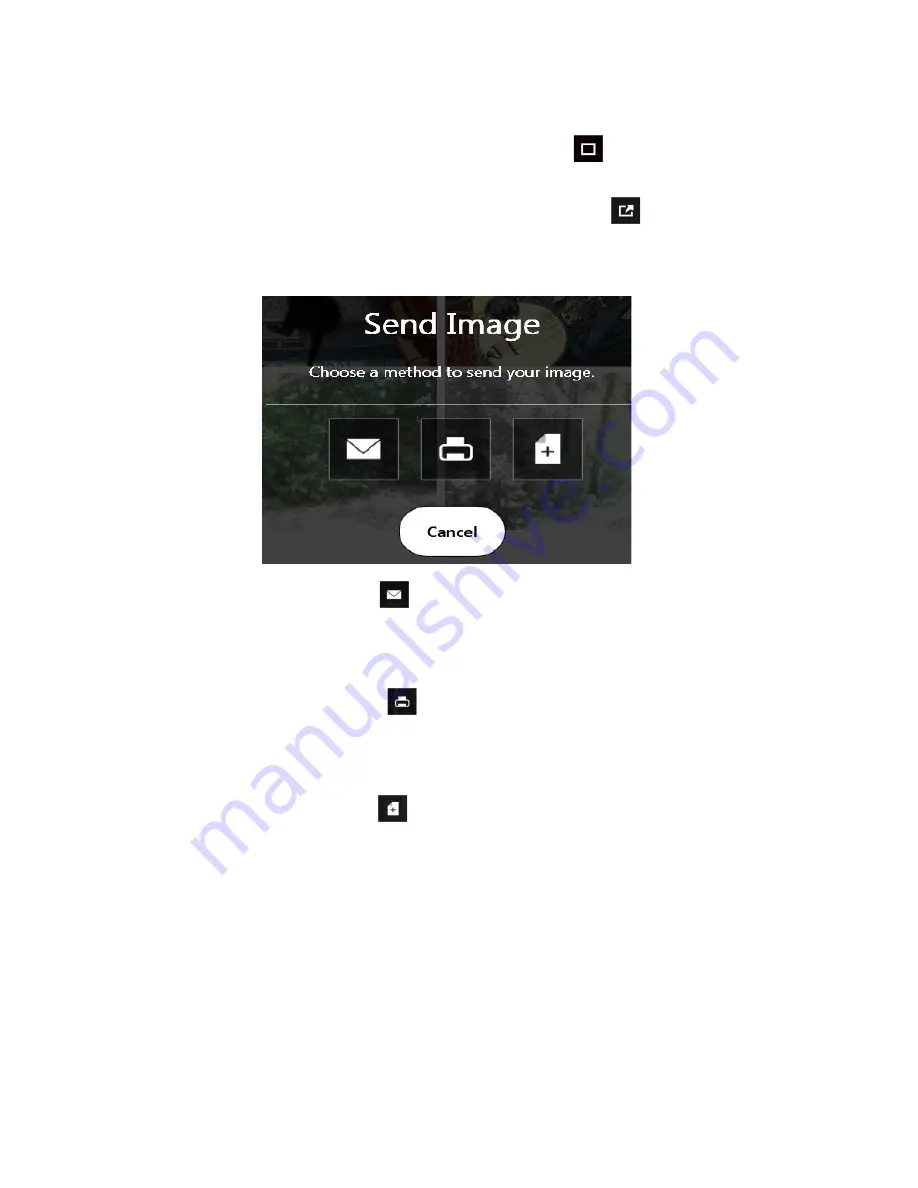
2. Tap your photo once to select it, then tap the Send icon
.
You’ll see a pop-up window that tells you to choose a method to send your image.
3. Tap the Email icon
to send your photo as an email attachment.
4. Select the resolution of the image you want to email in the following pop-up window.
Your default email program opens and the photo you selected is attached.
5. Tap the Printer icon
to send your photo to a printer.
6. Select the resolution of the image you want to print in the following pop-up window.
The photo you selected is sent to the printer.
7. Tap the Copy icon
to copy your photo to the clipboard.
8. Select the resolution of the image you want to copy in the following pop-up window.
The photo you selected has been copied to the clipboard and you can paste it into the
application of your choice.
Documentation camera tips
•
Hold the camera steady and give it a few seconds to focus.
•
If your pen is tethered, ensure that the tether is not in front of the camera lens.
•
Make sure you have adequate lighting to take your photo.

