background image


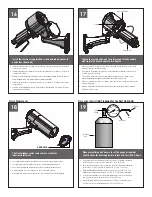
When pressurizing unit be sure to set the gauge or regulator 
slightly above the housing pressure target of 5-7psi (0.35-0.5bar).

•  Al presurizar la unidad esté seguro de fijar el calibrador o el regulador levemente 

sobre la blanco de la presión de la cubierta de 5-7psi (0.35-0.5bar). 

•  En pressurisant l'unité soyez sûr de placer la mesure ou le régulateur légèrement 

au-dessus de la cible de pression de logement de 5-7psi (0.35-0.5bar). 

•  Wenn Sie Maßeinheit unter Druck setzen, seien Sie sicher, die Lehre oder den 

Regler über das Gehäusedruckziel von 5-7psi (0.35-0.5bar) etwas einzustellen.

•  Ao pressurizar a unidade seja certo ajustar ligeiramente o calibre ou o regulador 

acima do alvo da pressão da carcaça de 5-7psi (0.35-0.5bar). 

•  Nel pressurizzare l'unità sia sicuro regolare un po'il calibro o il regolatore sopra 

l'obiettivo di pressione dell'alloggiamento di 5-7psi (0.35-0.5bar).

PSI

0

50

100

150

200

250

300

Nitrogen 
Tank

Hose

Regulator

Air Chuck

580
Fitting

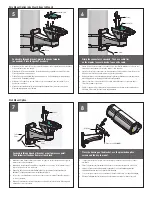
Install the camera using provided screws and rubber spacer, to 
center lens (if needed).

•  Instale la cámara usando los tornillos proporcionados y el espaciador de goma, a la lente de 

centro (si es necesario).

•  Installez l'appareil-photo utilisant les vis fournies et l'entretoise en caoutchouc, sur l'objectif 

central (si nécessaire).

•  Bringen Sie die Kamera unter Verwendung der zur Verfügung gestellten Schrauben und der 

Gummidistanzscheibe, zum Mittelobjektiv an (wenn erforderlich).

•  Instale a câmera usando os parafusos fornecidos e o espaçador de borracha, à lente center 

(se necessário).

•  Stalli la macchina fotografica usando le viti fornite ed il distanziatore di gomma, all'obiettivo 

concentrare (se necessario).

Loosen the screws shown on the picture and turn the camera 
sled ring to the desired angle and re-tighten.

•  Afloje los tornillos demostrados en el cuadro y dé vuelta al anillo del trineo de la cámara 

al ángulo deseado y vuélvalo a apretar.

•  Desserrez les vis montrées sur l'image et tournez l'anneau de traîneau d'appareil-photo 

à l'angle désiré et le resserrez.

•  Lösen Sie die Schrauben, die auf der Abbildung gezeigt werden und drehen Sie den 

Kameraschlittenring zum gewünschten Winkel und ziehen Sie wieder an.

•  Afrouxe os parafusos mostrados no retrato e gire o anel do trenó da câmera para o ângulo 

desejado e reaperte-o.

•  Allenti le viti indicate sull'immagine e giri l'anello della slitta della macchina fotografica 

nell'angolo voluto e riserri.

Screw

Camera Sled Ring

Camera Sled

16

The front window can be removed in case the lens 
requires adjustment.

•  La ventana delantera puede ser quitada en caso de que la lente requiera el ajuste.

•  La fenêtre avant peut être enlevée au cas où l'objectif exigerait l'ajustement.

•  Das vordere Fenster kann entfernt werden, falls das Objektiv Justage erfordert.

•  A janela dianteira pode ser removida caso que a lente exige o ajuste.

•  La finestra anteriore può essere rimossa nel caso l'obiettivo richieda la registrazione.

HAND HOLD

17

18

19

Future Maintenance

Pressurize the Unit  (

NOT required for the Dust Tight Unit

)

Summary of Contents for DFH10C2W

Page 1: ...span included heater blower with feed thru wall pole mount supports af PoE cameras adjustable sunshield DFH10C2W Dust Proof tubular housing 24Vac or 12Vdc input heater blower with feed thru wall pole mount DFH10C2WY Dust Proof tubular housing 24Vac or 12Vdc input heater blower with feed thru wall pole mount adjustable sunshield DFH10C8WY Dust Proof tubular housing PoE input with Dynamic Power Allo...

Page 2: ...n be damaged if improperly handled or dropped If an item appears to have been damaged in shipment replace it properly in its carton and notify the shipper Be sure to save 1 The shipping carton and packaging material They are the safest material in which to make future shipments of the equipment 2 These Installation and Operating Instructions If technical support or service is needed contact us at ...

Page 3: ...spect to any Product requiring service during the warranty period which is subjected to any of the following abuse improper use negligence accident lightning damage or other acts of God i e hurricanes earthquakes modification failure of the end user to follow the directions outlined in the product instructions failure of the end user to follow the maintenance procedures recommended by the Internat...

Page 4: ...ough hides and protects cables Pop Out Tabs allows for pole mounting Rear Access Panel acts as internal J Box Installers Connection Board allows for easy hook ups Lanyard Cable safely retains housing during installation Durable and Attractive grite color powder coated finish increased corrosion protection finish available Optional Accessory ...

Page 5: ...oto 12Vdc 11W Aucun appareil photo 24Vac 29W Keine Kamera 12Vdc 11W Keine Kamera 24Vac 29W Nenhuma câmera 12Vdc 11W Nenhuma câmera 24Vac 29W Nessuna macchina fotografica 12Vdc 11W Nessuna macchina fotografica Electrical Specifications Power 12VDC Class 2 Only Français Deutsch Italiano Portuguese Español English ADDITIONAL DETAIL TO BE UPDATED IN FUTURE REVISIONS ...

Page 6: ...enenplatte zusammenbauen stellen Sie sicher dass alle VerdrahtungsZugangslöcher Einfassung in Richtung zur Rückseite des niedrigen Einfassungszugangsportals sind CUIDADO Ao montar o suporte certifique se que todos os furos de acesso da fiação são revestimento para a parte traseira do portal baixo do acesso das montagens ATTENZIONE Nel montare il montaggio la staffa si assicura che tutti i fori di ...

Page 7: ...estellt Una a montagem à parede com a ferragem apropriada não fornecida Attacchi il supporto alla parete con fissaggi adatti non forniti WALL MOUNTING If attaching to pole first break away tabs with pliers and remove 4 strap plugs Si atan al poste el primeros rompen lejos lengüetas con los alicates y quitan 4 los enchufes de la correa Si attachant au poteau les premiers cassent loin des étiquettes...

Page 8: ...Alimenti il cavo tramite la staffa perfori gli ugelli della guarnizione come stato necessario Disponga la guarnizione come indicata Cable Gasket Nipples 5 6 Feed cable through back of bracket or bottom access point Then follow instructions from previous block Alimente el cable a través detrás del soporte o del punto de acceso inferior Entonces siga las instrucciones del bloque anterior Alimentez l...

Page 9: ... tutti collegamenti nessecary dei collegamenti A Slightly loosen B Completely loosen RJ45 568B Power BNC Communication 9 Use provided Key to remove the front part of the housing El uso proporcionó llave para quitar la parte delantera de la cubierta L utilisation a fourni la clef pour enlever la partie avant du logement Gebrauch lieferte Schlüssel um das Vorderteil des Gehäuses zu entfernen O uso f...

Page 10: ...a alimentación se suministra No hacer esto puede resultar en daños a la vivienda y anulará todas las garantías Assurez vous que le sélecteur de tension est réglé pour l entrée et la tension d alimentation appareil photo avant de l alimentation est fournie Le défaut de ce faire peut entraîner des dommages au logement et annulera toutes les garanties Stellen Sie sicher dass der Spannungswahlschalter...

Page 11: ...ektiv an wenn erforderlich Instale a câmera usando os parafusos fornecidos e o espaçador de borracha à lente center se necessário Stalli la macchina fotografica usando le viti fornite ed il distanziatore di gomma all obiettivo concentrare se necessario Loosen the screws shown on the picture and turn the camera sled ring to the desired angle and re tighten Afloje los tornillos demostrados en el cua...

Page 12: ...3 volte rimuovere tutta l umidità Depress to Purge Pressure Fill Schraeder Valve Pressure Fill Schraeder Valve Air Chuck Place the air chuck on the fill valve and begin filling until pressure relief valve opens Coloque la tirada del aire en la válvula del tanque y comience a llenar hasta que la válvula de descarga de presión se abra Placez le mandrin d air sur la valve de réservoir et commencez à ...

Page 13: ...5 30 Fill Valve Over Pressure Relief Valve Connectors Pressure Gauge NOT INCLUDED Air Chuck After purging and refilling check the housings pressure It should be around 5 7psi 0 35 0 5bar Después de purgar y de rellenar compruebe la presión de las cubiertas Debe estar alrededor de 5 7psi 0 35 0 5bar Après la purge et le remplissage vérifiez la pression de logements Elle devrait être autour de 5 7ps...

Page 14: ...ousings Poles Power Supplies and Accessories and 5 Years on camera systems SView QView Warriors and InfraRed Illuminators Register Your ProductsOnline Take a few moments and validate your purchase via the Online Product Registration Form at www videolarm com productregistration jsp Register your recent Moog Videolarm purchases and benefit from the following Simple and Trouble Free RMA process Adde...

Reviews: