EN
Mounting instructions MonLines mySwing MSM05 - Version no. 2021-10
4
2. Preparations before mounting
1. Before assembly, check all components received against the scope of delivery. If any parts are damaged or missing,
please contact us by e-mail or phone.
2. Select an installation location with sufficient space to fully extend and retract the mount.
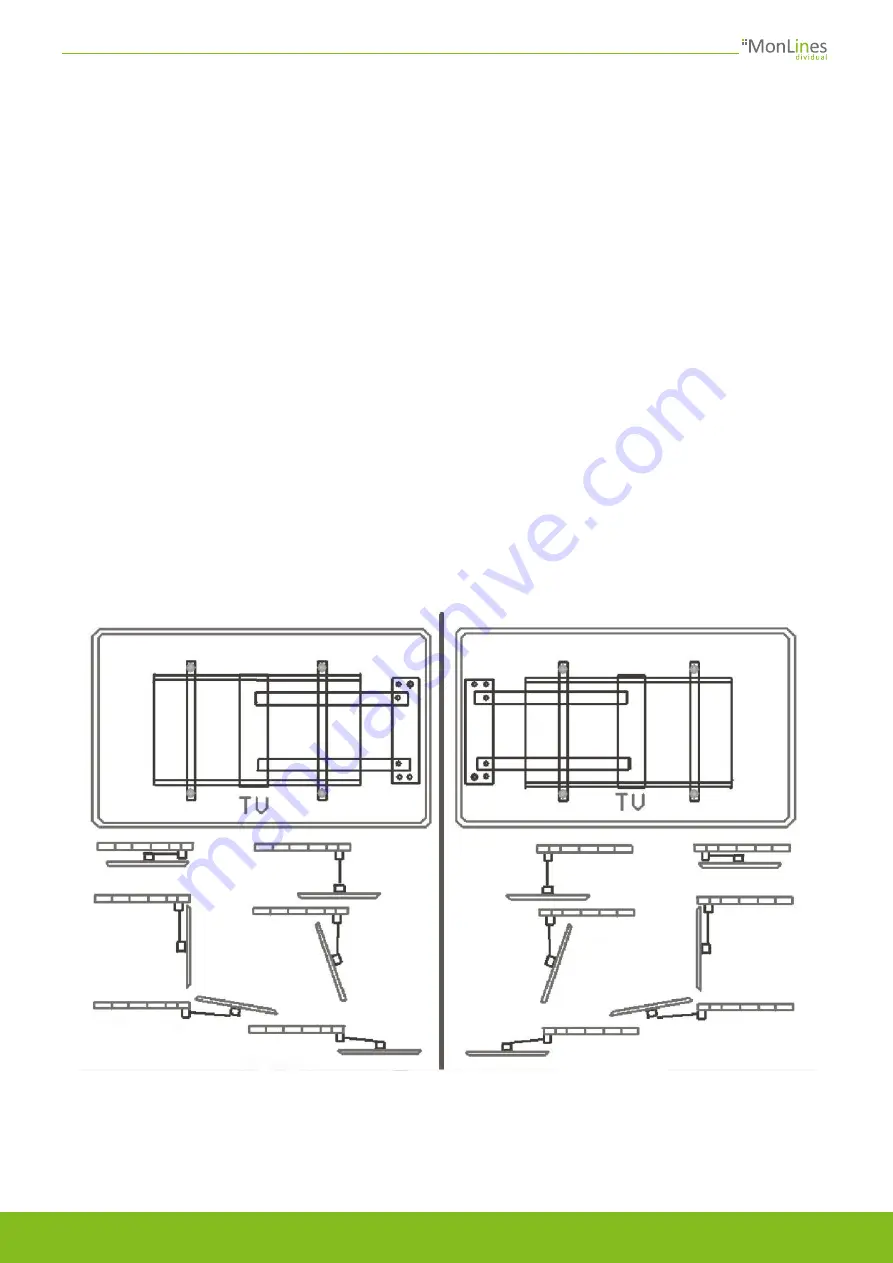
3. The mySwing bracket can be mounted with either left or right orientation. Depending on the selected orientation, the
mount can be swiveled either 90° left / 70° right or 90° right / 70° left (see the drawing below).
4. Only use suitable tools.
5. When mounting to a wood stud wall, be sure to center the screws in the wood stud. The use of a beam finder is strongly
recommended.
6. Make sure the wall is stable and load-bearing, as it must support the combined weight of the mount and TV.
7. Only use the screws supplied and do not overtighten them.
3. Safety instructions
1. Only use the mySwing mount indoors. Outdoor use may result in damage or injury.
2. Do not operate or mount the mySwing TV wall mount in a damp or wet environment.
3. Never operate the mySwing mount with a damaged power cord or plug. In case of damaged parts, please contact us by e-
mail or phone.
A
A
B
B
A: 0°
B: 0°
A: 0°
B: 0°
A: 90°
B: 0°
A: 90°
B: 0°
A: 90°
B: 90° R
A: 90°
B: 90° L
A: 90°
B: 70° R
A: 90°
B: 70° L
A: 160°
B: 90° R
A: 160°
B: 90° L
A: 160°
B: 70° L
A: 160°
B: 70° R
Joint A: max. 160°
Joint B: max. 70° L / 90° R
Joint A: max. 160°
Joint B: max. 90° L / 70° R
Left side mounting
Right side mounting


