If the monitor is part of a car rear view system and
has been connected accordingly (
chapter 5.1), it
will automatically switch to the camera image
when you put the car into reverse (provided that the
camera supplies a video signal). The monitor will
show the inverted image (mirror image left / right)
and “CAM” will be inserted for 10 seconds. While
the car is in the reverse gear, operation of the mon-
itor will not be possible.
3) To change the settings for brightness, contrast
and colour intensity of the image, use the arrow
buttons (10) of the remote control:
buttons
for brightness
buttons COL
for colour intensity
buttons
for contrast
Press the corresponding arrow button to increase
(
L
) or decrease (
M
) the value in a scale of 0 to 100
(also possible via the menu
step 6). The scale
will disappear 10 seconds after the last button was
pressed, then “AV1” or “AV2” will be inserted for
10 seconds.
The values that have been changed will be
saved when the monitor is switched off.
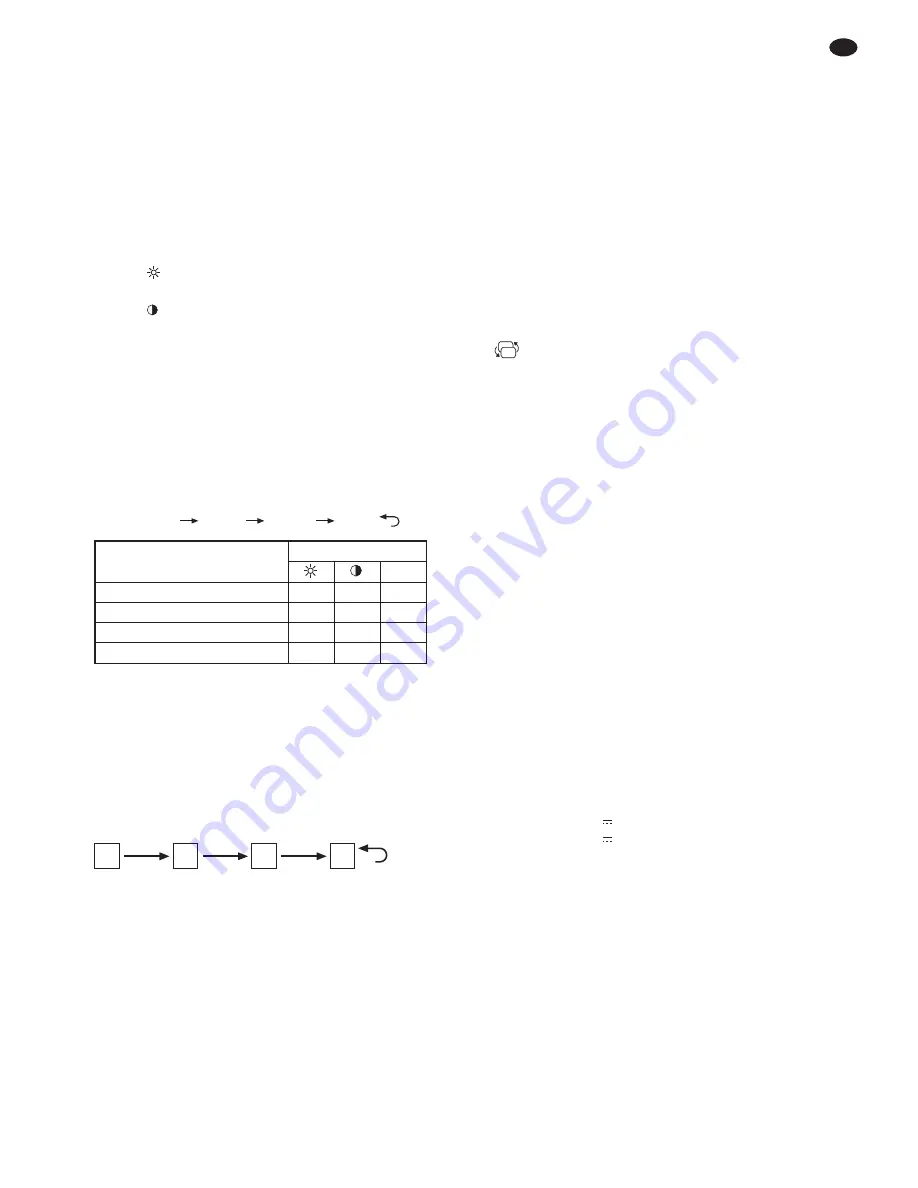
4) Four image presets are selectable with the button
P.P (12) on the remote control:
STANDARD
SOFT
LIGHT
VIVID
The preset selected will be inserted for 10 seconds,
then “AV1” or “AV2” will appear for 10 seconds.
Individual settings (
step 3) will be reset when
a preset is selected.
5) For mirror image, press the button SYS (13) [also
possible via the menu
step 6]. Each time you
press a button, the monitor will switch to the next
display mode:
no
mirror image
mirror image
rotation
mirror image
left / right
up / down
180°
6) To activate the OSD menu, press the button MENU
(4) on the monitor. The OSD menu consists of
9 menu items. Each time you press the button
MENU, the next menu item will be selected. To
change the settings of a menu item, press the
buttons “+” and “-” (2). The menu will disappear
10 seconds after the last button was pressed.
Order of menu items:
1. BRIGHT
2. CONTRAST
3. COLOR
To change the values of the current image set-
tings, use the first three menu items: increase
the value with “+”, decrease it with “-”.
4. SIGNAL (video source)
Press “+” or “-” to switch between the video
sources “AV1” and “AV2”.
5. LANGUAGE
Press “+” or “-” to switch between English
(“ENG”) and Russian (“PyC”).
6. ZOOM (format)
Press “+” or “-” to switch between “16 : 9” and
“4 : 3”.
7.
(mirror image)
Press “+” or “-” to switch among four image dis-
play modes (
step 5).
8. RESET (set values to “50”)
Press “+” or “-” to set the values of the current
image settings (brightness, contrast, colour
intensity) to “50”.
9. EXIT
Press “+” or “-” to exit the menu.
8
Specifications
Diagonal screen size: 17.8 cm / 7
″
(...-720COL)
22.5 cm / 9
″
(...-920COL)
Colour system: . . . . . PAL / NTSC (automatic switching)
Resolution: . . . . . . . . hor. 480 × vert. 234 pixels (…-720COL)
hor. 640 × vert. 234 pixels (…-920COL)
Video inputs: . . . . . . . 1 Vpp / 75
Ω
Connections
Video: . . . . . . . . . . 2
×
RCA plug
Power supply: . . . . jack for a hollow plug of the dimensions
3.5 / 1.35 mm (
∅
outside/inside), internal
contact = positive pole
Ambient temperature: 0 – 40 °C
Power supply: . . . . . . 12 V / 250 mA (...-720COL)
12 V / 300 mA (...-920COL)
via power supply unit provided or
the vehicle’s electrical system
Dimensions, weight: . 185 × 120 × 27 mm, 750 g (…-720COL)
230 × 150 × 27 mm, 1.3 kg (…-920COL)
Subject to technical modification.
R
R
R
R
Image preset
Values
COL
STANDARD
50
50
50
SOFT
45
35
45
LIGHT
60
50
50
VIVID
40
60
70
9
GB
All rights reserved by MONACOR
®
INTERNATIONAL GmbH & Co. KG. No part of this instruction manual may
be reproduced in any form or by any means for any commercial use.


