Distributor of Molex Connector Corporation: Excellent Integrated System Limited
Datasheet of 0638257400 - HAND CRIMP TOOL
Contact us: [email protected] Website: www.integrated-circuit.com
Tool Kit for 250 Slip-in Receptacle Terminals
Doc No: ATS-6382574HM Release Date: 05-20-13
UNCONTROLLED COPY
Page 3 of 8
Revision: A
Revision Date: 05-20-13
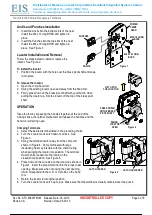
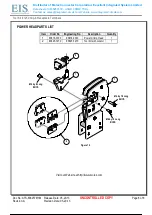
SWING
LOCATOR
OPEN
PRESS DOWN
ON THE BRASS
PIVOT SHAFT
LIFT UP ON
THE LOCATOR
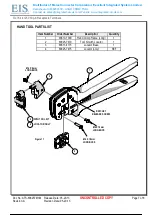
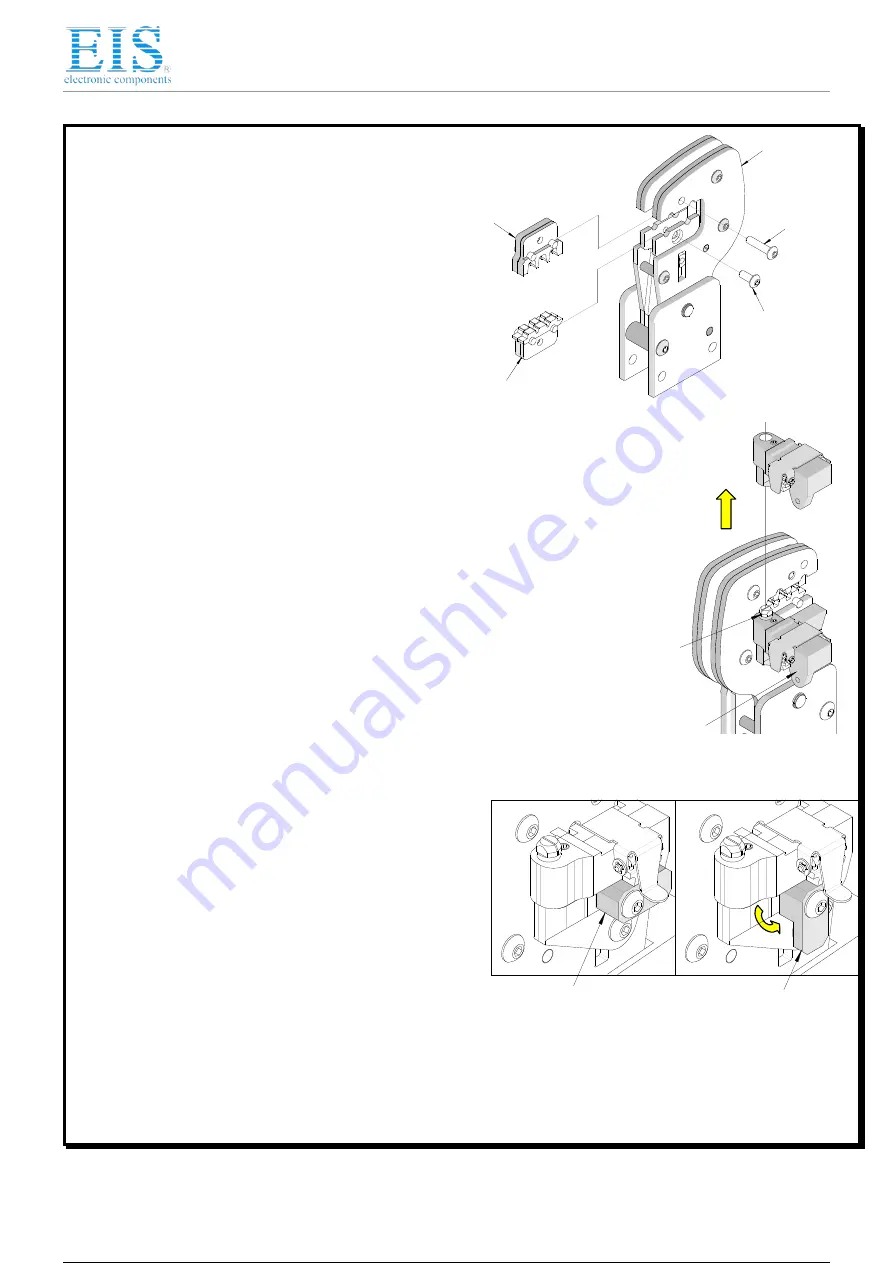
Figure 2
ANVILS
POWER
CRIMP
HEAD
Figure 1
PUNCHES
M4 X 10 LONG
BHCS
M4 X 18 LONG
BHCS
Anvils and Punches Installation
1.
Insert the Anvils into the bottom slots of the nest.
Install the M4 x 10 long BHCS and tighten in
place.
2.
Insert the Punches into the top slots of the nest.
Install the M4 x 18 long BHCS and tighten in
place. See Figure 1.
Locator Installation and Removal
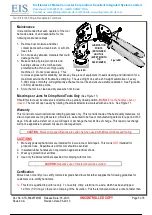
Follow the steps below to install or replace the
locator. See Figure 2.
To install the locator
1.
Position the locator with the hole over the brass pivot shaft and snap
it into place.
To remove the locator
1.
Open the crimp hand tool.
2.
Swing the existing locator open and away from the hand tool.
3.
Firmly press down on the brass pivot shaft with your thumb, while
pulling the locator up. Slip the locator off the top of the brass pivot
shaft.
OPERATION
Open the tool by squeezing the handles together, at the end of the
closing stroke, the ratchet mechanism will release the handles, and the
hand tool will spring open.
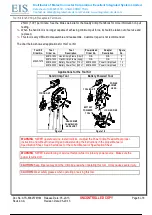
Crimping Terminals
1.
Select the desired terminal listed in the preceding charts.
2.
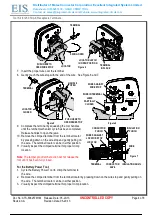
Turn the Locator Lock Latch down to unlock. See
Figure 3.
3.
Swing the terminal locator away from the crimp tool
shown in Figure 4. Some terminals with large
insulation grips may interfere with the crimp tooling
when swinging the locator into position. The terminal
must then be loaded into the locator in the
closed/crimp position. See Figure 5.
4.
Press down on the wire stop on the locator as shown in
Figure1. Insert the proper terminal into the proper nest
opening. Make sure when choosing the nest opening,
it will correspond with the A, B or C profile on the hand
tool.
5.
Return the locator to its original position.
6.
Turn the Locator Lock Latch up to lock. Make sure that the terminal is visually centered over the punch.
Figure 3
LATCH LOCKED
LATCH UNLOCKED
4 / 9
4 / 9


