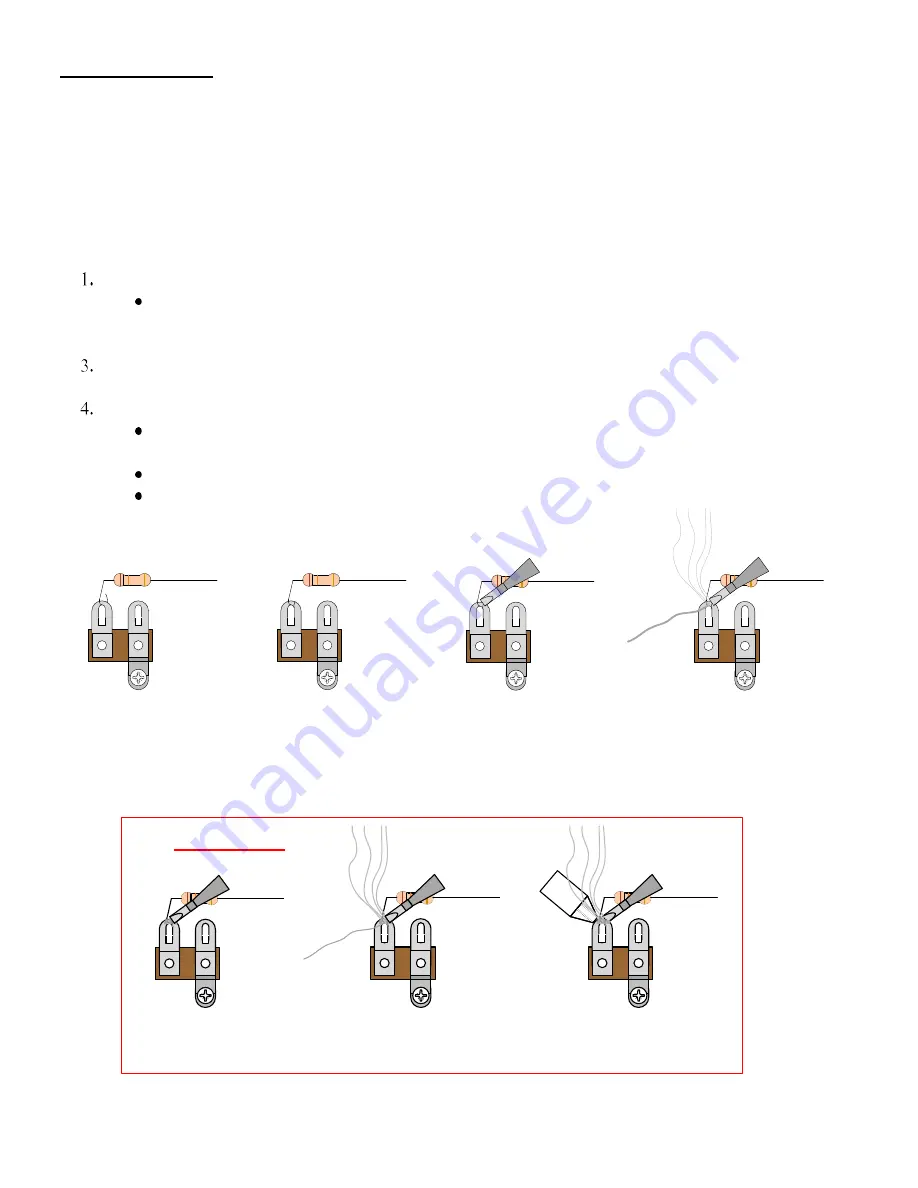
SOLDERING TIPS
1. Bend the component lead
and wrap it around the
connection point.
2. Wrap the component lead
so that it can hold itself to the
connection point.
3. Heat up both component
lead and connection point with
the soldering iron.
4. Apply solder to both
component lead and
connection point.
2. Apply fresh solder to mix in
with old solder joint
1. Heat up old solder joint
with the soldering iron.
3. Use a de-soldering tool to
remove the old solder joint
while it is heated.
De-Soldering Tip
5
It is important to make a good solder joint at each connection point. A cold solder joint is a connection that
may look connected but is actually disconnected or intermittently connected. (A cold solder joint can keep
your project from working.)
Follow these tips to make a good solder joint.
Take your time with each connection and make sure that all
components are connected and will remain connected if your project is bumped or shaken.
Bend the component lead or wire ending and wrap it around the connection point.
Make sure it is not too close to a neighboring component which could cause an
unintended connection.
2.
Wrap the component lead so that it can hold itself to the connection point.
Touch the soldering iron to both the component lead and the connection point allowing both to
warm up just before applying the solder to them.
Be sure to adequately cover both component lead and connection point with melted solder.
Remove the soldering iron from your work and allow the solder joint to cool. (The
solder joint should be shiny and smooth after solidifying.)
Cut off any excess wire or component leads with cutting pliers.
Clean the soldering iron's tip by wiping it across the wet sponge again after making the
solder joint.


