background image

Page   5


MOCET IP3093-U Communicator mini Quick User Guide


1.    Main unit x 1 
2.  Handset x 1 
3.    Handset cord x 1 
4.    Power adapter with cord x 1 

5.  Flip-side micro-USB connector module x 1 
6.    AUX-in cable x 1 
7.    Quick start guide x 1 
8.    Warranty card x 1 


Setting up the Communicator mini™ 


1.


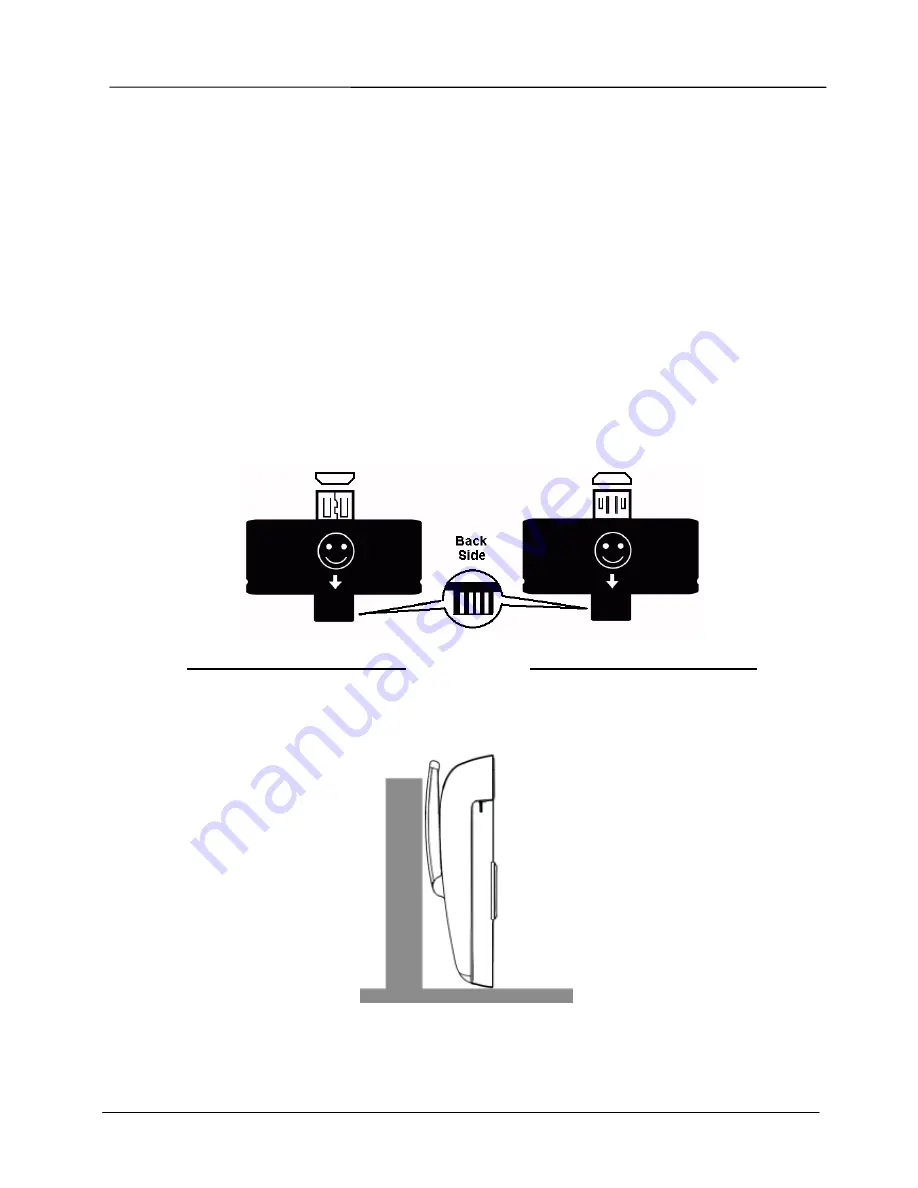
Use the right connector module 


The Communicator mini supports two connector modules, one is regular micro-USB which 
is for devices like Google Nexus 4, Samsung Galaxy series and Galaxy Note series, and 
the other one is flip-side micro-USB which is for devices like Google Nexus 7. The default 
module installed in the Communicator mini is a regular micro-USB connector. You can 
follow the steps below to change it to the flip-side micro-USB connector module. 


Step1: After unpacking the product package box, place the main body of the Communicator 
mini top down in your lap or a firm sofa. 


Step2: Insert two ballpoint pen refills into the two holes in the bottom of the Communicator 
mini, and then, in parallel, push the ballpoint pen refills with a proper little force down 
straight the regular micro-USB connector till it drops out.   

(A) Regular micro-USB 

t

d l

(B) Flip-side micro-USB 

t

d l

Summary of Contents for Communicator mini

Page 1: ...IP3093 U Communicator mini Quick User Guide Copyright 2013 All Rights Reserved Ver R02 D C 102 1111...

Page 2: ...at may cause undesired operation CE Declaration of Conformity This equipment complies with the requirements relating to electromagnetic compatibility EN55022 class B for ITE and EN 50082 1 This meets...

Page 3: ...ency equipment such as TVs radios hi fi or video equipment which radiate electromagnetic fields 9 Do not attempt to upgrade device in an unstable power environment This could cause unexpected issues 1...

Page 4: ...om there is even an optional desktop microphone set available to ensure all participants in the room can be heard clearly on on the call For a more enjoyable multimedia experience there is an availabl...

Page 5: ...the other one is flip side micro USB which is for devices like Google Nexus 7 The default module installed in the Communicator mini is a regular micro USB connector You can follow the steps below to...

Page 6: ...firmly 2 Adjust the stand Place the Communicator mini on the table and slightly pull the stand apart from the bottom shell to a comfortable viewing position 3 Attach the handset Attach the long end of...

Page 7: ...of the Communicator mini Plug the power cord into an outlet When it is powered the LEDs on the front panel of main unit will light up and an alert sound will indicate that the Communicator mini is rea...

Page 8: ...all to hear everyone in the room Appearance and Buttons The figures below show the appearance of both sides of the Communicator mini along with the user interface buttons and handset The front panel i...

Page 9: ...indicator light bar For current volume indication Press volume up button twice will turn on one more light Press volume down button twice will turn off one more light Volume control Volume up Touch to...

Page 10: ...port for charging your second mobile device 9 Cable tray slot Put handset cord in the tray to prevent accident pull force on the handset 10 Hand Handset connector for connecting the handset cord 11 M...

Page 11: ...conds 3 Pair your tablet or smart phone with the Communicator mini Once your Communicator mini is listed as a device appearing in the Bluetooth Devices list with an ID like IP3093 XXXXXX tap it to pai...

Page 12: ...your tablet or smart phone volume switch to adjust the sound level 4 Synchronizing data You can synchronize data such as music photos and media files between your Mobile device and the computer throu...

Page 13: ...t with your device s headset port to the Communicator mini AUX IN port will allow you to use these apps When the AUX in cable is connected audio will route automatically through the included AUX in ca...

Reviews: