Before Use
Operation
Cleaning
Troubleshooting
Troubleshooting
36
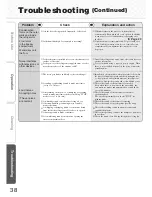
The refrigerator does not cool at all!
The operation panel
turns off automatically!
Smells the strong odor
on the food or ice!
The outer walls heat up!
The refrigerator takes time to cool when you fi rst start
using it. In summer, it may take up to 24 hours for the
inside to be fully cooled.
Are the displays on the operation panel blinking?
Demonstration operation:
Page 33
Is the power plug disconnected or has the circuit breaker
tripped?
If 30 seconds pass without any
operation panel button operations,
displays turn off.
Do you clean the water tank and the
water supply pump once a week?
Have you placed food with strong odor
inside the refrigerator without sealing
in a container?
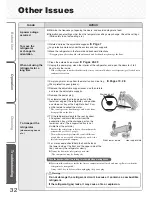
The outer walls heat up signifi cantly (to about 50 to
60°C) immediately after installation and in summer.
This is because the heat discharging and condensation
prevention pipes are located on the sides and the top of
the refrigerator. They are required for cooling and the
heat is not an abnormality.
A heat discharging fan is located under the refrigerator.
Warm air may be discharged from here.
First, check the items described in this section. If the problem persists, contact the retail store where
you purchased the refrigerator as soon as possible.
Frequently asked questions in the initial
period and in summer
Questions about operation
and handling
Page 10
Pages 28 - 29
Page 24
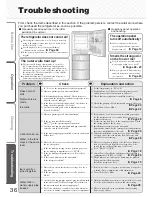
Problem
Check
Explanation and action
Is “L” set as the temperature for the compartment?
Has enough time passed after installation?
Is heat discharge being blocked? Check if there is
gap around the refrigerator and the refrigerator is not
exposed to direct sunlight.
Is the fl ow of cold air being blocked? Are the doors
being opened frequently, or left ajar?
Are the ice making and versa compartments set to
Power Save Mode?
Set the temperature to “M” or “H”.
It takes about 4 to 5 hours for the refrigerator to cool,
and 24 hours or more in summer to fully cool.
Check that the refrigerator is installed correctly.
Check the quantity of food inside and any door left ajar.
Cancel Power Save Mode.
Does not cool
well
Not much ice is
made
Ice melts
Page 6
Page 20
Page 22
Has ice been stored inside the ice storage box for a
long time?
Is the ice making compartment set to Power Save
Mode?
If the ice is stored for a long time, ice cubes may join together
or shrink. (Due to a phenomenon called sublimation.)
Cancel Power Save Mode.
Ice is small or
joined together
Page 22
Water tank or
water supply pipe
freezes
Are the water supply pipe and the pipe installed fi rmly
in the water tank? Is there a foreign object between
the water tank and the water supply pipe?
Has food, a plastic bag, or another object fallen behind the
case in the ice making compartment or freezer compartment?
When the installation is incorrect or a gap is caused by a foreign
object, the cold air may fl ow in reverse and cause freezing.
The cold air may fl ow in reverse and cause freezing.
Remove any objects.
Page 28
Has enough time passed after installation?
Is the ice tray installed correctly?
Has
on the operation panel turned on?
Are the water supply pump and tank pipe installed
correctly onto the water tank?
Is the water supply pipe installed correctly in the tank
holder area?
Has food, the ice server or other object been left in
the ice storage box?
Is the ice making setting on the operation panel for
the ice making compartment set to “STOP”?
Is the ice making compartment set to Power Save
Mode?
Is there enough water in the water tank?
Is the refrigerator tilted?
It takes about 4 to 5 hours after fi rst starting operation
for the refrigerator to cool, and 24 hours or more in
summer to make ice.
Set the ice tray lock lever to the correct position. Check
the setting status of the ice tray.
Install them correctly onto the water tank.
(In particular, ensure that the opening of the tank pipe inside
the tank is installed fi rmly to the tank.)
When the installation is incorrect or a gap is caused by
a foreign object, the cold air may fl ow in reverse and
prevent ice from forming.
The ice storage box is judged to be full of ice. Remove
food or other objects from the ice storage box. Also,
spread the ice out fl at all the way to the front.
Set to “REG” or “QCK”.
Cancel Power Save Mode and then set the ice making
compartment to “REG” or “QCK”.
The number of ice cubes in one batch may be reduced.
Pour water into the water tank.
Install the refrigerator level.
Cannot make ice
Water in the tank
stays at the same
level
Page 28
Page 19
Page 29
Page 28
Page 22
Page 18
Troubleshooting
Summary of Contents for MR-BX52W-BR-ML
Page 39: ...Memo...
Page 40: ...58 60 ECO 63 58 ECO 3 24...
Page 42: ...42 44 45 44 44 44 44 45 70...
Page 43: ...43...
Page 44: ...2 10 1 44 5cm 24 10 2 50 60 2...
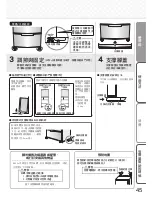
Page 45: ...3 4 45 2 3mm 100kg R600a 1 2...
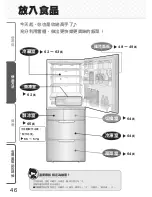
Page 46: ...46 62 63 48 49 62 64 64 64 65 56 57...
Page 47: ...30 47 3 9 0 6 9 5 22 16 54 55 3 3...
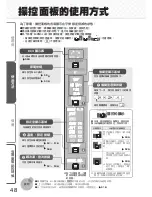
Page 48: ...ECO 30 61 48 3 58 ECO ECO 58 60 50 51 56 52 53 53 52 60 30...
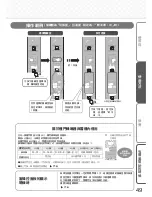
Page 49: ...1 4 60 1 2 3 4 5 60 2 49 3 71 71 1 1...
Page 50: ...30 5 50 1 56 2 5 72 6 16 9 5 17 8 3 19 6 1 21 5 0 22 3...
Page 51: ...51 2 3 53 1 52 5 7 9 12 15 18 2 72 6...
Page 52: ...52 2 30 2 1 1 1 56 2 1 2...
Page 53: ...30 53 1 60 2 2 1 3 3 12 2 3 1 1 54 55...
Page 54: ...1 2 54 80 70 1 2 100 400g 2 5 15 30 1...
Page 55: ...7 24 1 2 3 5 15 50 51 55 53 1 2 1 1cm 250cc 2 1 300g 60 100g 2 3...
Page 56: ...2 60 80 1 1 10 12 80 140 10 24 66 56 1 2 1 10 12 ECO 58 60 1...
Page 57: ...1 57 3 1 56 5 66 4 2 66 2 3 66 4 5 66 67 1 56...
Page 58: ...58 ECO 60 1 30 ECO 1 1 2 3 0 1 0 3 4 1 ECO ECO ECO 30 30 ECO Eco Mode ECO ECO 3 24...
Page 59: ...59 ECO 30 30 ECO ECO ECO...
Page 60: ...60 10 0 2 5 57 1 3 2 1 1 2 3 30 3...
Page 61: ...61 1 3 1 3 1 3 48 ECO 3 3...
Page 62: ...3 3 62 10 LED 75 49...
Page 63: ...63 LED 68 68 69 1 2...
Page 64: ...64 49...
Page 65: ...65 60 66 67 49 80 140 1 2L...
Page 66: ...66 2 3 2 2 56 1 6 56 4 3 5 1 60 1 2 3 4 1 2...
Page 67: ...2 3 67 1 4 5 2 3 1 2 1 2 3 4...
Page 68: ...2 1 68 10 4 4 4 4 3 2 4 3...
Page 69: ...3 69...
Page 70: ...70 1 45 2 3 66 67 57 66 3cm 30 2 2...
Page 71: ...71 2 5 1 1 5 5...
Page 74: ...74 24 30 50 60 48 66 67 62 71 4 5 24 44 58 60 60 66 4 5 24 66 57 67 66 60 56...
Page 75: ...75 61 53 45 5 30 60 1 4 5 49 55 53 53...
Page 76: ...76 1 2 1 2 100 58...
Page 77: ...Memo...
Page 78: ...Memo...
Page 79: ...Memo...

