background image

6-7

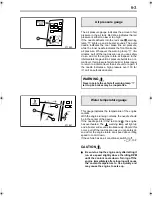
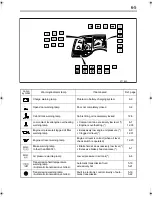
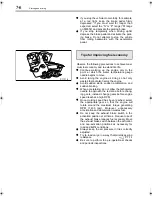
2 Low coolant level/engine overheating

warning lamp

This lamp illuminates and a buzzer sounds if

there is insufficient engine coolant or if the

engine overheats. 

NOTE:

The buzzer stops sounding when the vehicle is

stopped and the parking brake is activated.

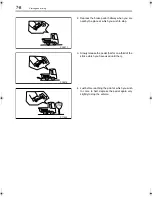
If the water temperature gauge’s needle enters

the red zone, the engine has overheated. Pull

off the road as soon as it is safe to do so and run

the engine slightly faster than idling speed until it

cools down and then take necessary action

against overheating.

 P. 13-7

CAUTION

Be sure to stop the engine only after letting it

run at a speed slightly above the idling RPM

until the coolant cools down. Turning off the

engine immediately after stopping will cause the

coolant temperature to rise quickly and may

cause the engine to seize up.

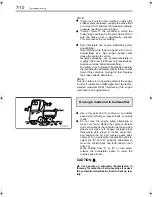
If the water temperature gauge’s needle does

not point to the red zone, there is insufficient

engine coolant. Check the coolant level and add

the coolant.

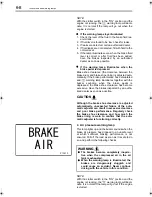
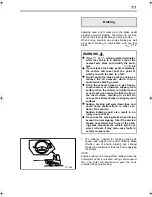
3 Brake warning lamp

<Other than FM65F>

The brake warning lamp will light up and a buzzer

will sound if the brake fluid in the brake fluid reser-

voir tank falls below the predetermined level, or if

the brake shoe clearance exceeds the predeter-

mined value.

WARNING

Driving with an overheated engine can dam-

age the engine or even cause a fire.

WARNING

Driving with insufficient coolant will cause

overheating, which can damage the engine

and even cause a fire.

WARNING

Never continue driving if the 

 warning

lamp is illuminated. The brakes are danger-

ously ineffective and could cause an acci-

dent.

Z10486

Z10912

FKFM.book  Page 7  Tuesday, February 1, 2005  8:21 PM

Summary of Contents for Fuso FK/FM 2006

Page 1: ...Owner s Manual Pub No Owner s Manual 2006 Model 2006 Model ...

Page 2: ...OWNER AND VEHICLE INFORMATION OWNER NAME USER COMPANY NAME MAILING ADDRESS CITY STATE ZIP VEHICLE IDENTIFICATION NUMBER DATE OF DELIVERY WARRANTY START DATE MO DAY YR SELLING DEALER IMPRINT HERE ...

Page 3: ......

Page 4: ...ive your vehicle safely and comfortably As improper use of the vehicle may result in a breakdown or cause an accident we urge you to read this manual thoroughly before operating the vehicle Please keep this manual in the vehicle so it is always available for reference If you sell the vehicle make sure the next owner receives this manual and is aware of its contents 2005 Mitsubishi Fuso Truck Bus C...

Page 5: ...r the follow ing four headings which identify the nature of the instructions and information Q California Proposition 65 Warning DANGER Precautions that should be taken when handling dangerous sub stances such as battery fluid in order to prevent a serious injury WARNING Precautionary instructions which if not observed could result in serious injury or death CAUTION Precautionary instructions whic...

Page 6: ...6 1 7 Starting and driving 7 1 8 ABS driving hints 8 1 9 Heating and air conditioning 9 1 10 Interior equipment and accessories 10 1 11 In cold weather 11 1 12 Simple inspection and service 12 1 13 Useful advice for emergencies 13 1 14 Service data 14 1 15 Maintenance schedule 15 1 16 Alphabetical index 16 1 17 Maintenance record 17 1 Each chapter has a table of contents on its first page ...

Page 7: ......

Page 8: ...d engine numbers 1 2 Powerline label 1 2 Vehicle identification number VIN 1 3 Maintenance 1 4 Fuels 1 5 Handling of the new vehicle 1 7 Reporting safety defects 1 7 Obtaining service 1 8 1 Recommendation to drivers ...

Page 9: ... the left frame near the left front wheel 2 Engine number The engine number is indicated on the left side of the crankcase The powerline label located in the position shown indicates the vehicle model chassis number and information relevant to the vehicle s power trans mission components Chassis and engine numbers Powerline label Z11685 Z11660 Example FK61FH Vehicle model Chassis number Example 6M...

Page 10: ... 26 001 to 33 000 lbs Full air G 16 001 to 19 500 lbs Air over hydraulic Line F FK61F G FM61F H FM64F J FM65F Series Wheel base F 3 5 to 3 79 m 11 48 to 12 43 ft H 4 1 to 4 39 m 13 45 to 14 40 ft J 4 4 to 4 69 m 14 43 to 15 38 ft K 4 7 to 4 99 m 15 41 to 16 37 ft L 5 0 to 5 29 m 16 40 to 17 35 ft M 5 3 to 5 59 m 17 38 to 18 33 ft P 5 9 to 6 19 m 19 35 to 20 30 ft Cab chassis type 1 Chassis cab Eng...

Page 11: ...us parts When the distance has been reached have your vehicle inspected by an autho rized dealer by showing them this Owner s Manual NOTE The cost of oil Lubricants parts and any work that is not included in the new vehicle inspection must be borne by the owner 2 Pre operational check Make a habit of checking your vehicle at the start of every day s operation This will ensure safe and comfortable ...

Page 12: ...liers and users are responsible for keeping fuel clean 2 Danger of fire and explosion by using mixed fuel Do not use diesel fuel mixed with gasoline gasohol and or alcohol Fuel containing 5 gasoline has a flash point as low as 0 C 32 F which can lead to a fire or explosion while the engine is running Fuels Use condition Recommendation Normal operation at temperatures above 12 C 10 F ASTM D 975 Gra...

Page 13: ...entering the fuel tank The fuel tank is on the left hand side of the vehicle To open the cap slowly turn it counterclockwise To close the cap turn it fully clockwise NOTE If you run out of fuel refuel the tank After refueling an empty tank be sure to air bleed the fuel system Otherwise the engine will not start P 13 17 WARNING Stop the engine before fueling Never smoke when fueling since diesel fu...

Page 14: ... 1 000 km 600 miles Then run in your vehicle step by step at various speeds beginning with low gears If you believe that your vehicle has a defect that could cause a crash or could cause injury or death you should immediately inform both the National Highway Traffic Safety Administration NHTSA and Mitsubishi Fuso Truck of America Inc MFTA If NHTSA receives similar complaints it may open an investi...

Page 15: ...st direct and expedient way to obtain service Each Authorized Dealer has the ultimate responsibility for providing the services and repairs you may need We recommend that you contact the Service Manager of your nearest Authorized Dealer for assistance In the event that you feel additional assistance is required ask to speak to the General Manager of the Authorized Dealer STEP 2 Contact MFTA After ...

Page 16: ...2 1 Locations in cab 2 2 Locations outside cab 2 4 2 Warning labels ...

Page 17: ...thorized dealer The warning and caution labels apply only to the vehicle itself not to any equipment mounted on the vehicle For information on cau tion and warning labels that apply to equipment mounted on the vehicle please refer to the Owner s Manual supplied by the manufacturer of the equipment The caution and warning labels are located in the cab as shown below Samples of these labels are indi...

Page 18: ...s Automatic transmission Automatic transmission vehicles Parking brake Automatic transmission vehicles Starting the engine while the cab is tilting Towing Automatic transmission vehicles To shift into the P position Z11663 Z11665 Z11667 Z11664 Z11666 Z12206 ...

Page 19: ...2 4 Warning labels Tire and rim Z11668 Z11669 Z11670 Z12299 FM65F automatic transmission vehicles Locations outside cab Z11730 Z11671 FK Z11731 FM ...

Page 20: ...2 5 Wiper linkage Tilting the cab Tilting the cab Clutch fluid Manual transmission vehicles No step FM Engine oil Z11672 Z11673 Z11675 Z11683 Z11674 Z10084 ...

Page 21: ...tage Fuel Battery High current fuses This applies to the vehicles other than FM65F automatic transmission vehicles Connectors for body lights and van body dome lights Starting the engine Z11676 Z11678 Z11677 Z11679 Z11680 Z11681 ...

Page 22: ...2 7 Air cleaner Automatic transmission oil cooler FM65F automatic transmission vehicles Z09802 Z12300 ...

Page 23: ......

Page 24: ...3 1 Starter key 3 2 Doors 3 2 Central door locks 3 4 Entering and leaving the vehicle 3 4 Door window glass 3 5 Rear quarter window 3 6 3 Opening and closing ...

Page 25: ... ajar can be very dan gerous Make sure the doors are com pletely closed before starting Exercise caution when opening a door in strong wind Otherwise the wind could catch the door and suddenly blow it open Exercise caution when opening a door on a downward slope Otherwise the inclina tion of the vehicle could cause the door to suddenly fall open When leaving the vehicle take with you any child who...

Page 26: ...rs to prevent theft Be careful not to lock the doors with the starter key inside the vehicle 2 From the inside To close pull door waist bar Be sure to close the door completely To lock press lock knob To open raise the lock knob and pull inner han dle CAUTION Closing the door by pulling any part other than the waist bar could damage the door mecha nism 3 When the door is open The indicator lamp il...

Page 27: ...p off The step can become slippery in rain or snow Firmly hold the grip while climbing into or down from the vehicle Holding the grip is particularly important when snow has settled and frozen on the step If the soles of your shoes are oily or greasy you could slip when climbing down from the vehicle or when operating the brake or clutch pedal Wipe any oil and grease off the soles of your shoes be...

Page 28: ...n a window switch it can cause a malfunction Door window glass WARNING Do not put your hands or head outside a window or let anyone in your vehicle do so Serious injury could result from exter nal objects or in the event of sudden brak ing Be particularly careful when carrying a child in your vehicle Always make sure that no one has their head or hands out of the window when closing it A body part...

Page 29: ... to open the window Raise the switch to close the window 2 Power window lock switch Press the power window lock switch to prevent the passenger s window from being opened or closed Pressing the switch a second time releases the lock NOTE If a child is in your vehicle it is important for safety s sake to press the power window lock switch to pre vent the child from opening or closing the passen ger...

Page 30: ...4 1 Seats 4 2 Seat belts 4 5 Steering wheel 4 9 4 Seat and steering wheel adjustments ...

Page 31: ...rate it comfortably with your arms slightly bent P 4 9 2 Driver s seat Slide lever Reclining lever Front height adjustment knob Rear height adjustment knob Head restraint Lumbar support knob Seats WARNING Avoid adjusting the seat while the vehicle is moving since the seat may move more than you intend and cause an accident by impeding operation of the vehicle Be sure to stop the vehicle and set th...

Page 32: ...ur head To raise or lower the head restraint Slide it while pressing the head restraint knob Removing and refitting the head restraint To remove the head restraint Press the head restraint knob and pull the head restraint off the seat To refit the head restraint Slide it into the seat press the head restraint knob and lower the head restraint in position WARNING When adjusting the recline angle si...

Page 33: ...is approx 30 mm below the edge of seat belt buckle 3 Now the air pressure has been adjusted to your body weight Adjust the seat height as desired by using the front and rear height adjusting knobs CAUTION Without a proper air pressure adjustment you may experience uncomfortable riding under cer tain road conditions The following two seat suspension settings can be selected using adjustment lever a...

Page 34: ...ure the folded seatback with strap To help prevent injury in the event of a sudden stop or accident the driver and all passengers must wear their seat belts correctly When wearing your seat belt sit back in your seat with your back straight If a seat belt is used incorrectly its effectiveness is greatly dimin ished and it could aggravate injuries in the event of accident For details of seat belt u...

Page 35: ... the tang to confirm that it is locked in WARNING Passenger s must never be in the cargo area while the vehicle is in motion Unless seated and properly belted up the risk of injury is greatly increased Seat belts should be worn as low as possi ble over the hips Wearing a seat belt across the abdomen could be dangerous since undue pressure would be placed on internal organs in the event of a collis...

Page 36: ...the tongue to confirm that it is locked in 3 Adjust the belt so it is low across you hips 4 To adjust the belt s length hold the tongue at 90 to the belt Pull the belt end to shorten the belt or the tongue to lengthen it Unfastening Press the red button on the buckle to separate the tongue and buckle Insert tongue into buckle until you hear a click Press red button to unlock the belt buckle To adj...

Page 37: ...nsult a doctor about the use of seat belts before riding in the vehicle A pregnant woman should wear her seat belt as low as possible across the hips not across her abdomen 5 Seat belt care Periodically check the action of the mechanical parts such as the buckles tangs and ELR units Check also for any damage that could stop the seat belts from functioning properly Replace seat belt unit if there i...

Page 38: ... adjustments firmly push the lock lever down to lock the steering wheel in position Steering wheel WARNING After every adjustment try to move the steering wheel back and forth to make sure that it is securely locked Unless the lever returns to the locking position the steering wheel may move while the vehicle is in motion and cause an accident Adjusting the steering wheel while driving is dangerou...

Page 39: ......

Page 40: ...ine 5 12 Pedals 5 13 Gearshift lever 5 14 9 speed transmission 5 15 Allison automatic transmission LCT 1000 2400 series 5 17 Allison automatic transmission MD3060P series 5 20 Parking brake 5 22 Combination switch 5 24 Van body dome light switch 5 28 Brightness control switch 5 28 Power take off switch 5 28 Cruise control 5 29 Air suspension height control 5 33 5 Switches and controls ...

Page 41: ...than FM65F Parking brake control valve FM65F Combination switch Van body dome light switch Brightness control switch Power take off switch option Cruise control main switch Power mode switch other than FM65F Height control switch Air suspension vehicle Oil level check switch P 12 20 Arrangement of switches and controls Z02466 Manual transmission vehicles Z02467 Automatic transmission vehicles ...

Page 42: ...over an extended period of time always place the starter key in the LOCK position and remove it from the starter switch or keep it in the position midway between the ACC and LOCK positions marked Leaving the key in the ON or ACC position could run down the battery Starter switch WARNING Never turn the starter switch to any position other than the ON position while driving the vehicle Turning the s...

Page 43: ...ion All electrical circuits are operable S The engine is turned over and started in this position Once the engine is running release the starter key and the switch will automatically return to the ON position NOTE Insert the starter key fully in the starter switch before turning it If you are unable to turn the starter key gently turn the steering wheel clockwise and counter clockwise as you turn ...

Page 44: ... control volume with the cold start switch set to the ON position black smoke may be produced Before turning on the cold start switch be sure to set the engine idling control volume to the AUTO position Automatic control The engine is warmed up with the speed being automatically controlled according to the engine coolant temperature The engine speed auto matically decreases as the coolant temperat...

Page 45: ...ntain carbon monox ide CO which if breathed can cause unconsciousness or death If you smell exhaust gases inside the cab inspect the exhaust pipe and check whether exhaust gases are leaking through holes or cracks caused by corro sion or damage If exhaust gases are leak ing have the exhaust pipe inspected by an authorized dealer If exhaust gases that have leaked from the exhaust pipe come into the...

Page 46: ...sure on the pedal properly to prevent the engine from running at exces sively high speeds If the engine does not start in cold weather check if the preheating circuit fuse has blown P 13 10 On a vehicle that has not been operated for a long period or after replacement of engine oil or engine oil filter element be sure to crank the engine before turning it over P 5 9 1 Pre starting steps 1 Pull par...

Page 47: ...ehicle is on a level crossing In an automatic transmission vehicle of the FM65F the engine cannot be started unless the range selector lever is in the N position 2 Starting procedure 1 Turn the starter key to the ON position NOTE If a buzzer sounds when the starter key is turned to the ON position activate the parking brake Should the buzzer still continue sounding with the parking brake activated...

Page 48: ... using the following method to distribute oil throughout the engine CAUTION For safety apply the parking brake fully and chock the wheels to prevent the vehicle from moving Cranking the engine as described here is essential for protection of the turbocharger 1 Pull the parking brake lever or knob to fully apply the parking brake 2 Manual transmission vehicle Place the gearshift lever in the neutra...

Page 49: ...ves in the water temperature gauge Warming up the engine WARNING Do not warm up the engine in a garage or other closed area When starting the engine or entering or leaving a garage do not run the engine for longer than is nec essary as the accumulation of exhaust gas in closed areas is very dangerous Exhaust emissions contain carbon monox ide CO which if breathed can cause unconsciousness or death...

Page 50: ... from a standstill and accelerating This is a normal effect of the cata lytic converter that is located in the muffler and does not indicate any abnormality 1 When the engine has started remove your foot from the clutch pedal If you started the engine with the accelerator pedal depressed gradually release the accelerator If the engine idling control volume is placed in the automatic control positi...

Page 51: ...ter stopping the engine do not leave the starter switch in the ON or ACC position since this could drain the battery Turn the switch to the LOCK position or to the posi tion between the ACC and LOCK posi tions marked with a 1 Apply the parking brake while depressing the brake pedal Stopping the engine WARNING Never allow the vehicle to coast with the engine stopped as braking may be ineffec tive a...

Page 52: ...h speed driving Therefore let the engine cool down sufficiently by allowing it to idle for a time before stopping it 4 Turn the starter switch to the ACC position to stop the engine Accelerator pedal Racing the engine also increases fuel consumption Pedals WARNING If you use a floor mat lay it correctly and make sure it is suitable for the size of the vehicle It is dangerous for a floor mat to cov...

Page 53: ...that there is nothing in your path When the gearshift lever is in the neutral position never keep your hand on the lever as a forward or backward pressure resulting from this practice could cause malfunction of the transmission When shifting fully depress the clutch pedal and then operate the gearshift lever Other wise damage to the transmission may result The gear pattern is inscribed on gearshif...

Page 54: ... ranges 2 Shift pattern The shift pattern is indicated on the top of the gear shift lever knob LOW range LO 1 2 3 4 Reverse R HIGH range 5 6 7 8 N Neutral position 3 Gearshifting Standing start 1 Select the LOW range with the range selection lever 2 Make sure the indicator lamp is illuminated 3 Depress the clutch pedal fully 4 Move the gearshift lever from the neutral posi tion to the LO or 1st po...

Page 55: ...er to the 4th position 5 Release the clutch pedal and depress the accel erator pedal CAUTION Range changes from LOW to HIGH and vice versa take place when the gearshift lever passes through the neutral position after the range selection lever has been moved to the HIGH or LOW position Whenever you change the range move the range selection lever to the LOW or HIGH position first and then move the g...

Page 56: ...engine speed is low enough for the engine not to overrev All models except FM65F with automatic transmis sion Please refer to the attached Allison Operator s Man ual for instructions not covered in this Owner s Man ual Range selector lever Overdrive switch Power mode switch Overdrive off indicator lamp Transmission fluid temperature warning lamp Transmission warning lamp 1 How to use the range sel...

Page 57: ...or lever operation again To place the range selector lever in the P posi tion proceed as follows Depress the foot brake pedal to bring the vehicle to a halt then apply the parking brake Move the lever from either the forward or reverse range whichever the gear is in at that time to the N position Then finally move the lever to the P position If this process is not followed it may require great eff...

Page 58: ...position and run the engine at slightly higher than idling speed to cool down the transmis sion If the warning lamp goes out it is safe to continue driving If the warning lamp does not go out or if it repeat edly lights up you must have your vehicle repaired by an authorized dealer While cooling the transmission check the automatic transmission for fluid leakage If any leakage is found call an aut...

Page 59: ...efer to the attached Allison Operator s Man ual for instructions not covered in this manual Range selector lever Digital display Mode button Mode indicator Transmission oil temperature warning lamp Transmission warning lamp 1 How to use the range selector lever Range selector lever position Corresponding range gear in manual mode P Park R Reverse N Neutral D Fixed in 3rd 3 Fixed in 3rd 2 Fixed in ...

Page 60: ...ton A choice of two driving modes is available to suit the road conditions and the load being carried Pressing the mode button changes the mode back and forth between Power mode and Normal mode When the transmission is in Power mode the mode indicator illuminates Power mode This is used when a powerful driving force is needed such as in mountainous areas when carrying heavy loads and when overtaki...

Page 61: ... properly If the lamp illuminates while the vehicle is moving drive to a safe place and stop NOTE Do not stop the engine until the vehicle is in a safe place If the engine is stopped the gear will auto matically go into the neutral and the vehicle will not be able to move Wait 10 seconds after stopping the engine then start it again If the fault was only temporary the system may return to normal I...

Page 62: ...ng brake has been fully activated Be sure to pull the lever all the way Before putting the vehicle in motion check that indicator lamp is not illuminated Do not drive with the parking brake applied Doing so will not only degrade the parking brake performance but also cause the park ing brake to overheat possibly resulting in a fire 2 Parking brake control valve FM65F To set for parking Pull knob o...

Page 63: ...nal lamp switch Passing signal dimmer switch Auto cruise cancel switch and set resume switch P 5 29 Wiper and washer switch Hazard warning lamp switch Exhaust brake switch 2 Lighting switch The lighting switch can be used with the starter switch in any position Turning the knob at the end of the lever controls the illumination of lamps as follows Illuminated by daytime running light system CAUTION...

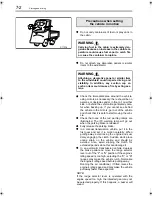
Page 64: ...sponding turn signal causing it to flash At the same time the corresponding indicator lamp or flashes When the steering wheel is returned to the neu tral position after a right or left turn the switch automatically moves back to the neutral position and the lamp stops flashing After making a moderate turn however the switch will some times not return automatically In this case put the switch in th...

Page 65: ... stays illuminated The exhaust brake is temporarily deactivated if any of the actions listed below are performed It will become active again as soon as the vehicle returns to its previous state Depressing the accelerator pedal Depressing the clutch pedal manual transmis sion models Moving the gearshift lever or selector lever to the neutral position Operating the anti lock brake system Driving at ...

Page 66: ... for more than 20 seconds or when there is no fluid in the reservoir could burn out the washer motor Rotating the grip at the end of the lever activates the windshield wipers in one of the following three modes INT Wipers operate intermittently at 3 to 5 sec ond intervals LO Wipers operate at a slow speed HI Wipers operate at a rapid speed To activate the windshield washer push the button at the e...

Page 67: ...wer side of the switch This switch is used to engage and disengage the power take off device that transfers engine power through the transmission CAUTION To engage power take off turn on the switch only after depressing the clutch pedal Never attempt to engage the power take off while the vehicle is in motion Disengage the power take off before driving the vehicle It is dangerous to drive the vehi...

Page 68: ...used to activate and deactivate the cruise control function The lamp inside the switch illuminates when the cruise control is on Cancel switch Used to terminate cruise control operation SET RESUME switch SET position Used to set a desired speed and to reduce the set speed RESUME position Used to increase the set speed and to return to a previously memorized speed Cruise control indicator lamp If t...

Page 69: ...rized so release the accelerator pedal The vehicle will run maintain ing that speed automatically NOTE When setting the desired speed the gearshift lever in a manual transmission vehicle must be in the 4th or higher gear position and in an auto matic transmission vehicle the selector lever must be in the D position Before pressing the ON side of the main switch to set a desired speed make sure the...

Page 70: ...accelerator pedal and speed set switch 1 Use the accelerator pedal to reach the desired speed 2 When the desired speed is reached turn the SET RESUME switch to the SET position The vehicle will cruise at the current speed 3 To decrease the set speed in cruise con trol mode Turn the SET RESUME switch to the SET posi tion The vehicle will decelerate When the desired speed is reached release the swit...

Page 71: ... in the N position tem porarily deactivates the cruise control How ever such practice is dangerous during driving because engine braking will no longer be possi ble It will also cause malfunction of the auto matic transmission 6 To reactivate the temporarily deacti vated cruise control To reactivate the cruise control turn the SET RESUME switch to the RESUME position The indicator lamp will illumi...

Page 72: ... is possible to lower the cargo bed while the vehi cle is stationary This function can be used with the starter switch in ON or ACC position NOTE The height control switch should be turned off when adjustment of the cargo bed height is not being performed Compressed air will be required to move the cargo bed back to driving height It is important therefore that the engine be started up Extended pe...

Page 73: ...ight The height control switch will automatically return to OFF The parking brake is released The starter switch is turned to positions other than ON or ACC The gear shift lever is moved out of NEU TRAL vehicle with manual transmission The range selector lever is moved out of the N or P range vehicle with automatic transmission 2 Returning the cargo bed to driving height Push the OFF side of the h...

Page 74: ...Arrangement of instruments and warning lamps 6 2 Speedometer 6 2 Tachometer 6 2 Air pressure gauge 6 3 Water temperature gauge 6 3 Fuel gauge 6 4 Warning indicator lamps 6 4 6 Instruments and warning lamps ...

Page 75: ...vo lutions per minute The red zone indicates that engine is over reved Reduce the vehicle speed sufficiently so that the needle does not enter this range during downhill driving or downshifting CAUTION The term overrev refers to an operational state of the engine in which it turns at an RPM exceeding the maximum limit Persistent over revving could lead to an engine failure Tachometer with overrevv...

Page 76: ...call an authorized dealer This gauge indicates the temperature of the engine coolant With the engine running normally the needle should be in the center of the gauge If the needle points in the red zone the engine has overheated The warning lamp will light up and a buzzer will sound simultaneously Should this occur pull off the road as soon as you can safely do so and let the engine rotate at a sp...

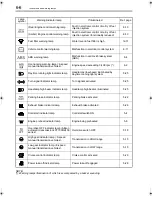
Page 77: ...r change slightly over a long period even if the actual fuel level does not change 1 Arrangement of warning indicator lamps The illustrations below show the standard arrange ment of the warning and indicator lamps Some lamps may not be included depending on vehicle specifications CAUTION The red warning lamps if illuminated warn you of vehicle component failures and possible dan ger of accident Ne...

Page 78: ... lamp Excessively low engine oil pressure Clogged oil level 6 9 12 31 Engine oil level warning lamp Engine oil level is correct when oil level check switch is operated 12 20 Brake warning lamp other than FM65F Brake fluid at an excessively low level Excessive brake shoe clearance 6 7 Air pressure warning lamp Low air pressure in air tank 6 8 Transmission fluid temperature warning lamp Automatic tr...

Page 79: ...amps low beam illuminated by daytime running light system 5 25 Turn signal indicator lamp Turn signals activated 5 25 Headlamp high beam indicator lamp Headlamp high beams illuminated 5 25 Parking brake indicator lamp Parking brake activated 5 22 Exhaust brake indicator lamp Exhaust brake activated 5 26 Cold start indicator lamp Cold start switch ON 5 4 Engine preheat indicator lamp Engine being p...

Page 80: ...ngine immediately after stopping will cause the coolant temperature to rise quickly and may cause the engine to seize up If the water temperature gauge s needle does not point to the red zone there is insufficient engine coolant Check the coolant level and add the coolant 3 Brake warning lamp Other than FM65F The brake warning lamp will light up and a buzzer will sound if the brake fluid in the br...

Page 81: ...s depressed the brake shoe clearance has become excessive Have the brakes inspected by an autho rized dealer as soon as possible CAUTION Although the brake shoe clearance is adjusted automatically unexpected failure of the auto matic adjuster can result in excessive clearance and poor brake performance Regularly check the brake shoe clearance and how much the brake lining is worn to confirm that t...

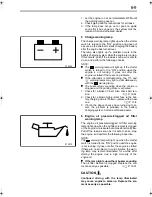
Page 82: ...king brake is activated 1 Check for a broken V belt Also check belt ten sion P 12 44 2 Check for a blown high current fuse in the bat tery charging circuit If blown replace with a new one P 13 8 3 If both the above checks have turned out nor mal the problem is probably in the battery charging system Call an authorized dealer 6 Engine oil pressure clogged oil filter warning lamp The engine oil pres...

Page 83: ...onds or longer to reset the computer and then restart the engine If the lamp stays off there is no problem If the lamp illuminates again stop the engine and contact the nearest authorized dealer NOTE The warning lamp will light up when the starter switch is turned to the ON position and the engine is not running It goes out after the engine is started if there are no problems Illumination of amber...

Page 84: ... starter switch to the ACC or LOCK position for more than five seconds then restart the engine If the warning lamp goes out there are no problems If it remains on have your vehicle inspected by an authorized dealer as soon as possi ble NOTE The warning lamp will light up when the starter switch is turned to the ON position and the engine is not running If it goes out after a few seconds there are ...

Page 85: ......

Page 86: ...ns when driving on a manual transmission vehicle 7 5 Precautions when driving on an automatic transmission vehicle 7 5 Tips for improving fuel economy 7 6 Braking 7 7 On uphill and downhill roads 7 9 On rough roads and in bad weather 7 10 Parking 7 12 Loading cargo 7 14 7 Starting and driving ...

Page 87: ...d be avoided Also avoid slipping the clutch for extended periods since this can damage it In an automatic transmission vehicle depress the brake pedal and move the range selector lever out of the P or N position If the engine s idling speed is too high selecting the D or R ranges may make the vehicle lurch Normalize the engine s idling speed before pulling away Running the air conditioner if fitte...

Page 88: ...ng high speed driving could cause the vehicle to tip over Avoid accelerating sharply on slippery roads since this could make the tires slip and impair directional stability If you notice a strange noise vibration or smell or if steering or braking feels unusual pull the vehicle off the road as soon as it is safe to do so and check for the source of the trouble Precautions for driving WARNING Never...

Page 89: ... dangerous because the steering wheel would be pulled to one side with great force Do not keep the steering wheel turned to the right or left stop for more than 10 seconds as doing so could lead to a failure of the power steering system When driving at high speeds in the rain it some times happens that the tires ride on a film of water and lose contact with the road surface This is known as hydrop...

Page 90: ...rrev NOTE Overrev refers to an operating state of the engine in which it rotates at an RPM higher than the recom mended maximum RPM Overrevving the engine could lead to an engine failure Select the D range for normal driving Other than FM65F it is also possible to pull away using the range selector lever in the same way as a manual gearshift lever starting in L then upshifting position by position...

Page 91: ...sudden starts sudden acceleration and sudden braking When accelerating do not allow the tachometer needle to approach the red zone before chang ing gears instead change gears before engine speed reaches a high RPM Once cruising speed has been reached select the appropriate gear so that the engine will rotate around the maximum torque generating RPM 1 400 rpm Moreover unnecessary acceleration and d...

Page 92: ... nearest safe place and identify the prob lem P 6 5 If you release the brake pedal completely the vehicle will coast past the point at which you wish to come to a halt Do not pump the brake pedal as doing so reduces the air pressure which in turn could reduce braking power Using the exhaust brake on a wet frozen snow covered or otherwise slippery road surface when the vehicle is lightly loaded or ...

Page 93: ...arby the place at which you wish to stop 3 Slowly release the pedal half or one third of the stroke which you have used until then 4 Just before reaching the point at which you wish to come to halt depress the pedal again very slightly to stop the vehicle Z05577 Z05578 Z11865 ...

Page 94: ...ng causing the vehicle to speed up too much Add engine braking as required by shift ing down the gears Other than FM65F Shift down to 3 2 or L position Use the ser vice brakes to prevent engine overrev when shifting to 2 or L position FM65F Shift down to 5 4 3 2 or 1 position Use the service brakes to prevent engine overrev when shifting to 2 or 1 position On slippery roads avoid sudden engine bra...

Page 95: ...press the brake pedal to decelerate NOTE Overrev refers to an operating state of the engine in which it rotates at an RPM higher than the recom mended maximum RPM Overrevving the engine could lead to an engine failure Use a low gear and try to drive at a constant speed when driving on gravel roads or muddy roads Do not race the engine when attempting to move out of mud Racing the engine is useless...

Page 96: ...he brake drums If this happens drive slowly while paying careful attention to sur rounding traffic and keeping light pressure on the brake pedal to dry the brake shoes and drums If you cannot avoid driving the vehicle into water for example when the road is covered with water because of torrential rain first check the depth of the water If water gets into the engine it can cause engine damage Afte...

Page 97: ...or pedal or shift lever while sleep ing Also you could suffer carbon monox ide poisoning from exhaust gases if the vehicle is parked in a closed space Never leave lighters cans of carbonated drink and spectacles in the cabin when parking the vehicle in hot sunshine The cabin will become extremely hot so light ers and other flammable items may catch fire and unopened drink cans including beer cans ...

Page 98: ...y by setting the range selector lever to the P position Be sure to also apply the parking brake at the same time On a vehicle with automatic transmission FM65F apply the parking brake and then set the range selector lever to the N posi tion 3 Stop the engine by turning the starter switch to the ACC position P 5 12 4 To help prevent theft and needless consumption of electricity from the battery be ...

Page 99: ...load cargo Improperly loaded cargo not only is unstable but also may result in uneven weight distribution which could damage the cargo deck and frame Loading cargo WARNING Overloading the vehicle can damage the vehicle and make safe driving difficult For safety never overload The GVWR and GAWRs pertain to the max imum load the vehicle can physically carry Please also abide by state and regional lo...

Page 100: ...n If you place supports under the cargo position them at equal intervals Use suitable supports when loading long objects Avoid supporting long objects only with the gate and the rear edge of the cargo deck To prevent cargo from falling strap it down securely and cover it with a tarpaulin Secure the tarpaulin ends neatly so they do not flap Z11326 ...

Page 101: ......

Page 102: ...8 1 Anti lock brake system ABS 8 2 ABS warning lamp 8 4 8 ABS driving hints ...

Page 103: ...avel or heavily snow covered roads may be longer than that for a vehicle without an ABS On these roads therefore be sure to drive at reduced speeds Also avoid sudden maneu vering or braking on such roads to prevent colli sion with the vehicle behind you Driving on icy roads or quickly braking from a high speed causes the ABS to work hard and in turn consume much air If the warning lamp illuminates...

Page 104: ...s recommended to depress the clutch pedal first and then the brake pedal If cargo is loaded only on the back half of the cargo bed the rear wheel brakes must share an extremely large burden during braking to pre vent the front wheels from locking On a snow covered or otherwise slippery long downslope use engine exhaust braking and minimize use of the service brakes The exhaust brake if activated i...

Page 105: ...ing lamp will light up when the starter switch is turned to the ON position and the engine is not running If it goes out when the vehicle speed exceeds approx 10 km h there is no problem 1 Turn off the engine then set the ignition switch to the ON position again 2 Determine the system condition as follows The system is faulty if the warning lamp does not illuminate The system is normal if the lamp...

Page 106: ...9 1 Heater 9 2 Air conditioner 9 5 9 Heating and air conditioning ...

Page 107: ...parking turn ON the cold start switch to help warm the interior more quickly 1 Control panel Fan switch Temperature control lever Mode selector lever Air selector lever Fresh air bypass lever Fan switch Fan switch allows you to select 4 fan speeds Select the desired speed OFF Turned off Breeze Weak Medium Strong Temperature control lever Slide lever toward the high temperature side orange colored ...

Page 108: ...luted If the lever is left for long at this setting the windows will fog up Keep the lever in the setting under normal conditions During parking place the lever in the position to prevent the entry of dust Fresh air bypass lever This lever is used to direct fresh air to the head without passing through the heater unit If your face or head becomes hot place lever in the position This function is mo...

Page 109: ...accordingly When fresh air bypass lever is placed in the position more cool air is directed toward the head 4 Defrosting Warm air is directed toward the windshield and door windows Select the high blower speed if you need to defrost quickly To remove frost or ice from the outside surface of the windshield place air selector lever in the position When mode selector lever is placed in the position w...

Page 110: ...n you use the heater while warming up the engine or parking turn ON the cold start switch to help warm the interior more quickly 1 Control panel Air conditioner switch Fan switch Temperature control lever Mode selector lever Air selector lever Fresh air bypass lever Air conditioner WARNING Never leave children alone in the vehicle In hot weather or when the vehicle is parked under the sun the temp...

Page 111: ...tting orange colored for warmer air Mode selector lever Use mode selector lever to select the appropriate air outlet combination Outlets B have a louver You can change the direction of air by moving it as desired The air will shut down when you place the lever in the posi tion Lever posi tion Air outlets Purpose B Ventilation Fresh air to head B A Bi level heating Warm air to feet and relatively c...

Page 112: ...o direct fresh air to the head without passing through the heater unit If your face or head becomes hot place the lever in the position This function is more effective if you use it with air selector lever in the or position and the air conditioner switch in the ON position 2 Cooling Press air conditioner switch and slide tempera ture control lever as necessary to obtain a com fortable temperature...

Page 113: ... the head Place temperature control lever in the middle setting Sliding this lever to the right or left adjusts the air temperature from both outlets accordingly When fresh air bypass lever is placed in the position more cool air is directed toward the head 6 Defrosting Warm air is directed toward the windshield and door windows Press air conditioner switch and select the high blower speed if you ...

Page 114: ...erefore check the refrigerant level from time to time The refrigerant level can be checked by setting the air conditioner to maximum cooling by placing the temperature adjustment lever to the lowest temperature position and the fan switch to the high speed position and looking into the sight glass of the receiver The refrigerant is sufficient if no bubbles are visible through the glass when the ai...

Page 115: ... con ventional method be sure to contact an authorized dealer if your system needs to be serviced Using any refrigerant other than the HFC 134a will cause a malfunction of the air con ditioning system Be sure to use only the HFC 134a NOTE Do not release refrigerant gas into the atmosphere When the air conditioning system requires servicing or when you discard the vehicle ask your nearest dealer to...

Page 116: ...10 1 Cigarette lighter 10 2 Ashtrays 10 2 Sun visors 10 3 Interior lamp spotlights 10 3 Small article compartments 10 4 Using the radio 10 6 Accessories 10 7 10 Interior equipment and accessories ...

Page 117: ... this should happen pull it out manually and have the lighter inspected by an authorized dealer Leaving the lighter unremoved in the socket could cause a fire Do not leave your vehicle with the ciga rette lighter pushed in Doing so could result in a fire Do not allow a child to touch the cigarette lighter The child could get burned Do not touch the metallic parts of the ciga rette lighter You coul...

Page 118: ...s opened and goes out when either of the doors is closed Press button to illuminate the interior lamp regardless of whether the doors are open or closed Press both the above mentioned buttons a second time to turn the interior lamp off WARNING Be sure to put out cigarettes and match sticks before putting them in the ashtrays Close ashtrays completely Put only cigarette stubs and matchsticks in the...

Page 119: ...it off Parcel box Pull knob toward you to open the parcel box To close the box press lid until it snaps shut Small article compartments WARNING Always close the parcel box glove compart ment and console box before operating the vehicle If left open their covers could cause injury in the event of a collision or sudden stop Z11971 Z11972 ...

Page 120: ...g cleaning rags and other small articles CAUTION Storing things that tend to roll in the overhead console pocket is not recommended because they could fall down during starts and stops Center console box Open the lid by lifting the black knob with your fin ger After closing press down lightly on the lid to lock it Coin box Pocket Use this pocket to store small things CAUTION Storing things that te...

Page 121: ...n the cab This noise does not indicate a fault Use mobile telephones as far away from the audio system as possi ble If a foreign object gets inside the audio sys tem water splashes on the audio system or smoke or an abnormal smell is emitted by the audio system immediately stop using the audio system and have it inspected by an authorized dealer WARNING The contents in a cup or can held in the cup...

Page 122: ...otected against interference from electromagnetic emissions you should refer to an authorized dealer before fitting equip ment that emits strong signals such as mobile telephones Accessories WARNING To avoid the risk of overheating fire or faulty operation have electrical accessories con nected by an authorized dealer Never con nect them yourself Z00020 ...

Page 123: ......

Page 124: ...11 1 Coolant 11 2 Engine oil 11 2 Fuels 11 2 Other recommendations for cold weather operation 11 3 Installing tire chains 11 4 11 In cold weather ...

Page 125: ...ion additives since these can detract from its performance If a different coolant additive has been used and the FUSO DIESEL LONGLIFE COOLANT is to be used be sure to thoroughly flush the cooling system The viscosity of the engine oil increases in cold temperatures sometimes making it hard to start the engine especially early in the morning Therefore use an engine oil of a viscosity which suits th...

Page 126: ...ing attention to vehicles behind as well as in front and checking normal function of the brakes from time to time by slightly depressing the brake pedal If the brakes are sluggish depress the brake pedal repeatedly while driving at a low speed until normal braking returns When parking your vehicle select a site not directly exposed to wind or snow and face it away from the wind Do not apply the pa...

Page 127: ...ise while driving stop the vehicle in the nearest safe place and check the tire chains Driving on a dry road with chains installed may damage the chains as well as the road surface Avoid doing so as far as possible When fitting tire chains refer to the instruc tions supplied with them 1 Place the chains over the tires with the hook ends of cross chains facing outward 2 Connect the hook of inside c...

Page 128: ...nd are flat on the tire sidewalls Also make sure that the chains are not twisted 7 Fasten extra chain links with a metal wire to pre vent them from hitting against other vehicle parts 8 Fit spring band Attach the hooks of spring band on the chain at even intervals with the hook ends facing outward 9 After driving the vehicle for 5 to 10 minutes check the chains for looseness or disconnected hooks ...

Page 129: ......

Page 130: ...12 45 Service brakes check 12 46 Air pressure check 12 48 Parking brake check 12 48 Clutch check 12 49 Air drier check 12 50 Air tank check 12 51 Draining sediment from fuel tank 12 51 Tires check 12 51 Tires replacement 12 54 Wheel nuts check and retightening 12 58 Tire rotation 12 59 Wiper blade replacement 12 60 Windshield washer fluid level check and refilling 12 60 Battery check and cleaning ...

Page 131: ...h can cause unconscious ness or death if breathed Never smoke when servicing your vehicle since its fuel and the gases given off by its battery are highly flammable When tilting the cab carefully follow the instructions in this manual Be sure to insert the safety pin in the cab stay hole to prevent the cab from dropping After letting the cab down check that it is locked securely in position P 12 5...

Page 132: ...rinse it off under a faucet Open the front panel to gain access to the parts or equipment located at the vehicle s front on those occasions when you need them for performing inspections or for servicing the vehicle or again for the pre operational checks Windshield washer tank Air filter for heater and air conditioner Coolant reservoir tank Engine oil filler port oil filler cap Clutch fluid reserv...

Page 133: ...could damage the panel WARNING Be careful when opening the front panel during high winds as the wind could force up the panel blowing it off its stay Never operate the wipers when the front panel is open your hands or other items could become trapped in the wiper links WARNING Fit the stay securely into the hole in the front panel to prevent the front panel from fall ing and possibly causing an in...

Page 134: ...ly stow all loose items before tilting the cab Close both doors completely At least 1 m 1 yard is needed both in front of and above the cab when the cab is tilted If there are obstacles within these 1 m 1 yard spaces remove them Tilting the cab WARNING Before tilting or lowering the cab make sure that the area around the cab is clear of people and obstructions The cab will move too quickly under t...

Page 135: ...d the grip and push the cab up until it is stopped by cab stay 5 Fit safety pin into hole in the cab stay CAUTION If lever is not pulled down completely the hook may not be engaged when the cab is lowered Raise the cab only gently WARNING To ensure safety be sure to fit the safety pin in the cab stay hole On no account climb under the cab before the pin is in the hole Z00601 FK Z00602 Z05108 FM Z1...

Page 136: ... sure that the cab does not rise even when lever is pulled WARNING Before lowering the cab make sure that you have not left rags tools etc in the engine compartment Flammable objects left inside the engine compartment can cause fires The cab could come down too quickly if there are heavy objects inside or on the roof deck Always lower the cab slowly while supporting it WARNING When pushing the lev...

Page 137: ... could be damaged Be sure to perform the pre operational checks for the items listed below at the start of each day s operation in order to ensure safe and comfortable driving If you find anything unusual you should have your vehicle inspected at an authorized dealer before operating it 1 Before starting the engine Open the front panel WARNING The cab could come down abruptly Lower the cab slowly ...

Page 138: ...shield washer fluid level is visi ble within the transparent hose see figure P 12 60 Engine oil level Check that there is sufficient engine oil using the oil level gauge or the engine oil level check switch P 12 19 Belt tension and damage Check the fan belt tension by applying a force of 98 N 22 lbs 10 kgf to its center Check that the belt is not nicked or otherwise damaged P 12 44 Z12012 Z12013 Z...

Page 139: ...ign of leakage Parking brake lever stroke All models other than FM65F Parking brake lever stroke 7 to 10 notches P 12 48 Parking brake operation FM65F Pull and place the parking control valve in the PARKING position and listen for the sound of air being released P 12 49 Lighting system operation Make sure that each lamp lights up or flashes prop erly Check lamp lenses for dirt and damage P 5 24 Z1...

Page 140: ...ree play is in the range of 10 to 40 mm 0 39 to 1 57 in P 12 45 Air pressure built up rage 0 to 100 lb in2 pressure build up time Less than 8 minutes P 12 48 Gauge and warning lamp operation Check that gauges and warning indicator lamps are working properly P 6 4 Air cleaner dust indicator Clean the air cleaner if a red signal appears in the indicator s window P 12 34 Z11823 Z12019 Z12020 Z12425 Z...

Page 141: ...e the mirrors are clean Horn operation Press the horn button to check that the horn is work ing properly Brake fluid level other than FM65F Check that the brake fluid level is between the H and L marks on the reservoir tank P 12 28 Draining condensate from air tank Pull the ring on the air tank drain cock to remove condensate from the air tank P 12 51 Z12022 Z12023 Z12024 Z09971 ...

Page 142: ...lation pressure Check that all tires are properly inflated P 12 51 Broken suspension springs Check for broken springs and tilt of vehicle body toward either side Check also U bolts and nuts for looseness Reflector condition Make sure that the reflectors are clean not dam aged and securely installed Z10805 Z12426 Z12026 Z12027 ...

Page 143: ...dal and check that the brakes work effectively and evenly on all wheels P 12 47 Steering wheel operation Check that the steering wheel does not vibrate or pull to one side and that it is not unduly heavy Also make sure that the steering wheel returns to its neu tral position smoothly P 12 46 Exhaust brake effectiveness Activate the exhaust brake and check that it works effectively Z12028 Z12029 Z1...

Page 144: ...rized dealer CAUTION Apply and replace lubricants regularly Use of lubricants beyond their designed service life could cause bearings or other compo nents to seize up and cause an accident Any checking application or replacement of lubricants should be carried out with the vehicle parked on level ground Wipe all lubricant inspection windows and filling ports carefully to prevent the entry of mud t...

Page 145: ...12 16 Simple inspection and service Z12031 Z12063 Z12065 Z12064 Z12066 ...

Page 146: ...12 17 Other than FM65F FM65F Z12067 Z11646 Z12069 Z00361 Z08242 Z12068 Z12070 Z12071 ...

Page 147: ...peed transmission vehicles Recommended lubricant Wheel bearing grease NLGI No 2 Li soap Kingpin top and bottom sections two points each for left and right kingpins Steering shaft Propeller shaft universal joint Propeller shaft slip joint Propeller shaft center bearing Clutch fork shaft two points each for left and right sides Manual transmission vehicles Clutch shifter 9 speed transmission vehicle...

Page 148: ...ty The first engine oil replacement during the run in period should be performed at the first 4 000 km 2 500 miles CAUTION Replace the engine oil earlier if the engine is fre quently used at high speeds or under high load ing Recommended oil Engine oil API classification CD CD SF CE CE SF CF 4 or JASO classification DH 1 SAE10W 30 15W 40 20W 20 30 40 Greasing intervals Every 10 000 km 6 000 miles ...

Page 149: ...mined when the vehicle is tilted or if the engine is running or the time after stopping the engine is too short Let the engine stand at least 30 minutes after stopping it before checking the oil level 1 1 Engine oil level check using oil level check switch simple method 1 Turn the starter switch to ON 2 Press the CHECK side of the oil level check switch and keep it pressed The oil level is suffici...

Page 150: ... access the second filler port tilt the cab P 12 5 NOTE If you use the filler port behind the front panel the oil will enter the oil pan directly allowing the oil level to be checked earlier 1 Remove the oil filler cap and add oil as neces sary 2 Clean the area around oil filler cap to prevent dust and dirt from entering the engine 3 If you use the filler port on the engine and check the oil level...

Page 151: ...ain plug to let the oil flow out of the filter 3 Remove drain plug from the oil pan to remove the oil 4 Tighten the oil pan drain plug and the oil filter drain plug 5 Carefully pour fresh engine oil through the oil filler 6 Check the oil level using the oil level gauge if you use the filler port on the engine wait for more than 6 minutes and check the oil level 7 Let the engine idle allowing oil t...

Page 152: ...cation GL 3 SAE80 general or SAE90 warm regions API classification GL 4 SAE90 tropical regions Long period of high speed driving Engine oil API classification CC CC SF SAE30 40 9 speed transmission Gear oil API classification GL 4 SAE90 Engine oil API classification CD SAE30 40 or 50 Quantity required Liters qts WARNING Take care not to spill engine oil as engine oil on the exhaust manifold or oth...

Page 153: ...and while the oil is still warm 2 For a drain plug fitted with a magnet wipe off any metal particles sticking to the magnet and install the drain plug WARNING Do not check or replace the gear oil immedi ately after operating the vehicle since the engine transmission exhaust pipe and other components will be extremely hot Inspection plug tightening torque 6 speed 69 15 N m 51 11 7 ft lbs 7 1 5 kgf ...

Page 154: ...tinue to use the lube filter at the first 8 000 km 5 000 miles Recommended fluid Automatic transmission fluid DEXRON III type Quantity required for replacement Liters qts Inspection plug tightening torque 6 speed 69 15 N m 51 11 7 ft lbs 7 1 5 kgf m 9 speed 32 to 37 N m 24 to 27 ft lbs 3 3 to 3 8 kgf m Inspection intervals Every 10 000 km 6 000 miles Replace ment inter vals Other than FM65F Every ...

Page 155: ...d at first 4 000 km 2 500 miles Recommended oil Gear oil API classification GL 5 Below 40 C SAE90 Above 40 C SAE140 or 85W 140 Use oil conforming to GL 5 SAE140 or SAE85W 140 if the vehicle is to be driven under heavy load conditions as for example driving up long uphill grades Remember however that this oil is to be used only when the temperature is above 10 C 50 F Quantity required guideline Lit...

Page 156: ...t the oil flow out 2 After the oil has flown out completely install drain plug 3 Add oil through the inspection plug hole until it reaches the bottom of the hole 4 Install the inspection plug WARNING Do not check or replace the gear oil immedi ately after operating the vehicle since the real axle and gear oil will be extremely hot Inspection plug tightening torque 98 to 115 N m 72 to 87 ft lbs 10 ...

Page 157: ... diesel fuel gear oil automatic transmission fluid or any other mineral oil to mix with the brake fluid When mixed with the brake fluid even very small in amounts such oils will cause the rubber parts of the brake system to swell and could cause brakes to become slug gish or to drag Also do not use contain ers which have been used for mineral oil for brake fluid Because brake fluid is highly hygro...

Page 158: ...d the recommended brake fluid up to the H line 2 Close the cap firmly CAUTION After the brake fluid has been added push the inside rubber of the cap back as illustrated before refitting the cap After adding Before adding WARNING The container used for adding brake fluid should be a clean one free of moisture mineral oil and dust If the fluid level is unusually low there is a fluid leak in the brak...

Page 159: ...e cab The fluid level should be between the MAX and MIN lines If necessary tilt the cab to make it easier to check the level and add power steering fluid 3 If the fluid level is lower than the recommended range clean the surfaces around fluid tank cap Open the tank cap and add fluid as neces sary 4 Install the cap on the fluid tank CAUTION Use a clean container when adding the power steering fluid...

Page 160: ...e sched uled replacement intervals If the buzzer sounds simultaneously engine oil pressure is excessively low Filter elements Replacement intervals Every 20 000 km 12 000 miles WARNING Do not replace the oil filter immediately after operating the vehicle since the engine transmission exhaust pipe engine oil and other items will be extremely hot If you do not observe this instruction you could get ...

Page 161: ...e oil filler 6 Crank the engine P 5 9 7 Start the engine and check for oil leaks 8 Stop the engine and after letting it cool down for 30 minutes or more check the oil level 2 Fuel filter replacement CAUTION Always replace with a new genuine fuel filter element Do not use the filter element beyond the recommended replacement intervals Fail ure to observe these may damage the fuel injec tion parts T...

Page 162: ...t have the special tool please contact an authorized dealer 7 Remove the filter case using the special tool by turning it in the direction of the arrow 8 Remove the element and the sensor from the filter case 9 Replace the O ring and O ring with new ones Apply a thin coat of engine oil to each of the new O rings and install the O ring on the filter case and the O ring on the sensor CAUTION Use the...

Page 163: ...ner element is clogged Clean the element regardless of the scheduled cleaning intervals After cleaning press reset button to clear the red signal Tightening torque 30 2 N m 22 1 5 ft lbs 3 0 2 kgf m WARNING If the fuel filter is tightened to an inappro priate torque fuel could leak and the filter itself could become damaged possibly resulting in a fire and or explosion Be careful not to damage the...

Page 164: ... 700 kPa 1000 psi 7 kgf cm2 Do not strike the element or hit it against another object If the element is contaminated with oily soot or dust replace it regardless of the sched uled replacement time 2 Place a light in the element and check the filer paper for damage or places where it has worn thin Also check the packing for damage 3 Clean the inside of cover and case with a rag 4 Check that vacuat...

Page 165: ...e element straight up and remove it 6 Replace the O ring on the cap with a new one Lightly coat the new O ring with engine oil before installing it onto the cap CAUTION Be sure to use the O ring supplied with the new valve element 7 Install the new valve element Always use a genuine part 8 Install the cap turning it by hand in the direction of the arrow Continue to turn the cap until it slightly l...

Page 166: ...from fuel filter WARNING Fuel is highly flammable and should be kept away from hot objects and open flames owing to he risk of fire or explo sion Wipe up any spilt fuel Keep cigarettes and other sources of heat away from the vehicle while draining water from the fuel filter They are dangerous because they could set fire to the fuel Be careful not to injure yourself on the edges of nearby component...

Page 167: ... with the properties shown in the fol lowing table Do no use hard water from wells and rivers as it is liable to form scales and cause corro sion 3 Coolant additives To prevent the cooling system freezing up and mini mize corrosion use FUSO DIESEL LONGLIFE COOLANT or an equivalent FUSO DIESEL LONGLIFE COOLANT is an ethylene glycol based antifreeze SAE J814 C with both anti freeze and anti corrosio...

Page 168: ...AP IF YOU FEEL UNWELL OR PAIN ON YOUR SKIN IMMEDIATELY SEEK MEDICAL ATTENTION IN THE EVENT OF CONTACT WITH YOUR CLOTHES IMMEDIATELY FLUSH FUSO LONGLIFE COOLANT WITH WATER AND SOAP DO NOT USE FUSO DIESEL LONGLIFE COOLANT IN A CLOSED OR POORLY VENTILATED SPACE SHOULD YOU INHALE A LARGE AMOUNT OF GAS OF FUSO DIESEL LONGLIFE COOLANT MOVE TO A PLACE WITH FRESH AIR AND KEEP YOURSELF WARM AND AT REST IF ...

Page 169: ...k the coolant level before starting the engine when the coolant temperature is low If checked when hot the coolant level will be high due to expansion Deposition may occur in the reserve tank but this will not cause any problem 1 Open the front panel P 12 3 2 The coolant level in reservoir tank should be between the FULL and LOW lines If the level is below the LOW line you must add coolant See the...

Page 170: ...e radiator to add coolant 1 If the coolant level in the reservoir tank is lower than the LOW line as a result of the above check remove cap from reservoir tank and add coolant up to the FULL line 2 Refit cap securely after adding coolant 5 2 Refilling when warning lamp illumi nates Adding coolant into radiator 1 Check the water temperature gauge If the needle points in the red zone the engine has ...

Page 171: ...d close both engine and radiator drain cocks WARNING Make sure that the engine has cooled thor oughly before removing the radiator cap Put a cloth on the cap and hold the cap over the cloth to slowly open the cap Doing other wise is dangerous as you could be scalded by extremely hot coolant or steam WARNING Do not replace the coolant immediately after operating the vehicle since the engine radiato...

Page 172: ...p left removed run the engine for a while in order to remove air from the cool ing system 8 Stop the engine and add more coolant if neces sary CAUTION If air is not completely removed from the cool ing system this may lead to reduced cooling efficiency and engine parts failure After replac ing the coolant drive the vehicle and then check the coolant level in the radiator 9 Screw the radiator cap d...

Page 173: ...the cab P 12 5 2 Press the belt with an approximately 98 N 22 lbs 10 kgf force at the point midway between the pulleys and measure the amount of deflec tion 3 If the deflection is not as specified below the tension of the belt must be adjusted 4 Also check the belts for damage Belt check and adjustment Inspection intervals At the time of pre operational check and every 10 000 km 6 000 miles WARNIN...

Page 174: ...any abnormality contact an authorized dealer and have the abnor mality rectified before you again drive the vehicle Driving the vehicle with the abnormality unrectified could result in a serious accident 1 Steering wheel play 1 Place the steering wheel in its straight ahead neutral position 2 Turn the steering wheel clockwise and counter clockwise to the point where a resistance is first felt for ...

Page 175: ...sistance during operation If any abnormal condition is encountered during the above check call an authorized dealer for inspection The service brakes are safety critical parts of the vehicle If an inspection reveals any abnormality contact an authorized dealer and have the abnor mality rectified before you again drive the vehicle Driving the vehicle with the abnormality unrectified could result in...

Page 176: ...heck ing that warning lamp or is not illuminated drive the vehicle at a low speed to make sure that braking power is sufficient and even If braking seems in any way abnormal operating the vehicle could be dangerous Ask an authorized dealer for a more thorough inspection Inspection intervals Every 10 000 km 6 000 miles Brake pedal play 10 0 to 15 5 mm 0 39 to 0 61 in Inspection intervals At the tim...

Page 177: ...s braking power is insufficient 1 Parking brake lever stroke check Other than FM65F 1 Depress the brake pedal firmly so that the vehi cle cannot move 2 Gently pull up parking brake lever from the fully returned position while counting the clicks until it cannot be moved any more with a 300 N 66 lbs 30 kgf force click are generated by notches 3 The lever stroke is normal if the number of clicks is ...

Page 178: ...l vehicle operation could be dangerous Contact an authorized dealer Manual transmission vehicles Before performing the following inspections make sure that warning lamp is not illuminated 1 Clutch pedal play Inspection intervals At the time of pre operational check and every 10 000 km 6 000 miles Inspection intervals Every 10 000 km 6 000 miles WARNING Perform brake tests in a safe place that allo...

Page 179: ...tch pedal allows you to move the gearshift lever easily to the various gear posi tions and that the clutch engages smoothly without slipping when the clutch pedal is released slowly The air drier contains a desiccant that removes moisture from compressed air As part of pre operational checks open the drain cock of the air tank If a large amount of condensate drains out the desiccant has become ine...

Page 180: ...ut of the tank 1 Checking inflation pressure Check the inflation pressure when the tires are cold before starting driving Make sure that the tire air valve caps are securely fitted You can roughly judge the air pressure from the form of the tire tread but need to use an air gauge for precise measurement An FK model vehicle uses low profile tires whose air pressure must be checked using an air gaug...

Page 181: ... be higher just after vehicle operation than before vehicle oper ation The increases in pressure are not abnor mal they occur because the air in the tires expands as the tires get hot while the vehicle is moving Do not release air from the tires at this time The pressures will return to normal as the tires cool down Tire pressure drops naturally as time passes You should therefore check the tire p...

Page 182: ... a film of water caus ing the driver to lose control of both steering and braking 3 Checking for cracks damage and objects embedded in tread Check both the tread and the sides of each tire for cracks damage and excessive or unusual wear Check also for metal pieces nails and stones that might be embedded in the tread or caught between the tires of dual wheels Tire groove depth Normal roads 1 6 mm 2...

Page 183: ...diagonally opposite to the tire to be replaced Example Block the left front tire if the right rear tire is to be replaced 5 Prepare a replacement tire NOTE Your vehicle is not provided with a replacement tire as standard equipment Specified tire types FK 225 70R 19 5 FM 11R 22 5 14PR 6 A socket wrench for removing and replacing wheel nuts is stored in the box under the bed 2 Tire removal 1 Set the...

Page 184: ...l nuts and then the tire 5 To remove the rear dual wheel tires first loosen the outer wheel nuts and remove outer tire then lower the jack loosen inner wheel nuts and jack up the vehicle again to remove inner tire WARNING Apply the jack only to designated jacking points Applying the jack elsewhere could damage the vehicle and cause the jack to slip out of position Never rock or climb below the veh...

Page 185: ...hat the wheel bolts line up with the bolt holes in the disc wheel Then tighten the wheel nuts to hold the disc wheel in position The spherical end of the wheel nut should be directed toward the disc wheel NOTE The wheel bolts and nuts on the right hand wheels have right hand threads and those on the left hand wheels have left hand threads The bolts and nuts have stamped marks for easy identificati...

Page 186: ...NING Do not jump or jerk on the wrench handle when tightening the nut by using your own weight Doing so can overtighten the nut Overtightening the nuts could overstrain the bolts or deform the disc wheel s surface WARNING The wheel nuts must be tightened to the specified torque Unless the nuts are tight ened correctly the wheel may work loose while the vehicle is in motion resulting in a serious a...

Page 187: ...e initial stages of driving due to wear in Therefore retighten the wheel nuts to specification after you have driven 50 to 100 km 30 to 60 miles Wheel nut tightening torque FK 370 to 410 N m 275 to 304 ft lbs 38 to 42 kgf m FM 400 to 440 N m 297 to 325 ft lbs 41 to 45 kgf m WARNING A loose wheel nut could cause broken wheel bolts or a cracked disc wheel resulting in a tire coming loose or falling ...

Page 188: ...e pressure of each of the new tires If using different tread patterns on the front and rear wheels select tires with a ribbed tread for the front wheels and tires with a traction type tread for the rear wheels NOTE When tires are new they tend to generate heat and wear more quickly Tire rotation Tire rotation intervals Every 10 000 km 6 000 miles WARNING Be sure to use the specified type of tires ...

Page 189: ...in the blade rubber 2 Slide out the blade rubber 3 Replace the old blade rubber with a new genu ine wiper blade rubber To install reverse the removal procedure Make sure that the claws fit into the grooves in blade rubber 1 Fluid level check 1 Open the front panel P 12 3 2 Check the amount of remaining washer fluid using fluid level check hose 3 If the fluid level has dropped to the lower part of ...

Page 190: ...ID IS DILUTE SULFURIC ACID AND CAN HARM MOST THINGS IT TOUCHES INCLUDING HUMAN SKIN AND CLOTHING IF YOU GET IT ON YOUR SKIN OR CLOTHING FLUSH IT OFF WITH SOAP AND WATER IF YOU GET BATTERY FLUID IN YOUR EYES QUICKLY FLUSH IT OUT WITH PLENTY OF WATER AND SEEK MEDICAL ATTENTION WARNING The battery generates flammable hydro gen gas and should be kept away from open flame and spark When removing the ba...

Page 191: ... position securely 2 Removal installation of battery Follow the instructions below when removing and installing the battery for charging or replacing with a new one 1 Remove the battery cover 2 Loosen the connector nut on the negative terminal and disconnect the cable In the same way disconnect the cable from the posi tive terminal 3 Undo the battery holding screws to remove the battery 4 When rei...

Page 192: ...arge the bat tery 2 If the battery fluid level is correct or between the UPPER LEVEL and LOWER LEVEL lines simply recharge the battery Replace the battery if the indicator does not turn blue after charging CAUTION Do not add distilled water above the UPPER LEVEL line Too much fluid will overflow from the battery and contact external parts WARNING Be sure to observe the following instructions when ...

Page 193: ...to a live battery using a booster cable P 13 16 Remove and clean the air filters with water or com pressed air to eliminate dust and dirt at regular intervals 6 months or so Clogged filters may cause inefficient heating or air conditioning and even malfunction of the blower motor CAUTION Clean the air filters at shorter intervals if your vehicle is used frequently in dusty areas 1 Outside air filt...

Page 194: ...rush or something also appropriate CAUTION The intercooler could be damaged if a bristle brush or an object with a sharp point is used for its cleaning FM65F automatic transmission vehicles If a large amount of dirt or mud adheres to the front of the oil cooler it will reduce the oil cooler s cooling performance and cause rust Form time to time wash with water the front of the oil cooler and the c...

Page 195: ...ront bumper steps CAUTION Never apply rubbing compound to glass since it leaves scratches Cleaning your vehicle WARNING Some cleaning fluids are poisonous or flammable Carefully follow the safety pre cautions shown on the container Use solvent based cleaning materials only in a well ventilated area Open the win dows when using solvent based cleaning materials in the cab The following materials cou...

Page 196: ... intake port Do not use concentrated soap or synthetic detergents Rinse the detergent off with water Take care that none remains on the paintwork since it could discolor the paint Cleaning plastic parts with thinner or gaso line could result in cracking or discoloration Do not use a vehicle cleaning brush to clean the plastic lenses of the turn signal lamps and parking lamps A brush could scratch ...

Page 197: ...er electrical components and connectors of electri cal wiring to them ABS devices behind tires and electric wiring to them Steering shaft Dust covers on steering system parts Transmission oil cooler FK65F automatic transmission vehicles 1 4 Waxing Wax the vehicle once or twice a month or whenever the wax on the vehicle ceases to repel water Apply wax out of direct sunlight and only when the vehi c...

Page 198: ...oration and stains Do not water wash the floor with the floor mat left in place as this could cause the floor to rust and could also damage the relays and com puter If you wish to wash the floor mat remove it from the vehicle After washing allow the felt lining on the back to dry completely The floor mat can be removed by removing the scuff plates 2 1 Cleaning interior trim Keep the vehicle s inte...

Page 199: ...dissolve 5 ml 0 17 fl oz of baking soda in 250 ml 8 5 fl oz of luke warm water and use the solution to clean the affected area 4 If necessary lightly wipe the area with a fabric cleaning solvent 2 5 Other contaminants Use this method to remove contamination by candy ice cream mayonnaise and chili sauce 1 Carefully clean off the contamination then wash the area with water and dry it 2 If any spot r...

Page 200: ...mp has burn out 13 10 When braking is sluggish 13 13 If parking brake cannot be released normally 13 14 If the engine stalls while the vehicle is in motion 13 15 If a tire goes flat while the vehicle is in motion 13 15 When the battery has run down 13 16 When the fuel has run out Bleeding the fuel system 13 17 Towing 13 18 13 Useful advice for emergencies ...

Page 201: ...60 C 140 F or lower The air cleaner is clogged Clean or replace the element 12 34 The engine preheating time is insufficient Follow the preheating instructions 5 6 The engine preheating circuit fuse is blown Replace the fuse 13 8 There is malfunction in any of the fuel injection system components Have the vehicle inspected by an authorized dealer Possible cause Remedy Ref page Idling speed setting...

Page 202: ...ef page The front of the intercooler or radiator is plugged with dust and dirt Clean 12 65 The coolant level is too low Add coolant 12 38 The radiator cap is not closed completely Install the cap firmly The fan belt is loose Adjust the belt tension 12 44 The coolant is contaminated Flush the cooling system and replace the coolant 12 38 Possible cause Remedy Ref page Insufficient quantity of engine...

Page 203: ...ce the air cleaner element 12 34 The fuel filter is clogged Replace the filter element 12 32 The clutch is slipping Manual transmission vehicles Adjust play 12 49 Air is present in the fuel system Bleed the fuel system 13 17 The front of the intercooler or radiator is plugged with dust and dirt Clean 12 65 Possible cause Remedy Ref page Clutch fluid is insufficient Add clutch fluid 12 28 Clutch pe...

Page 204: ...ficiently greased Grease parts 12 15 Possible cause Remedy Ref page The bulb is burnt out Replace the bulb 13 10 The fuse is blown Replace the fuse with one of the correct amperage 13 8 There are open wiring and or poor connection to ground Have the vehicle inspected by an authorized dealer Possible cause Remedy Ref page The battery terminals are loose or corroded Scrape off corrosion and tighten ...

Page 205: ...ur vehicle carries reflective triangles erect them by the side of the road behind the vehicle 2 Repair Check the mechanical failure and if you judge it readily repairable fix it while paying attention to the traffic If you are unable to repair it call an autho rized dealer for help Stopping your vehicle in an emergency WARNING Stopping your vehicle in a tunnel could be dangerous Wherever possible ...

Page 206: ... a speed slightly above the idling RPM until the coolant cools down Turning off the engine immediately after stopping will cause the coolant temperature to rise quickly and may cause the engine to seize up 2 When the gauge s needle stays near the center of the scale stop the engine and wait until the coolant temperature has dropped further 3 Check the radiator piping for coolant leakage If there i...

Page 207: ... blown Check and replace fuses as necessary Before checking or replacing fuses turn the starter switch to the LOCK position and push all switches to the OFF position 1 Replacing fuses in fuse box 1 The fuse box is under the glove compartment To gain access to the fuse box open glove com partment cover and then remove tray by raising it from the front 2 The circuit protected by each fuse and its am...

Page 208: ...that ordinary fuses do If a high current fuse is blown most of the vehicle s elec trical circuits become inoperative Check for a blown high current fuse by looking into the inside through inspection window If it is blown immediately call an authorized dealer and have them check your vehicle For high current fuses and first remove their mounting nuts and then remove the fuses For other fuses simply...

Page 209: ...d cracks When the fluid adheres immediately wipe it off or wash it with water NOTE Inside lenses in lamps such as headlamps tempo rarily fog during driving in the rain or vehicle wash Just as in the case of window glass fogging in the rain fogging is formed by difference of the tempera ture between inside and outside of the lamp No functional problem develops and fogging will disap pear by itself ...

Page 210: ...urn signal lamp front 12V 21W 2 Parking lamp 12V 5W 2 Front side turn signal lamp FK 12V 10W 2 Front side turn signal lamp FM Identification lamp 12V 7 5W 3 Stop tail lamp 12V 21 5W 2 Rear turn signal lamp 12V 21W 2 Backup lamp 12V 21W 2 License plate lamp 12V 7 5W 1 Clearance and side marker lamp 12V 7 5W 2 Interior lamp 12V 10W 2 Spotlights 12V 8W 2 Z12161 ...

Page 211: ...oration plate 2 Remove socket by turning it counterclock wise 3 Push bulb and turn counterclockwise to remove it 4 Install the lamp by reversing the order of removal 5 If the packing is dirty clean it 3 Replacing front turn signal lamp 1 Open the front panel P 12 3 2 Remove socket by turning it counterclock wise 3 Push bulb and turn counterclockwise to remove it 4 Install the lamp by reversing the...

Page 212: ...d shorten its life Depress the brake pedal harder than usual down shift to use engine braking and activate exhaust braking to stop the vehicle Apply the parking brake when necessary After the vehicle has been brought into a stop check parts then call an authorized dealer When braking is sluggish WARNING Activating the parking brake while driving could cause the vehicle to topple over The brake sys...

Page 213: ...cially designed for the purpose 1 Remove the release bolt nut and washer from the rear brake chamber 2 Remove the plastic cap from the brake cham ber 3 Insert the release bolt head first into the hole in the brake chamber Push the release bolt until it stops 4 Give the release bolt 1 4 of a turn clockwise then check that it cannot be pulled out If parking brake cannot be released normally WARNING ...

Page 214: ... to start the engine The brake booster becomes inoperative because no compressed air is supplied and braking power is significantly reduced The power assistance then becomes unavail able making steering extremely difficult Additional force must be used when turning the steering wheel Avoid sudden braking Hold the steering wheel firmly and gradually slow down before pulling over at a safe place To ...

Page 215: ...ttery at a point as far away as possible from the battery When the battery has run down WARNING Check the battery s fluid level before con necting booster cables If the fluid is below the LOWER LEVEL line add battery fluid or distilled water If the battery was charged with an excessively low fluid level it would deteriorate rapidly and could overheat or explode Be careful not to connect the booste...

Page 216: ... the engine is refueled In these cases bleed the fuel system by performing the following steps CAUTION The fuel injection system may fail if the engine stops due to lack of fuel 1 Loosen one of the air bleeder plugs of the fuel filter NOTE Use whichever of the two air bleeder plugs is the most convenient both plugs provide the same effect 2 Cover the pipe portion of the loosened air bleeder plug w...

Page 217: ...lternatively tow the vehicle with its rear wheels off the ground Towing the vehicle with out taking these precautions would damage the automatic transmission Before raising the front wheels for towing remove the bumper and air scoop to prevent them from damaging Attach the towing chain securely to the front axle CAUTION Do not attach the chain to the bumper since the bumper would be damaged upon r...

Page 218: ...14 1 Recommended lubricants hydraulic fluids and quantities 14 2 Service data 14 4 14 Service data ...

Page 219: ... holes and level lines as appropriate Recommended lubricants hydraulic fluids and quantities Item Quantity Engine Oil pan Approx 11 11 6 Oil filter Approx 2 3 2 4 Manual transmission Other than FM65F 6 speed Approx 6 7 7 1 Add approx 0 5 0 5 if vehicle has PTO FM65F 6 speed Approx 8 1 8 6 9 speed Approx 8 5 9 0 Automatic transmission Other than FM65F LCT1000 Approx 7 0 7 5 LCT2400 Approx 10 0 10 6...

Page 220: ... Rear axel Gear oil API GL 5 Below 40 C 104 F 90 Above 40 C 104 F Use oil conforming to GL 5 SAE140 or SAE85W 140 if the vehicle is to be driven under heavy load conditions as for example driving up long uphill grades Remember however that this oil is be used only when the temperature is above 10 C 50 F 140 or 85W 140 Power steering Automatic transmission fluid DEXRON DEXRON II or DEXRON III type ...

Page 221: ...rake pedal play 10 0 to 15 5 mm 0 39 to 0 61 in Air pressure buildup time from 0 to 100 lb in2 with the engine idling Within 8 minutes Parking brake lever stroke other than FM65F when pulled with a 295 N 66 lbs 30 kgf force 7 to 10 notches Wheel nut tightening torque FK 370 to 410 N m 275 to 304 ft lbs 38 to 42 kgf m FM 400 to 440 N m 297 to 325 ft lbs 41 to 45 kgf m Tire tread groove depth Normal...

Page 222: ...15 1 Maintenance schedule 15 2 Lubrication schedule 15 8 15 Maintenance schedule ...

Page 223: ... for air fuel oil and coolant leaks Engine starting perfor mance speed noise and exhaust gas conditions Check for engine starting performance idling speed abnormal engine noise black smoke or other abnormal exhaust gas during idling and acceleration Check engine speed on tachometer Retightening inlet and exhaust manifold bolts Retighten Checking of the tightening torque is unnecessary Valve cleara...

Page 224: ...e element replacement Replace element 12 36 Starter function Operate starter switch and check the switch for proper function Alternator function Check for function with a circuit tester POWER TRAIN Air or oil leaks from power train Check power train for air and oil leaks Clutch pedal play Press clutch pedal lightly and check that its play is adequate 12 49 Clutch function Press the clutch pedal to...

Page 225: ... tire tread and side walls for cracks damage uneven ridgy and other abnormal wear 12 51 Tire rotation Rotate all tires 12 59 SUSPENSION SYSTEM Looseness play and damage of suspension system Check suspension system for looseness play and damage Damage and looseness of leaf springs Check leaf springs for damage and looseness 12 13 Retightening U bolts Check U bolts for looseness Air leak and damage ...

Page 226: ...air drier 12 50 Air drier disassembly and check Disassemble air drier and check every part of it If more than 1 5 of the drying agent is discolored replace drying agent 12 50 Replacement of drying agent in air drier Every 24 months Disassemble air drier and replace drying agent and rubber parts 12 50 Brake shoe clearance Measure clearance with thickness gauge Brake lining wear Check for lining wea...

Page 227: ...and expander 4 Every 36 months Replace rubber parts at brake chamber s wheel parking brake spring and expander STEERING SYSTEM Fluid leaks from steering system Check steering system for fluid leaks Steering wheel play Turn steering wheel right and left to mea sure play at steering wheel rim Measure while engine is running 12 45 Steering operating condition Check steering wheel to see if it vibrate...

Page 228: ...lectrolyte level Measure electrolyte specific gravity with hydrometer 12 61 Operation and damage of light ing system and turn signal lamps Check operation damage and installa tion of an lighting units Also check turn signal lamps operated by turn signal switch 12 10 Operation of horn Check operation damage and mounting condition 12 12 Operation and fluid level of wind shield wiper and washer Check...

Page 229: ...ual transmission oil level 12 23 Manual transmission oil replacement Every 50 000 km 30 000 miles Automatic transmission fluid level 12 25 Automatic transmission fluid replacement Filter should also be replaced Other than FM65F Every 80 000 km 48 000 miles FM65F Every 40 000 km 24 000 miles At initial 8 000 km 5 000 miles only the fluid filter should be replaced On FM65F only the main filter shoul...

Page 230: ...16 1 16 Alphabetical index ...

Page 231: ...29 Cup holder 10 6 Dimmer switch 5 25 Door pocket 10 5 Door window glass 3 5 Doors 3 2 Draining water from fuel filter 12 37 Driver s seat 4 2 Dust indicator 12 34 Emergencies 13 1 Engine idling control volume 5 5 Engine number 1 2 Engine oil 12 19 Engine overheats 13 7 Entering and leaving the vehicle 3 4 Exhaust brake switch 5 26 Front panel 12 3 Fuel filter 12 32 Fuel gauge 6 4 Fuel has run out...

Page 232: ...belts 4 5 Seats 4 2 Service brakes 12 46 Service data 14 1 Speedometer 6 2 Spotlights 10 3 Starter key 3 2 Starter switch 5 3 Starting the engine 5 6 Steering wheel 4 9 12 45 Stopping the engine 5 12 Sun visors 10 3 Tachometer 6 2 Tilting the cab 12 5 Tire chains 11 4 Tire rotation 12 59 Tires 12 51 Tires replacement 12 54 Towing 13 18 Transmission oil cooler 12 65 Turn signal lamp switch 5 25 Van...

Page 233: ......
Page 234: ...17 MAINTENANCE RECORD NOTE The symbols and prefixed to some check items stand for Exhaust Emission Control item and Noise Control item respectively 17 1 ...

Page 235: ...ribed by MFTA Owner s Name Address City State Zip Vehicle identification number Date NVI was Performed Mileage at time of NVI Dealer Code of Servicing Dealer Dealer Reference R O Dealer Claim No J L Dealer imprint Dealership Name and Address Dealer Representive Signature Date MFTA COPY New Vehicle 4 000 km 2 500 Miles FREE INSPECTION AND SERVICE CERTIFICATE NVI FK FM ...

Page 236: ...ibed by MFTA Owner s Name Address City State Zip Vehicle identification number Date NVI was Performed Mileage at time of NVI Dealer Code of Servicing Dealer Dealer Reference R O Dealer Claim No J L Dealer imprint Dealership Name and Address Dealer Representive Signature Date DEALER COPY New Vehicle 4 000 km 2 500 Miles FREE INSPECTION AND SERVICE CERTIFICATE NVI FK FM ...

Page 237: ...er Representive Signature Date OWNER COPY New Vehicle 4 000 km 2 500 Miles FREE INSPECTION AND SERVICE CERTIFICATE NVI NEW VEHICLE 4 000 km 2 500 miles SERVICE OPERATIONS Owner s name Date Address Vehicle identification number Lubrication Engine oil replacement Manual transmission oil replacement Axle housing gear oil replacement Inspection and maintenance Engine Valve clearance PCV valve element ...

Page 238: ...bearing Lubrication of king pins Lubrication of chassis parts Inspection and maintenance Engine Air fuel oil or coolant leaks from engine Engine starting performance speed noise and exhaust gas conditions Retightening the fuel tank bracket bolts Belt tension and damage Radiator cap condition Cooling system hose clamp position and clamping condi tion Cleaning the air cleaner element Damage of air i...

Page 239: ...s from steering system Steering wheel play Steering operating condition Looseness and play of steering system including hoses and pipes Cab and frame Looseness and damage of chassis and body Heater and defroster operation Door lock function Seat belt mounting condition Electrical system Looseness and damage of electrical wiring and connec tions Operation and damage of lighting system Operation of ...

Page 240: ...s from engine Engine starting performance speed noise and exhaust gas conditions Oil filter replacement Retightening the fuel tank bracket bolts Belt tension and damage Radiator cap condition Cooling system hose clamp position and clamping condi tion Cleaning the air cleaner element Damage of air intake system looseness of clamp and loss of parts Exhaust system PCV valve element replacement Power ...

Page 241: ...eness and play of steering system including hoses and pipes Cab and frame Looseness and damage of chassis and body Heater and defroster operation Door lock function Seat belt mounting condition Electrical system Looseness and damage of electrical wiring and connec tions Battery electrolyte level and specific gravity Operation and damage of lighting system Operation of horn and turn signal lamps Op...

Page 242: ...king pins Lubrication of chassis parts Inspection and maintenance Engine Air fuel oil or coolant leaks from engine Engine starting performance speed noise and exhaust gas conditions Fuel filter replacement Retightening the fuel tank bracket bolts Belt tension and damage Radiator cap condition Cooling system hose clamp position and clamping condi tion Cleaning the air cleaner element Damage of air ...

Page 243: ...e Brake lining wear Parking brake operation Parking brake effectiveness Parking brake lever stroke Steering system Fluid leaks from steering system Steering wheel play Steering operating condition Looseness and play of steering system including hoses and pipes Cab and frame Looseness and damage of chassis and body Heater and defroster operation Door lock function Seat belt mounting condition Elect...

Page 244: ...n of chassis parts Inspection and maintenance Engine Air fuel oil or coolant leaks from engine Engine starting performance speed noise and exhaust gas conditions Oil filter replacement Retightening the fuel tank bracket bolts Belt tension and damage Radiator cap condition Cooling system hose clamp position and clamping condi tion Cleaning the air cleaner element Damage of air intake system loosene...

Page 245: ...Steering wheel play Steering operating condition Looseness and play of steering system including hoses and pipes Cab and frame Looseness and damage of chassis and body Heater and defroster operation Door lock function Seat belt mounting condition Electrical system Looseness and damage of electrical wiring and connec tions Battery electrolyte level and specific gravity Operation and damage of light...

Page 246: ...ation of chassis parts Inspection and maintenance Engine Air fuel oil or coolant leaks from engine Engine starting performance speed noise and exhaust gas conditions Retightening the fuel tank bracket bolts Belt tension and damage Radiator cap condition Cooling system hose clamp position and clamping condi tion Air cleaner element replacement Damage of air intake system looseness of clamp and loss...

Page 247: ...ks from steering system Steering wheel play Steering operating condition Looseness and play of steering system including hoses and pipes Cab and frame Looseness and damage of chassis and body Heater and defroster operation Door lock function Seat belt mounting condition Electrical system Looseness and damage of electrical wiring and connec tions Operation and damage of lighting system Operation of...

Page 248: ... Lubrication of king pins Lubrication of chassis parts Inspection and maintenance Engine Air fuel oil or coolant leaks from engine Engine starting performance speed noise and exhaust gas conditions Retightening intake and exhaust manifold bolts Valve clearance Oil filter replacement Fuel filter replacement Retightening the fuel tank bracket bolts Belt tension and damage Radiator cap condition Cool...

Page 249: ...ar Damage on boot of brake chamber expander Wheel cylinder piston cup and dust seal replacement Brake booster packing cup and rubber parts replace ment Brake hose replacement Check valve packing and rubber parts replacement Brake valve packing and rubber parts replacement Steering system Fluid leaks from steering system Steering wheel play Steering operating condition Looseness and play of steerin...

Page 250: ... from engine Engine starting performance speed noise and exhaust gas conditions Retightening the fuel tank bracket bolts Belt tension and damage Radiator cap condition Cooling system hose clamp position and clamping condi tion Cleaning the air cleaner element Damage of air intake system looseness of clamp and loss of parts Exhaust system PCV valve element replacement Power train Air or oil leaks f...

Page 251: ...ndition Looseness and play of steering system including hoses and pipes Cab and frame Looseness and damage of chassis and body Heater and defroster operation Door lock function Seat belt mounting condition Electrical system Looseness and damage of electrical wiring and connec tions Operation and damage of lighting system Operation of horn and turn signal lamps Operation and fluid level of windshie...

Page 252: ...of chassis parts Inspection and maintenance Engine Air fuel oil or coolant leaks from engine Engine starting performance speed noise and exhaust gas conditions Oil filter replacement Retightening the fuel tank bracket bolts Belt tension and damage Radiator cap condition Cooling system hose clamp position and clamping condi tion Cleaning the air cleaner element Damage of air intake system looseness...

Page 253: ...Steering wheel play Steering operating condition Looseness and play of steering system including hoses and pipes Cab and frame Looseness and damage of chassis and body Heater and defroster operation Door lock function Seat belt mounting condition Electrical system Looseness and damage of electrical wiring and connec tions Battery electrolyte level and specific gravity Operation and damage of light...

Page 254: ...f king pins Lubrication of chassis parts Inspection and maintenance Engine Air fuel oil or coolant leaks from engine Engine starting performance speed noise and exhaust gas conditions Fuel filter replacement Retightening the fuel tank bracket bolts Belt tension and damage Radiator cap condition Cooling system hose clamp position and clamping condi tion Cleaning the air cleaner element Damage of ai...

Page 255: ...ce Brake lining wear Parking brake operation Parking brake effectiveness Parking brake lever stroke Steering system Fluid leaks from steering system Steering wheel play Steering operating condition Looseness and play of steering system including hoses and pipes Cab and frame Looseness and damage of chassis and body Heater and defroster operation Door lock function Seat belt mounting condition Elec...

Page 256: ...hassis parts Inspection and maintenance Engine Air fuel oil or coolant leaks from engine Engine starting performance speed noise and exhaust gas conditions Oil filter replacement Retightening the fuel tank bracket bolts Belt tension and damage Radiator cap condition Cooling system hose clamp position and clamping condi tion Air cleaner element replacement Damage of air intake system looseness of c...

Page 257: ...Steering wheel play Steering operating condition Looseness and play of steering system including hoses and pipes Cab and frame Looseness and damage of chassis and body Heater and defroster operation Door lock function Seat belt mounting condition Electrical system Looseness and damage of electrical wiring and connec tions Battery electrolyte level and specific gravity Operation and damage of light...

Page 258: ...s from engine Engine starting performance speed noise and exhaust gas conditions Retightening the fuel tank bracket bolts Belt tension and damage Radiator cap condition Cooling system hose clamp position and clamping condi tion Cleaning the air cleaner element Damage of air intake system looseness of clamp and loss of parts Exhaust system PCV valve element replacement Power train Air or oil leaks ...

Page 259: ...ndition Looseness and play of steering system including hoses and pipes Cab and frame Looseness and damage of chassis and body Heater and defroster operation Door lock function Seat belt mounting condition Electrical system Looseness and damage of electrical wiring and connec tions Operation and damage of lighting system Operation of horn and turn signal lamps Operation and fluid level of windshie...

Page 260: ...d maintenance Engine Air fuel oil or coolant leaks from engine Engine starting performance speed noise and exhaust gas conditions Retightening intake and exhaust manifold bolts Valve clearance Oil filter replacement Fuel filter replacement Draining water and sediment in fuel tank Retightening the fuel tank bracket bolts Check fuel line outside the engine compartment Belt tension and damage Coolant...

Page 261: ...valve packing and rubber parts replacement Brake valve packing and rubber parts replacement Air compressor and pressure gauge hose replacement Brake booster power cylinder packing replacement Brake fluid reservoir tank tube replacement Brake chamber s packing and rubber parts replacement Steering system Fluid leaks from steering system Steering wheel play Steering operating condition Looseness and...

Page 262: ...s from engine Engine starting performance speed noise and exhaust gas conditions Retightening the fuel tank bracket bolts Belt tension and damage Radiator cap condition Cooling system hose clamp position and clamping condi tion Cleaning the air cleaner element Damage of air intake system looseness of clamp and loss of parts Exhaust system PCV valve element replacement Power train Air or oil leaks ...

Page 263: ...ndition Looseness and play of steering system including hoses and pipes Cab and frame Looseness and damage of chassis and body Heater and defroster operation Door lock function Seat belt mounting condition Electrical system Looseness and damage of electrical wiring and connec tions Operation and damage of lighting system Operation of horn and turn signal lamps Operation and fluid level of windshie...

Page 264: ...ks from engine Engine starting performance speed noise and exhaust gas conditions Oil filter replacement Retightening the fuel tank bracket bolts Belt tension and damage Radiator cap condition Cooling system hose clamp position and clamping condi tion Cleaning the air cleaner element Damage of air intake system looseness of clamp and loss of parts Exhaust system PCV valve element replacement Power...

Page 265: ...seness and play of steering system including hoses and pipes Cab and frame Looseness and damage of chassis and body Heater and defroster operation Door lock function Seat belt mounting condition Electrical system Looseness and damage of electrical wiring and connec tions Battery electrolyte level and specific gravity Operation and damage of lighting system Operation of horn and turn signal lamps O...

Page 266: ...ubrication of transmission gearshift control Lubrication of king pins Lubrication of chassis parts Inspection and maintenance Engine Air fuel oil or coolant leaks from engine Engine starting performance speed noise and exhaust gas conditions Fuel filter replacement Retightening the fuel tank bracket bolts Belt tension and damage Radiator cap condition Cooling system hose clamp position and clampin...

Page 267: ...ort Check air drier desiccant Brake shoe clearance Brake lining wear Parking brake operation Parking brake effectiveness Parking brake lever stroke Steering system Fluid leaks from steering system Steering wheel play Steering operating condition Looseness and play of steering system including hoses and pipes Cab and frame Looseness and damage of chassis and body Heater and defroster operation Door...

Page 268: ...n and maintenance Engine Air fuel oil or coolant leaks from engine Engine starting performance speed noise and exhaust gas conditions Oil filter replacement Retightening the fuel tank bracket bolts Belt tension and damage Radiator cap condition Cooling system hose clamp position and clamping condi tion Cleaning the air cleaner element Damage of air intake system looseness of clamp and loss of part...

Page 269: ...g operating condition Looseness and play of steering system including hoses and pipes Cab and frame Looseness and damage of chassis and body Heater and defroster operation Door lock function Seat belt mounting condition Electrical system Looseness and damage of electrical wiring and connec tions Battery electrolyte level and specific gravity Operation and damage of lighting system Operation of hor...

Page 270: ...ks from engine Engine starting performance speed noise and exhaust gas conditions Retightening the fuel tank bracket bolts Belt tension and damage Radiator cap condition Cooling system hose clamp position and clamping condi tion Cleaning the air cleaner element Damage of air intake system looseness of clamp and loss of parts Exhaust system PCV valve element replacement Power train Air or oil leaks...

Page 271: ...ndition Looseness and play of steering system including hoses and pipes Cab and frame Looseness and damage of chassis and body Heater and defroster operation Door lock function Seat belt mounting condition Electrical system Looseness and damage of electrical wiring and connec tions Operation and damage of lighting system Operation of horn and turn signal lamps Operation and fluid level of windshie...

Page 272: ...aintenance Engine Air fuel oil or coolant leaks from engine Engine starting performance speed noise and exhaust gas conditions Retightening of intake and exhaust manifold bolts Valve clearance Oil filter replacement Fuel filter replacement Retightening the fuel tank bracket bolts Belt tension and damage Radiator cap condition Cooling system hose clamp position and clamping condi tion Cleaning the ...

Page 273: ...ake booster packing cup and rubber parts replace ment Brake hose replacement Check valve packing and rubber parts replacement Brake valve packing and rubber parts replacement Replacement of rubber parts at brake chamber s wheel parking brake spring and expander Steering system Fluid leaks from steering system Steering wheel play Steering operating condition Looseness and play of steering system in...

Page 274: ...ks from engine Engine starting performance speed noise and exhaust gas conditions Retightening the fuel tank bracket bolts Belt tension and damage Radiator cap condition Cooling system hose clamp position and clamping condi tion Cleaning the air cleaner element Damage of air intake system looseness of clamp and loss of parts Exhaust system PCV valve element replacement Power train Air or oil leaks...

Page 275: ...ndition Looseness and play of steering system including hoses and pipes Cab and frame Looseness and damage of chassis and body Heater and defroster operation Door lock function Seat belt mounting condition Electrical system Looseness and damage of electrical wiring and connec tions Operation and damage of lighting system Operation of horn and turn signal lamps Operation and fluid level of windshie...

Page 276: ...spection and maintenance Engine Air fuel oil or coolant leaks from engine Engine starting performance speed noise and exhaust gas conditions Oil filter replacement Retightening the fuel tank bracket bolts Belt tension and damage Radiator cap condition Cooling system hose clamp position and clamping condi tion Air cleaner element replacement Damage of air intake system looseness of clamp and loss o...

Page 277: ...g operating condition Looseness and play of steering system including hoses and pipes Cab and frame Looseness and damage of chassis and body Heater and defroster operation Door lock function Seat belt mounting condition Electrical system Looseness and damage of electrical wiring and connec tions Battery electrolyte level and specific gravity Operation and damage of lighting system Operation of hor...

Page 278: ... of king pins Lubrication of chassis parts Inspection and maintenance Engine Air fuel oil or coolant leaks from engine Engine starting performance speed noise and exhaust gas conditions Fuel filter replacement Retightening the fuel tank bracket bolts Belt tension and damage Radiator cap condition Cooling system hose clamp position and clamping condition Cleaning the air cleaner element Damage of a...

Page 279: ...ce Brake lining wear Parking brake operation Parking brake effectiveness Parking brake lever stroke Steering system Fluid leaks from steering system Steering wheel play Steering operating condition Looseness and play of steering system including hoses and pipes Cab and frame Looseness and damage of chassis and body Heater and defroster operation Door lock function Seat belt mounting condition Elec...

Page 280: ...aks from engine Engine starting performance speed noise and exhaust gas conditions Oil filter replacement Retightening the fuel tank bracket bolts Belt tension and damage Radiator cap condition Cooling system hose clamp position and clamping condi tion Cleaning the air cleaner element Damage of air intake system looseness of clamp and loss of parts Exhaust system PCV valve element replacement Powe...

Page 281: ...seness and play of steering system including hoses and pipes Cab and frame Looseness and damage of chassis and body Heater and defroster operation Door lock function Seat belt mounting condition Electrical system Looseness and damage of electrical wiring and connec tions Battery electrolyte level and specific gravity Operation and damage of lighting system Operation of horn and turn signal lamps O...

Page 282: ...ks from engine Engine starting performance speed noise and exhaust gas conditions Retightening the fuel tank bracket bolts Belt tension and damage Radiator cap condition Cooling system hose clamp position and clamping condi tion Cleaning the air cleaner element Damage of air intake system looseness of clamp and loss of parts Exhaust system PCV valve element replacement Power train Air or oil leaks...

Page 283: ...ndition Looseness and play of steering system including hoses and pipes Cab and frame Looseness and damage of chassis and body Heater and defroster operation Door lock function Seat belt mounting condition Electrical system Looseness and damage of electrical wiring and connec tions Operation and damage of lighting system Operation of horn and turn signal lamps Operation and fluid level of windshie...

Page 284: ...maintenance Engine Air fuel oil or coolant leaks from engine Engine starting performance speed noise and exhaust gas conditions Retightening intake and exhaust manifold bolts Valve clearance Oil filter replacement Fuel filter replacement Draining water and sediment in fuel tank Retightening the fuel tank bracket bolts Check fuel line outside the engine compartment Belt tension and damage Coolant r...

Page 285: ...valve packing and rubber parts replacement Brake valve packing and rubber parts replacement Air compressor and pressure gauge hose replacement Brake booster power cylinder packing replacement Brake fluid reservoir tank tube replacement Brake chamber s packing and rubber parts replacement Steering system Fluid leaks from steering system Steering wheel play Steering operating condition Looseness and...

Page 286: ... maintenance Engine Air fuel oil or coolant leaks from engine Engine starting performance speed noise and exhaust gas conditions Retightening the fuel tank bracket bolts Belt tension and damage Radiator cap condition Cooling system hose clamp position and clamping condi tion Air cleaner element replacement Turbocharger rotor play Damage of air intake system looseness of clamp and loss of parts Exh...

Page 287: ...ring wheel play Steering operating condition Looseness and play of steering system including hoses and pipes Cab and frame Looseness and damage of chassis and body Heater and defroster operation Door lock function Seat belt mounting condition Electrical system Looseness and damage of electrical wiring and connec tions Operation and damage of lighting system Operation of horn and turn signal lamps ...

Page 288: ...aks from engine Engine starting performance speed noise and exhaust gas conditions Oil filter replacement Retightening the fuel tank bracket bolts Belt tension and damage Radiator cap condition Cooling system hose clamp position and clamping condi tion Cleaning the air cleaner element Damage of air intake system looseness of clamp and loss of parts Exhaust system PCV valve element replacement Powe...

Page 289: ...seness and play of steering system including hoses and pipes Cab and frame Looseness and damage of chassis and body Heater and defroster operation Door lock function Seat belt mounting condition Electrical system Looseness and damage of electrical wiring and connec tions Battery electrolyte level and specific gravity Operation and damage of lighting system Operation of horn and turn signal lamps O...

Page 290: ... of king pins Lubrication of chassis parts Inspection and maintenance Engine Air fuel oil or coolant leaks from engine Engine starting performance speed noise and exhaust gas conditions Fuel filter replacement Retightening the fuel tank bracket bolts Belt tension and damage Radiator cap condition Cooling system hose clamp position and clamping condi tion Cleaning the air cleaner element Damage of ...

Page 291: ...arance Brake lining wear Parking brake operation Parking brake effectiveness Parking brake lever stroke Steering system Fluid leaks from steering system Steering wheel play Steering operating condition Looseness and play of steering system including hoses and pipes Cab and frame Looseness and damage of chassis and body Heater and defroster operation Door lock function Seat belt mounting condition ...

Page 292: ...ction and maintenance Engine Air fuel oil or coolant leaks from engine Engine starting performance speed noise and exhaust gas conditions Oil filter replacement Retightening the fuel tank bracket bolts Belt tension and damage Radiator cap condition Cooling system hose clamp position and clamping condi tion Cleaning the air cleaner element Damage of air intake system looseness of clamp and loss of ...

Page 293: ...g operating condition Looseness and play of steering system including hoses and pipes Cab and frame Looseness and damage of chassis and body Heater and defroster operation Door lock function Seat belt mounting condition Electrical system Looseness and damage of electrical wiring and connec tions Battery electrolyte level and specific gravity Operation and damage of lighting system Operation of hor...

Page 294: ...ks from engine Engine starting performance speed noise and exhaust gas conditions Retightening the fuel tank bracket bolts Belt tension and damage Radiator cap condition Cooling system hose clamp position and clamping condi tion Cleaning the air cleaner element Damage of air intake system looseness of clamp and loss of parts Exhaust system PCV valve element replacement Power train Air or oil leaks...

Page 295: ...ndition Looseness and play of steering system including hoses and pipes Cab and frame Looseness and damage of chassis and body Heater and defroster operation Door lock function Seat belt mounting condition Electrical system Looseness and damage of electrical wiring and connec tions Operation and damage of lighting system Operation of horn and turn signal lamps Operation and fluid level of windshie...

Page 296: ...Inspection and maintenance Engine Air fuel oil or coolant leaks from engine Engine starting performance speed noise and exhaust gas conditions Retightening intake and exhaust manifold bolts Valve clearance Oil filter replacement Fuel filter replacement Retightening the fuel tank bracket bolts Belt tension and damage Radiator cap condition Cooling system hose clamp position and clamping condi tion ...

Page 297: ... seal replacement Brake booster packing cup and rubber parts replace ment Brake hose replacement Check valve packing and rubber parts replacement Brake valve packing and rubber parts replacement Steering system Fluid leaks from steering system Steering wheel play Steering operating condition Looseness and play of steering system including hoses and pipes Wheel alignment Right and left turning angl...

Reviews: