EN-23
ENGLIS
H
Projecting images wirelessly (continued)
If the wireless connection fails
Check the following points.
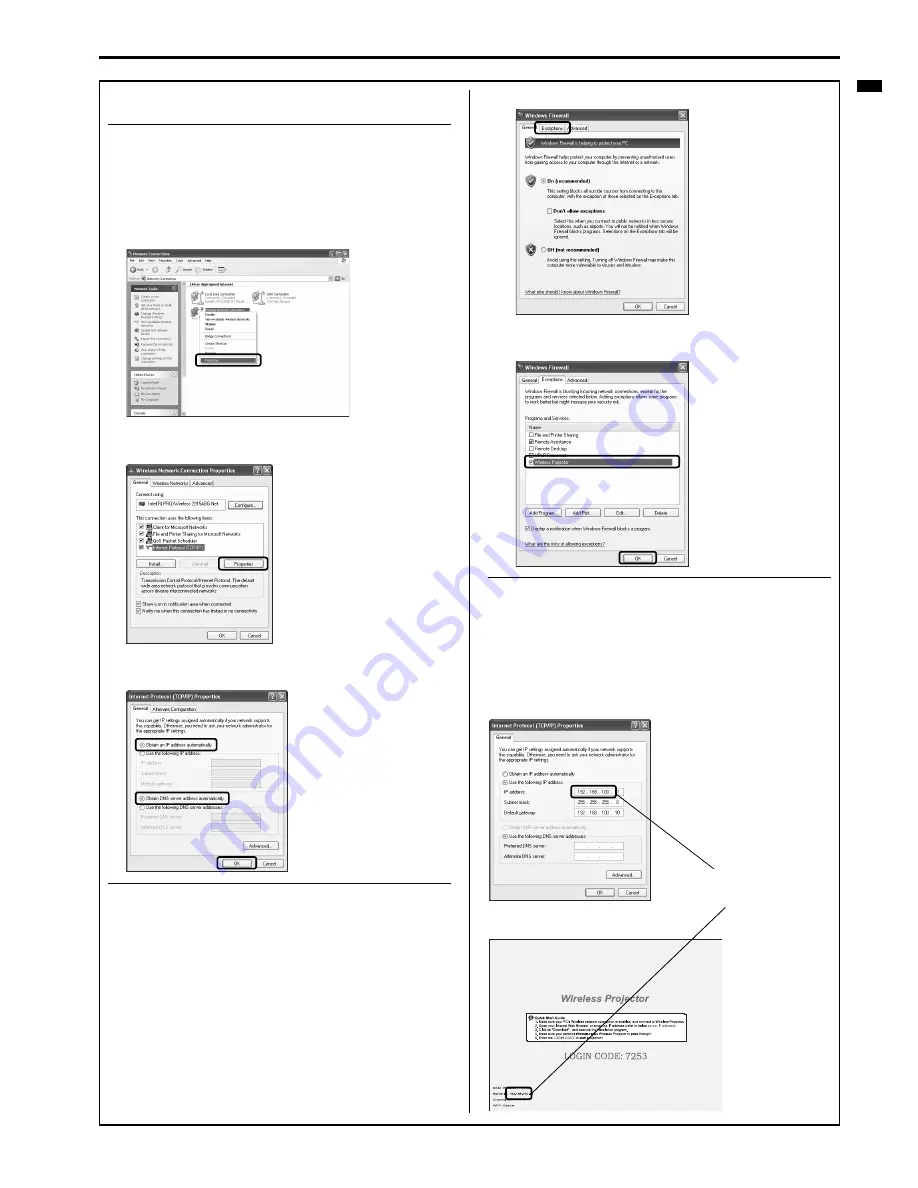
Check if the IP address and DNS server address are set to be
obtained automatically in the "Internet Protocol (TCP/IP)" prop-
erties.
1.
Perform the procedure from Step 2 to 5 in "E. Connecting wire-
lessly".
2.
Right-click "Wireless Network Connection" to select "Proper-
ties".
3.
Select "Internet Protocol (TCP/IP)", then click the [Properties]
button.
4.
Select "Obtain an IP address automatically" and "Obtain DNS
server address automatically", and then click the [OK] button.
Confirm that the "Wireless Projector" check box in the [Excep-
tions] tab in the Firewall settings is selected.
1.
Perform the procedure from Step 2 to 3 in "E. Connecting wire-
lessly".
2.
Click "Windows Firewall".
3.
Click the [Exceptions] tab.
4.
Select the "Wireless Projector" check box, then click the [OK]
button.
If the computer is used with a static IP address, make sure that
the first three digits of the IP address in the "Internet Protocol
(TCP/IP)" properties are the same as those of the IP address of
the projector (indicated in "Server IP:" on the lower left of the
default screen of the projector).
If not, conform the first three digits of their IP addresses to
each other.
Internet Protocol (TCP/IP) properties
Default screen of the projector
Check if the first three digits
conform to each other.


