4
1
2
3
5
7
6
8
9
- 15 -
(6) Setting the maintenance password
Take the following steps to change the maintenance password.
(7) Function setting
Make the Lossnay units' function settings from the remote controller as necessary.
• Refer to the Lossnay unit Installation Manual for information about the factory settings of Lossnay units, function setting numbers,
and setting values.
• When changing the Lossnay units' function settings, record all the changes made to keep track of the settings.
(8) Initializing the settings of the remote controller
Refer to the Instruction Manual for the remote controller.
12. Remote controller check
When the remote controller does not work properly, use the remote controller checking function to troubleshoot the problem.
(1) Check the remote controller display and see if anything is displayed (including lines). Nothing will appear on the remote controller
display if the correct voltage (8.5-12 VDC) is not supplied to the remote controller. If this is the case, check the remote controller wiring
and Lossnay units.
[Procedures]
[1] Select “Remote controller check” from the Service menu, and press the SELECT button to start the remote controller check and see
the check results. To cancel the remote controller check and exit the Remote controller check menu screen, press the MENU or the
RETURN button. The remote controller will not reboot itself.
OK: No problems are found with the remote controller. Check other parts for problems.
6832: There is noise on the transmission line, or the Lossnay unit or another remote controller is faulty. Check the transmission line
and the other remote controllers.
NG (ALL0, ALL1): Send-receive circuit fault. Remote controller needs replacing.
ERC: The number of data errors is the discrepancy between the number of bits in the data transmitted from the remote controller and that
of the data that was actually transmitted over the transmission line. If data errors are found, check the transmission line for external
noise interference.
[2] If the SELECT button is pressed after the remote controller check results are displayed, remote controller check will end, and the
remote controller will automatically reboot itself.
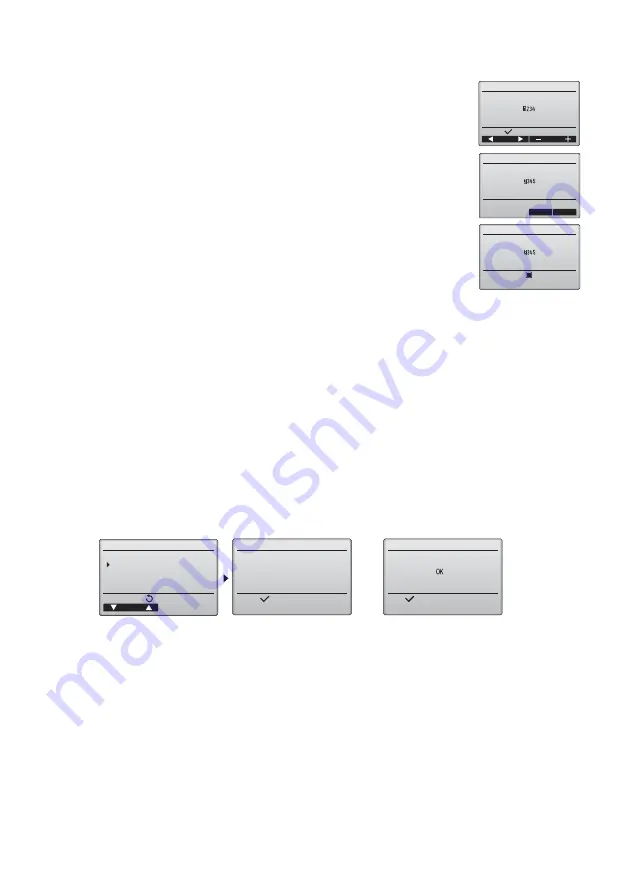
[Procedures]
[1] Select “Maintenance password” on the Service menu, and press the SELECT button to bring up
the screen to enter a new password.
[2] Move the cursor to the digit you want to change with the F1 or F2 button, and set each digit to the
desired number (0 through 9) with the F3 or F4 button.
[3] Press the SELECT button to save the new password.
[4] A confirmation screen will appear asking if you want to change the maintenance password. Press
the F4 button (OK) to save the change. Press the F3 button (Cancel) to cancel the change.
[5] “Changes saved” will appear when the password is updated.
[6] Press the MENU button to return to the Service menu or press the RETURN button to go back to
the “Maintenance password” screen.
Select “Remote controller check”.
Remote controller check results screen
Maintenance password
Cursor
Select:
Enter maintenance password
Change maintenance password.
Maintenance password
Cancel
OK
Enter maintenance password
Update maintenance password?
Maintenance password
Service menu:
Enter maintenance password
Changes saved
Service menu
Remote controller check
Remote controller check
Cursor
:
t
i
x
E
:
n
i
g
e
B
:
u
n
e
m
n
i
a
M
Maintenance password
Remote controller check
Function setting
Initializing
Start checking?
2/2
Summary of Contents for PZ-61DR-E
Page 276: ... 4 2 104 F 32 F 30 1 3 16 30 1 3 16 30 1 3 16 120 4 3 4 120 4 3 4 120 4 3 4 ...
Page 277: ... 5 4 4 1 2 3 10 13 32 6 1 4 ...
Page 278: ... 6 5 7 7 6 2 4 4 ...
Page 279: ... 7 8 9 9 1 2 2 ...
Page 280: ... 8 3 ...


