48
••••••••••••••••••••••••••••••••••••••••••••••••••••••••••••••••••••••••••••••••••••••••••••••••••••••••••••••••••••••••••••••••••••••
<INITIAL SET UP/INFORMATION> (continued)
■
INFORMATION/SERVICE
In the <INFORMATION/SERVICE> screen, the log list/de-
vice list during power failures, etc., can be checked and
the menus can be reset. At the bottom of the menu screen,
the accumulated operation time since the beginning of us-
age is displayed.
♦
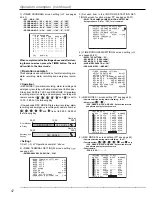
HDD/CFC INFORMATION
The recorded range of the HDD or Compact Flash Card
inserted in the unit can be checked.
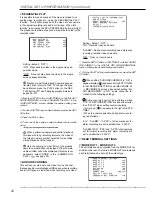
1. (To check the recorded range of the HDD • • • )
Press the SET UP button
}
<SETTINGS>
}
<INITIAL SET
UP/INFORMATION>
}
Select “HDD INFORMATION” in the
<INFORMATION/SERVICE> screen. Display the desired
setting and confirm.
• The <INFORMATION> screen appears.
<INFORMATION>
HDD
MASTER HDD(120GB)
SLAVE NONE
START 02-02-2003 00:00:00
END 04-04-2003 12:30:15
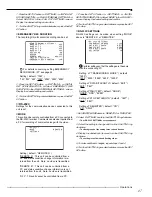
2. (To check the recorded range of the Compact Flash Card
inserted in the unit or to check the menu information recording
status • • • )
Select the SET UP button
}
<SETTINGS>
}
<INITIAL SET
UP/INFORMATION>
}
Select “CFC INFORMATION” in the
<INFORMATION/SERVICE> screen and turn the SHUTTLE
ring clockwise.
• The <INFORMATION> screen of the Compact Flash Card
inserted in the unit is displayed.
<INFORMATION>
CFC
CAPACITY 64MB
MENU INFORMATION
START 02-02-2003 00:00:00
END 02-02-2003 00:00:10
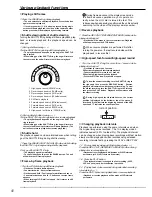
3. Turn the SHUTTLE ring counterclockwise or press the SET
UP button.
♦
WARNING LOG LIST
The WARNING LOG LIST enables to check the number of
failure, date, time and type of failure during power failures,
etc.
<INFORMATION/SERVICE>
HDD INFORMATION
CFC INFORMATION
>>WARNING LOG LIST
RESET TO FACTORY SETTING
HDD DATA CLEAR
CFC DATA CLEAR
ELAPSED TIME 10H
1. Press the SET UP button
}
<SETTINGS>
}
<INITIAL SET
UP/INFORMATION>
}
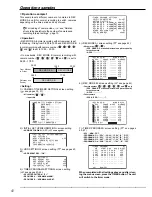
Select “WARNING LOG LIST” in the
<INFORMATION/SERVICE> screen. Turn the SHUTTLE ring
clockwise.
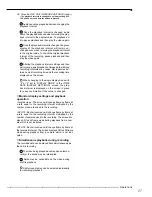
• The <WARNING LOG LIST> screen appears.
• The WARNING LOG LIST can display up to 1000 items. When
the number of items exceed this limit, the latest 1000 items
are displayed.
•
button/turn JOG dial counterclockwise : Selection moves
to the next number.
•
button/turn JOG dial clockwise : Selection moves to the
previous number.
• button : Displays the page with date prior to the date of
the currently opened page.
• button : Displays the page with date newer than the date
of the currently opened page.
• To reset the WARNING LOG LIST, press the WARNING
RESET button for 5 seconds.
When a failure occurs while the <WARNING LOG
LIST> is being displayed, exit the screen and dis-
play the screen again. A new item will be added to
the list.
Failures displayed in the WARNING LOG LIST (
see page 72).
<WARNING LOG LIST>
NO. DATE TIME WARNING
>>0001 02-02-03 10:00:00 ALM ON
“P-LOSS” : Power failure.
“SYS RST” : Reset button was pressed and the unit
was reset.
“ALM OFF” : ALARM INTERRUPT button was
pressed and the unit was put on interruption.
“ALM ON” : ALARM INTERRUPT button was
pressed and the alarm interrupt was cancelled.
2. Turn the SHUTTLE ring counterclockwise or press the SET
UP button.
♦
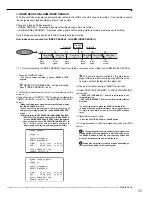
RESET TO FACTORY SETTING
Menu screen settings are reset.
1. Press the SET UP button
}
<SETTINGS>
}
<INITIAL SET
UP/INFORMATION>
}
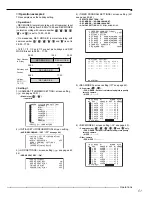
Select “RESET TO FACTORY
SETTING” in the <INFORMATION/SERVICE> screen. Turn
the SHUTTLE ring clockwise.
• The <RESET TO FACTORY SETTING> screen appears.
• When not resetting menu screen settings, turn the SHUTTLE
ring counterclockwise.
<RESET TO FACTORY SETTING>
>>EXECUTE
SHUTTLE>>:EXECUTE,<<:CANCEL
2. Turn the SHUTTLE ring clockwise.
• The menu screen settings are reset.
3. Turn the SHUTTLE ring counterclockwise or press the SET
UP button.
Summary of Contents for DX-TL900U
Page 75: ...75 Specifications ...
Page 76: ...872C276A8 PRINTED IN MALAYSIA ...

