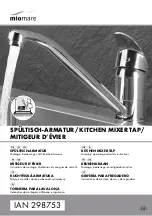


10 GB/IE
always positioned within the area of the sink,
otherwise escape of water can lead to serious
flooding to your house or building.
CAUTION! DANGER OF SCALDING!
When making the hot water setting please ensure
that the temperature of the water is not too high.
Before installation, make yourself familiar with
all the existing services, e.g. water connection
and stopcocks.
Please read carefully through these operating
instructions before installing and using the product.
Keep all the safety advice and instructions in a
safe place for future reference!
Installation
Installing the tap
Turn off the main water supply to prevent serious
leakage of water. Allow any remaining water
in the pipework to drain.
Install the tap as shown in figs. A–C.
CAUTION!
Do not bend the hoses or place
them under tension. Otherwise material damage
could result.
Flushing the tap
The tap must be flushed through before first use
to remove any dirt. To do this, follow these steps
(see fig. D):
Screw the mixer nozzle
7
off.
Open the main water supply and allow the
water to run for two minutes.
Then screw the mixer nozzle on again.
Operation
Bringing into use
Note:
If the tap has not been used for a long period
flush the pipes through thoroughly in order to avoid
stagnation and build-up of residues in the drinking
water supply.
Open the main water supply.
Lift the control lever
8
and swivel it to the right
or left to regulate the strength or temperature
of the water flow.
Hot water:
Swivel the control lever to the left.
Cold water:
Swivel the control lever to the right.
Check that the mixer tap is working properly.
To do this, swivel the lever into all the possible
positions. Please check the connections regularly
for leaks.
Setting the temperature limiter
The cartridge
13
in this unit has a temperature
limiter. This function is not activated in the factory
(neutral setting).
CAUTION!
Change the temperature limiter
setting only after the tap has been installed.
Follow fig C. to set the temperature limitation.
Turn off the main water supply.
Remove the red / blue hot / cold label
10
care-
fully by a small flat screwdriver.
Release the locking screw
9
by turning it anti-
clockwise using the Hexagonal key.
CAUTION!
Do not take the screw completely
out; just loosen it until the control lever
8
can
be easily taken off.
Take off the control lever
8
.
Loosen the cartridge covering ring
11
by hand.
Then, screw off the cartridge locking ring
12
by using a pipe wrench.
Now pull the setting ring
15
upwards with the
help of a screwdriver.
Note:
Do not remove the cartridge
13
.
Place the setting ring
15
in the desired position
(see fig. E).
Note:
The setting ring
15
can limit the turning
angle of the handle, so that the amount of hot
water can be limited.
Tighten the cartridge retaining ring
12
onto the
tap body
14
again by using a pipe wrench.


