background image

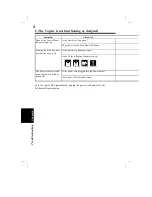
1. Care of the Copier


Ch

a

p

te

r 8

Mi

sce

ll

a

n

eo

u

s


99

Summary of Contents for EP1052

Page 1: ... this declaration relates is in conformity with the specifications below This declaration is valid for the area of the European Union EU only Product Type Copying Machine Product Name EP1052 Options MB 4 Standards Safety EN 60 950 1992 Safety of information technology equipment including electrical business equipment EMC EN 55 022 Class B 1995 Limits and method for measurement of radio disturbance...

Page 2: ...g this Manual Organization viii Page Organization ix Terms and Symbols for the Type of Originals and Copy Paper x Chapter 1 Safety Notes p 1 1 Installing the Copier p 2 Installation Site Power Source Grounding Space Requirements 2 Precautions for Use p 4 Operating Environment Using the Copier Properly Care of Copier Supplies Moving ii ...

Page 3: ...nside Copier p 10 Multi Bypass Tray p 12 3 Control Panel Keys and Indicators Control Panel p 14 Display p 16 4 Turning ON and OFF and Resetting the Copier Turning ON and OFF p 19 When Copier is Turned ON p 19 Minimizing the Warm up Time p 20 Initial Mode and Panel Resetting p 21 Auto Reset Function p 22 Contents iii ...

Page 4: ...s p 26 Checking the Copy Paper Size and Selecting the Paper Source p 28 Zoom Ratio Types of Zoom Ratios p 30 Zoom Ratio Table Original Size to Copy Paper Size p 33 Image Density p 34 Book Copying p 36 Number of Copies p 38 Starting the Copy Cycle p 39 Manual Bypass Copying p 40 Contents iv ...

Page 5: ...hoice p 48 Chapter 5 When an Indicator Lights Up p 59 Replenishing Supplies Clearing Misfeeds and Correcting a Closure Failure 1 Quick Reference for Indicator Lights p 60 2 Detailed Instructions for Indicator Lights Add Toner Indicator p 62 Add Paper Indicator p 64 Closure Failure Indicator p 67 Misfeed Indicator p 68 Call Tech Rep Indicator p 71 I U Service Life Indicator p 72 Contents v ...

Page 6: ...ks or spots The edge of the copy is dirty The image on the copy is not aligned properly 2 The Copier is not functioning as designed p 86 None of the Control Panel Indicators light up Pressing the Start Key does not start the copy cycle The Copier is not activated when the Power Switch is turned ON Chapter 7 Specifications p 89 1 Copier p 90 2 Multi Bypass Tray p 92 Contents vi ...

Page 7: ...er Size p 100 3 Zoom Ratio Table Original Size to Copy Paper Size p 101 4 Index p 102 Chapter 1 Safety Notes Chapter 2 Getting to Know your Copier Chapter 3 Making Copies Chapter 4 Auxiliary Functions Chapter 5 When an Indicator Lights Up Chapter 6 Troubleshooting Chapter 7 Specifications Chapter 8 Miscellaneous vii ...

Page 8: ...ges offer quick at a glance instructions for making copies Each step is keyed to a page number with more detailed information Chapter 4 Auxiliary Functions About the auxiliary functions that can be used for specific purposes Chapter 5 When an Indicator Lights Up About the various warning indications given on the control panel and steps to correct these conditions Chapter 6 Troubleshooting Instruct...

Page 9: ...dicator on the control panel are indicated as follows p XX Cross reference Shows the page to refer to for more detailed information Index To locate your Chapter quickly Section title Table of contents of the Chapter To quickly locate your page in the chapter 1142O166CA Blinking Light 1158O009AA 1158O010AA Steady Light Using This Manual ix ...

Page 10: ...to the Exit Tray In the figure below the direction in which the copy paper is fed as indicated by the arrow is called the feeding direction Terms and Symbols for the Type of Originals and Copy Paper A few special terms and symbols are used in this manual to designate types of originals and copy paper These two pages explain about these terms and symbols 1158O032AA Using This Manual x ...

Page 11: ...ength A Width B Length Terms and Symbols Used 1139O1610A Lengthwise When the original or copy has a length longer than its width we call it lengthwise and use symbol L or 1139O1620A Crosswise When the original or copy has a length shorter than its width we call it crosswise and use symbol C or Using This Manual xi ...

Page 12: ...xii ...

Page 13: ... environment conditions and precautions for use 1 Installing the Copier p 2 Installation Site Power Source Grounding Space Requirements 2 Precautions for Use p 4 Operating Environment Using the Copier Properly Care of Copier Supplies Moving Chapter 1 Safety Notes 1 ...

Page 14: ...m the same power outlet make sure that the capacity of the outlet is not exceeded The outlet should be located near the copier and easily accessible Never connect by means of a multiple socket any other appliances or machines to the outlet being used for the copier If an extension cord is needed use one with a capacity more than the power consumption of the copier Make sure that no unusual excessi...

Page 15: ...dhere to the recommended space requirements detailed below NOTE Be sure to allow a clearance of 6 in or more at the back of the copier as there is a ventilation duct 1152O037AA 1 063 430 633 841 469 372 Scale mm 1152O038AA EP1052 1 250 655 253 387 1 Installing the Copier Chapter 1 Safety Notes 3 ...

Page 16: ...prays near the copier NEVER place a vase or vessel containing water on the copier NEVER drop paper clips staples or other small pieces of metal into the copier NEVER attempt to remove any Cover that is secured ALWAYS insert the Power Plug all the way into the outlet ALWAYS make sure that the outlet is visible clear of the copier or copier cabinet ALWAYS ensure that the copier does not ride on the ...

Page 17: ... your hands become soiled with toner wash them with soap and water immediately Moving If you need to transport the copier over a long distance consult your Technical Representative 2 Precautions for Use Placer le copieur dans une pièce largement ventilée Une quantité d ozone négligable est dégagée pendant le fonctionnement du copieur quand celui ci est utilisé normalement Cependant une odeur désag...

Page 18: ...2 Precautions for Use Safety Notes Chapter 1 6 ...

Page 19: ...pier Parts and Accessories Outside Copier p 9 Inside Copier p 10 Multi Bypass Tray p 12 3 Control Panel Keys and Indicators Control Panel p 14 Display p 16 4 Turning ON and OFF and Resetting the Copier Turning ON and OFF p 19 When Copier is Turned ON p 19 Minimizing the Warm up Time p 20 Initial Mode and Panel Resetting p 21 Auto Reset Function p 22 Chapter 2 Getting to Know your Copier 7 ...

Page 20: ...per 80 g m2 The Manual Bypass Tray allows you to make a copy on paper which is not loaded in the Drawer and which is fed into the copier manually via this Tray 1139O0170A Multi Bypass Tray MB 4 Option Holds up to 50 sheets of standard paper which is not loaded in any of the Drawers allowing to make copies on them p 41 MB 4 Chapter 2 Getting to Know your Copier 8 ...

Page 21: ...40 5 Right Door Open to clear a paper misfeed p 69 6 Total Counter Shows the total number of copies made so far 7 Front Door Open to Replace the Toner Bottle p 62 Clear a paper misfeed p 68 Clean the Corona Units p 98 Closing the Front Door after a misfeed has been cleared will turn the Misfeed Indicator on the control panel OFF 8 Paper Drawer Holds up to 250 sheets of paper The Edge Guide and Tra...

Page 22: ... Cleaning Lever Upper Lower Operate the Lever to clean the corresponding Corona Unit if unwanted lines are produced on the copy p 98 5 Lock Release Lever Turn counterclockwise to swing up the Upper Half of the copier to clear a paper misfeed p 68 6 Toner Bottle Contains toner Replace it with a new one when the Add Toner Indicator lights up p 62 7 Toner Bottle Holder Swing open to replace the Toner...

Page 23: ...ng Unit Lock Release Lever Operate when replacing the Imaging Unit p 72 11 Dehumidifier Switch Turn ON to prevent condensation from forming on the PC Drum when power is turned OFF For Technical Representative only 12 Fusing Unit Handle Hold onto this Lever when lifting the Upper Half of the Fusing Unit p 69 13 Fusing Unit Fuses the toner image onto the paper Chapter 2 Getting to Know your Copier 2...

Page 24: ...i Bypass Tray Load your paper on this Tray It allows you to make copies continuously on paper fed from this Tray p 41 3 Multi Bypass Tray Extender Slide this Extender out to use large size copy paper p 41 Multi Bypass Tray MB 4 Chapter 2 Getting to Know your Copier 2 Copier Parts and Accessories 12 ...

Page 25: ...Chapter 2 Getting to Know your Copier 2 Copier Parts and Accessories 13 ...

Page 26: ...necessary to make the zoom smaller in 1 increments p 32 8 Zoom Up Key Press as necessary to make the zoom larger in 1 increments p 32 9 Key Pad Use to enter the number of copies to be made and other numeric data p 38 10 Energy Saver Key Press to set the copier into the Energy Saver Mode p 20 11 Panel Reset Key Press to set the copier into the initial mode clearing all settings made previously on t...

Page 27: ...ary to make the exposure level higher in the Manual Exposure Mode p 35 19 Auto Exposure Mode Key Press to select the Auto Exposure Manual Exposure or Photo Mode p 35 20 Exposure Control Key Lighter Press as necessary to make the exposure level lower in the Manual Exposure Mode p 35 21 Book Key Press as necessary to select the Book Copying Mode p 36 1 4 7 3 6 9 C 2 5 8 0 A 100 Paper 50 200 Auto Lig...

Page 28: ...or Right Door is left open Misfeed Indicator Indicates that a paper misfeed has occurred The location of the misfeed is also indicated by a round marker p 68 Example Shows that a misfeed has occurred Example inside the copier A 100 Meter Count Toner Drum Dehumidify Paper 50 200 Auto Lighter Darker Book Photo Auto Photo 141 A4 A3 115 B4 A3 100 Full Size 81 B4 A4 70 A3 A4 A3 A4 B4 A4 FLS A5 Inch 115...

Page 29: ...ttle as soon as possible p 62 I U Service Life Indicator Indicates that the Imaging Unit needs replacement Replace the Imaging Unit p 72 2 Paper Information Display Paper Size Indicators Show the size of paper currently loaded in the Drawer p 28 Add Paper Indicator Lights up when the currently selected Drawer has run out of paper Add paper as necessary p 64 1158O006AA Paper 1142O170CA Paper A4 114...

Page 30: ... Lighter Darker Photo Auto Photo 1152O019CA Auto Lighter Darker Photo Auto Photo 1152O021CA 4 Exposure Information Display Auto Exposure Indicator Indicates that the copier is now in the Auto Exposure Mode p 34 Exposure Level Indicator Shows the exposure setting level in the Manual Exposure Mode p 34 The center LED is normally lit Photo Mode Indicator Indicates that the copier is now in the Photo ...

Page 31: ...wer Switch to the position Press the Power Switch to the position 1142O026AA 4 Turning ON and OFF and Resetting the Copier When Copier is Turned ON The period of time can be changed by using the User s Choice p 54 The Auto Shut OFF function will automatically shut down the copier a given period of time after the last activity The initial setting is 30 minutes 1152O011AA Blinking Orange Turns Green...

Page 32: ...m up cycle to about 20 sec The Energy Saver Mode is automatically activated a given period of time after the copier has been used last The initial is 15 min 1139O2360A Leaving the Energy Saver Mode Press any Key on the control panel for instance the Start Key This cancels the Energy Saver Mode and the copier will be ready to make copies in about 20 seconds Energy Saver Panel Reset 1142O093CA 1142O...

Page 33: ...l settings can be changed by User s Choice For details see USER S CHOICE p 48 Useful Tip No of copies to be made 1 Zoom ratio Full size 100 Auto Exposure Mode Non Sort Mode A 100 Meter Count Toner Drum Dehumidify Paper 50 200 Auto Lighter Darker Book Photo Auto Photo 141 A4 A3 115 B4 A3 100 Full Size 81 B4 A4 70 A3 A4 A3 A4 B4 A4 FLS A5 Inch 1158O023DA Chapter 2 Getting to Know your Copier 4 Turni...

Page 34: ...pies to be made and zoom ratio Auto Reset Function If no Key on the control panel is pressed within about 60 seconds after a copy cycle has been completed or copying settings made the Auto Reset Function is activated to cause the copier to return to the initial mode automatically The Auto Reset Function can be enabled or disabled by User s Choice For more details see USER S CHOICE p 52 Useful Tip ...

Page 35: ...er with more detailed information 1 Copying Overview p 24 2 Copying Procedure Placing Originals p 26 Checking the Copy Paper Size and Selecting the Paper Source p 28 Zoom Ratio Types of Zoom Ratios p 30 Zoom Ratio Table Original Size to Copy Paper Size p 33 Image Density p 34 Book Copying p 36 Number of Copies p 38 Starting the Copy Cycle p 39 Manual Bypass Copying p 40 Chapter 3 Making Copies 23 ...

Page 36: ...d place the original face down on the Original Glass p 26 Check whether the desired paper size is loaded into the Drawer or not p 28 YES Go step 3 or step 7 NO Load the desired paper size or make a copy using a Manual Bypass Tray Add Paper Indicator p 64 Manual Bypass Copying p 40 2 Checking the Copy Paper Size and Selecting the Paper Source Select the desired fixed zoom ratio p 31 Set the zoom ra...

Page 37: ...rect number p 38 A Auto Lighter Darker Photo Auto Photo Set the image density in the Manual Exposure Mode p 35 1152O022CA A Auto Lighter Darker Photo Auto Photo Select the Auto Exposure Mode or Photo Mode p 35 1152O023CA Book 1142O097CC 1142O097CC Chapter 3 Making Copies 8 Starting the Copy Cycle Press the Start Key to start the copy cycle p 39 Press the Stop Key to stop the copy cycle p 39 1139O2...

Page 38: ... 1142O142DB Three reduction ratios 50 70 81 Three enlargement ratios 115 141 200 And Full Size 100 Types of Zoom Ratios Fixed Zoom Ratios 50 200 1139O3590A Any ratio from 50 to 200 in 1 increments can be selected Zoom Ratios A 100 Meter Count Toner Drum Dehumidify Paper 50 200 Auto Lighter Darker Book Photo Auto Photo 141 A4 A3 115 B4 A3 100 Full Size 81 B4 A4 70 A3 A4 A3 A4 B4 A4 FLS A5 Inch 1158...

Page 39: ...The Zoom Ratio Indicator displays the actual percentage of the selected ratio 100 1142O141DC 141 A4 A3 115 B4 A3 100 Full Size 81 B4 A4 70 A3 A4 1142O141DB Enlargement Each time the Enlargement Key is pressed it selects a new enlargement ratio The Zoom Ratio Indicator displays the actual percentage of the selected ratio 100 1142O142DC 141 A4 A3 115 B4 A3 100 Full Size 81 B4 A4 70 A3 A4 1142O142DB ...

Page 40: ...s reached Zoom Down Key makes the ratio smaller Zoom Up Key makes the ratio greater Setting a Zoom Ratio Zoom range 50 to 200 To save time first select the fixed ratio nearest to the target zoom ratio before using the Zoom Up or Down Key Useful Tip Chapter 3 Making Copies 2 Copying Procedure 32 ...

Page 41: ...5 115 B4 200 B5 141 Inch Size Original Size Copy Paper Size Zoom Ratio 11 17 11 14 82 279 4 431 8 mm Legal 77 Foolscap 76 Letter 64 Invoice 50 11 15 11 14 93 279 4 381 mm Legal 77 Foolscap 77 Letter 73 Invoice 50 11 14 Legal 77 279 4 355 6 mm Foolscap 77 Letter 77 Invoice 50 Legal Foolscap 92 8 1 2 14 Letter 78 215 9 355 6 mm Invoice 60 11 17 121 Foolscap Letter 84 8 1 2 13 Invoice 64 215 9 330 2 ...

Page 42: ...ode you can vary the exposure level in nine steps Manual Exposure Mode Auto Lighter Darker Photo Auto Photo Auto Lighter Darker Photo Auto Photo Image Density Auto Lighter Darker Photo Auto Photo 1152O020CA The copier can make a faithful reproduction of an original having halftone images such as photos The image density of the photo may be varied in nine steps Photo Mode A 100 Meter Count Toner Dr...

Page 43: ...e copier has been factory set to automatically select the Auto Exposure Mode The User s Choice can be used to change this default setting to the Manual Exposure Mode p 50 Useful Tips A Auto Lighter Darker Photo Auto Photo 1152O023CA Press the Auto Exposure Mode Key A as necessary to light up the Auto Exposure Indicator Auto Selecting the Exposure Mode Each time the Auto Exposure Mode Key A is pres...

Page 44: ...an make copies with the Original Cover raised Book original refers to an open bound original 1 Selecting the Book Copying Mode Not positioning an open book properly will result in copies with pages in incorrect order Do not look directly at the Original Glass surface as a very intense beam of light can be emitted NOTES 1158O017CA Book 1158O017CA Press the Book Key The Book Indicator lights up 2 Ch...

Page 45: ...Drawer Indicator and the corresponding Paper Size Indicator blink on the Control Panel In such a case load paper of the same size and in the same direction of each page of a book into the Drawer 1158O026DA 1139O1460A A4 Crosswise NOTE Paper 1158O026DA A3 A4 A4 A5 Chapter 3 Making Copies 2 Copying Procedure 37 ...

Page 46: ... The Multi Copy Display now shows 18 1 7 3 6 9 C 2 5 8 0 4 1142O169AA To correct or reset a number entry press the Clear Key The Multi Copy Display is reset to 1 Correcting the Number Entry 1139O3750A 1 4 7 3 6 9 C 2 5 8 0 A 100 Meter Count Toner Drum Dehumidify Paper 50 200 Auto Lighter Darker Book Photo Auto Photo 141 A4 A3 115 B4 A3 100 Full Size 81 B4 A4 70 A3 A4 A3 A4 B4 A4 FLS A5 Inch 1158O0...

Page 47: ...592A To stop a multi copy cycle in progress press the Stop Key Stopping a Multi Copy Cycle The Start Key soon turns green and the copier stops The Multi Copy Display shows the number of copies yet to be made 1 4 7 3 6 9 C 2 5 8 0 A 100 Meter Count Toner Drum Dehumidify Paper 50 200 Auto Lighter Darker Book Photo Auto Photo 141 A4 A3 115 B4 A3 100 Full Size 81 B4 A4 70 A3 A4 A3 A4 B4 A4 FLS A5 Inch...

Page 48: ... Multi Bypass Tray Plain paper Approx 50 sheets Plain paper once copied paper Up to 20 sheets Heavyweight paper transparencies translucent paper Approx 20 sheets 1139O0150A Place the original on the Original Glass and make the control panel settings Insert the copy paper into the Manual Bypass Tray This automatically starts the copy cycle Using the Manual Bypass Tray 1 2 Insert the copy paper one ...

Page 49: ...aper on the Tray and insert it into the copier until it stops 3 Before inserting fan the paper stack well if you are using transparencies or translucent paper Correct any curl if you are using thick paper NOTES 1139O2360A Using the Key Pad enter the number of copies to be made Press the Start Key to start the copy cycle p 39 4 Do not insert the paper while the copier is in the warm up cycle or a m...

Page 50: ...Chapter 3 Making Copies 2 Copying Procedure 42 ...

Page 51: ...he Auxiliary functions that can be used for specific purposes 1 Checking the Total Number of Copies Mode p 44 2 Toner Replenisher Function Increasing the Image Density p 46 3 Drum Dehumidifier Function p 47 4 User s Choice p 48 Chapter 4 Auxiliary Functions 43 ...

Page 52: ...e Counter Display 1 Checking the Total Number of Copies Mode 50 200 The Zoom Ratio Indicator shows the upper 3 digits of the count The Multi Copy Display shows the lower 2 digits of the count Example The count is 12 345 copies 1139O3790A Meter Count Toner Drum Dehumidify 1142O152CA 1142O152CA This function allows you to check the total count of the two counters of the copier Chapter 4 Auxiliary Fu...

Page 53: ...Count Toner Drum Dehumidify 1142O116CA 1142O116CA Press the Meter Count Key once again This restores the copier to the state before entering the Meter Count Mode 3 1 Checking the Total Number of Copies Mode Meter Count Toner Drum Dehumidify 1142O116CA 1142O116CA Press the Meter Count Key again The count of the Size Counter is shown across the Zoom Ratio Indicator and Multi Copy Display 2 Chapter 4...

Page 54: ...en making a number of copies from an original with dark solid areas As a result the image density of the copy will become lighter In such a case you can use the Toner Replenisher function to regain the normal image density quickly Original Copy Copy Made After Toner Replenishing Even if you continue making copies after the image density has become lighter the copier will gradually recover the norm...

Page 55: ...aces such as the surface of the PC Drum 2 PC Drum Functions in the copier as film does in a camera 1142O119CA Press the Drum Dehumidify Key This sets the copier into the Drum Dehumidifier Mode which lasts for 90 seconds Make a copy to check that the copy image is clear Run the Drum Dehumidifier cycle once again if the copy image is not yet clear 1 2 Before a Drum Dehumidifier Operation After a Dru...

Page 56: ...r s Choice allows you to select the default settings which are automatically selected in the initial mode according to your own needs By setting defaults for the paper size zoom ratio and other settings that are most frequently used time and effort to make extra settings will be eliminated when the copier is turned ON or when the auto reset function is activated For more details consult your Techn...

Page 57: ...ow level 4 47 Low level 3 48 Low level 2 49 Low level 1 50 Standard 51 High level 1 52 High level 2 When the exposure level is Low the greater the level number is the lower the exposure level When the exposure level is High the greater the level number is the higher the exposure level Lower O Higher Level 4 3 2 1 Standard 1 2 Chapter 4 Auxiliary Functions 49 ...

Page 58: ...osure level EXP in the Manual Exposure Mode If any value between 0 and 8 is selected The Auto Exposure Mode is selected If any value between 10 and 18 is selected The Manual Exposure Mode is selected Auto Exposure Mode as Default Setting Value Description Initial Setting Default Mode Exposure Setting in Manual Mode 0 Auto Manual EXP1 1 Auto Manual EXP2 2 Auto Manual EXP3 3 Auto Manual EXP4 4 Auto ...

Page 59: ... 14 Manual Exposure Mode EXP5 15 Manual Exposure Mode EXP6 16 Manual Exposure Mode EXP7 17 Manual Exposure Mode EXP8 18 Manual Exposure Mode EXP9 Lighter Darker Auto Photo 1 2 3 4 5 6 7 8 9 With EXP5 at the central level the exposure level will be lower as the number becomes smaller and it is higher as the number becomes greater 1152O043CA 4 User s Choice Chapter 4 Auxiliary Functions 51 ...

Page 60: ...The control panel settings are canceled and the copier is reset into the default mode after 30 seconds Auto Panel Reset If 2 is selected The control panel settings are canceled and the copier is reset into the default mode after 60 seconds Auto Panel Reset Setting Value Description Initial Setting 0 Auto Panel Reset is not activated 1 Auto Panel Reset is activated after 30 sec 2 Auto Panel Reset i...

Page 61: ... a copy cycle has been completed or a key on the control panel has been operated The period of time can fall within the range 1 to 120 min The initial setting is 15 min Setting Value Description Initial Setting 1 Enabled 1 min 2 Enabled 2 min 3 Enabled 3 min 98 Enabled 98 min 99 Enabled 120 min 4 User s Choice Chapter 4 Auxiliary Functions 53 ...

Page 62: ...er a copy cycle has been completed or a key on the control panel has been operated In the initial setting the Auto Shut OFF Function is activated 30 min after the above said event Setting Value Description Initial Setting 0 Disabled 1 Enabled 1 min 2 Enabled 2 min 3 Enabled 3 min 98 Enabled 98 min 99 Enabled 120 min 4 User s Choice Chapter 4 Auxiliary Functions 54 ...

Page 63: ...4 User s Choice Chapter 4 Auxiliary Functions 55 ...

Page 64: ...lt exposure mode level Press and the Zoom Ratio Indicator shows U 14 1 2 Panel Reset 1139O4782A 1139O4782A Keep pressing the Panel Reset Key for about 3 seconds appears on the Zoom Ratio Indicator and the indicator on the Multi Copy Display goes out U 1 1139O3850A Zoom Ratio Indicator 1139O3850A 1139O3860A Multi Copy Display 1139O3860A Zoom Ratio Indicator 4 User s Choice 1139O3860A Multi Copy Dis...

Page 65: ... Multi Copy Display 3 1142O169AA 1 7 3 6 9 C 2 5 8 0 4 1142O169AA Press the Clear Key This clears the current setting 4 Zoom Ratio Indicator 1139O3880A Multi Copy Display 1139O3880A Zoom Ratio Indicator 1158O029DA 4 User s Choice 1139O3860A Multi Copy Display 1139O3860A 1158O029DA Chapter 4 Auxiliary Functions 57 ...

Page 66: ...This allows the copier to leave the User s Choice Mode and the control panel shows the default settings again 7 If the Choice Code number on the Zoom Ratio Indicator or codes on the Multi Copy Display start blinking when the Start Key is pressed following step 2 or 5 that entry is invalid Check the correct number Press the Clear Key and enter the correct one NOTE Zoom Ratio Indicator 1158O029DA 11...

Page 67: ...e control panel including those that entail inhibition of the initiation of a copy cycle It also shows action to be taken for each case 1 Quick Reference for Indicator Lights p 60 2 Detailed Instructions for Indicator Lights Add Toner Indicator p 62 Add Paper Indicator p 64 Closure Failure Indicator p 67 Misfeed Indicator p 68 Call Tech Rep Indicator p 71 Chapter 5 When an Indicator Lights Up 59 ...

Page 68: ...icator The copier has run out of toner Warning only and a copy cycle can still be initiated Replace the Toner Bottle by following the steps given in the Add Toner Indicator section p 62 Add Paper Indicator The paper has run out Add paper by following the steps given in the Add Paper Indicator section p 64 Misfeed Indicator There is a misfeed sheet of paper inside the copier Check the Monitor Displ...

Page 69: ...r The copier has developed a technical malfunction If the Call Tech Rep Indicator remains lit even after you have reset it call your Technical Representative p 71 1139O3940A 1 Quick Reference for Indicator Lights Chapter 5 When an Indicator Lights Up 61 ...

Page 70: ...e the Toner Bottle with a new one as soon as possible by following the procedure given below Replacing the Toner Bottle 1142O058AA Open the Front Door 1 1139O1380A Swing open the Toner Bottle Holder and pull out the Toner Bottle 2 1139O1410A Shake a new Toner Bottle well 3 2 Detailed Instructions for Indicator Lights Chapter 5 When an Indicator Lights Up 62 ...

Page 71: ...rated 4 6 Try to replace the Toner Bottle with a new one as soon as possible once the Add Toner Indicator lights up Continuing to make copies without changing the Toner Bottle will result in increasingly lighter images Use ONLY the specified toner for this copier Using any other toner could result in image trouble NOTES Use the Toner Replenisher Function if the image is light immediately after rep...

Page 72: ...hly 1 2 2 Detailed Instructions for Indicator Lights 1139O0390A Slide out the Edge Guide and Trailing Edge Stop in the direction of the arrows 3 Adding Paper Drawer When the Drawer or the Multi Bypass Tray has run out of paper the Add Paper Indicator lights up At this time you cannot start a new copy cycle Use the following procedure to load paper into the Drawer or the Multi Bypass Tray Paper Cha...

Page 73: ...ide faces down Make sure that the paper stack rests under the two catches of the Drawer 4 1139O0420A Slide the Edge Guide and Trailing Edge Stop tightly up against the paper Gently slide the Drawer back in 5 1151O094AA 2 Detailed Instructions for Indicator Lights NOTE The paper should be loaded no higher than the Max Level Indicator on the Edge Guide 1151O005AC Chapter 5 When an Indicator Lights U...

Page 74: ...ed Instructions for Indicator Lights Adding Paper Multi Bypass Tray 1139O1370A Front Side Unwrap the package of the copy paper and fan the paper stack thoroughly 1 1139O6130A Load the paper stack onto the Tray so that its front side faces up and insert it until it stops 2 Paper 1158O021CA The indications on the left show that the Multi Bypass Tray has run out of paper 1158O021CA Chapter 5 When an ...

Page 75: ...cation of the closure failure At this time you can no longer start a new copy cycle Correct the closure failure by following the procedure given below 2 Detailed Instructions for Indicator Lights Monitor Display Check Locations Check that the Right Door or Front Door is closed 1142O065AA 1158O004AA 1142O064AA Chapter 5 When an Indicator Lights Up 67 ...

Page 76: ...ording to the procedure given below 2 Detailed Instructions for Indicator Lights 1139O2160A When the copier is equipped with a Multi Bypass Tray Unload the paper stack from the Multi Bypass Tray Open the Front Door Turn the Lock Release Lever counterclockwise to unlock and swing up the Upper Half of the copier Be careful not to touch the area marked with High Voltage and Caution HOT with bare hand...

Page 77: ...ansport Section 3 2 Detailed Instructions for Indicator Lights 1142O073AA Holding up the Fusing Unit pull out the sheet of paper 2 1142O074AA Open the Right Door Then pull out the sheet of paper from the Manual Bypass Port 4 1142O075AA Pull out the sheet of paper from the Paper Take Up Section Close the Right Door 5 6 CAUTION HOT Chapter 5 When an Indicator Lights Up 69 ...

Page 78: ...139O6130A When the copier is equipped with a Multi Bypass Tray Fan the paper stack thoroughly and place it back on the Tray Gently swing down and lock the Upper Half of the copier Then close the Front Door 1142O076AA 1142O060AA Slide out the Drawer and unload the paper from the Drawer Next push down the Paper Lifting Plate until it is locked into position Chapter 5 When an Indicator Lights Up 70 ...

Page 79: ...g the instructions below If the Call Tech Rep Indicator lights up again call your Technical Representative immediately Call Tech Rep Indicator 1142O080AA Open the Front Door then close it This will reset the Call Tech Rep Indicator Resetting the Call Tech Rep Indicator If the Call Tech Rep Indicator lights up again call your Technical Representative immediately When calling your Technical Represen...

Page 80: ...0 Copies Add Toner Indicator lights up Blinking No new copy cycle can be initiated When 2 500 more copies are made with Add Toner Indicator lighting up or 7 500 more copies are made after the I U Service Life Indicator has started blinking the I U Service Life Indicator lights up steadily and the copier inhibits the initiation of a new copy cycle See the diagram below Replace the Imaging Unit as s...

Page 81: ...e the I U in a hot place of 40 C 104 F or more 1139O6052A Do not store the I U in a humid place or subject to water splash 1139O6062A Do not store the I U upside down or tilted Do not subject the I U to vibration 2 Detailed Instructions for Indicator Lights Chapter 5 When an Indicator Lights Up 73 ...

Page 82: ...er and while holding it down pull the I U halfway out from the copier 2 1139O0510A Firmly grasp the I U with both hands and pull it all the way out of the copier 3 2 Detailed Instructions for Indicator Lights 1142O072AA If the copier is equipped with an Automatic Document Feeder Unlock and swing up the Upper Half of the copier Then lock Stopper M2 Chapter 5 When an Indicator Lights Up 74 ...

Page 83: ...t from the Carton Box Take the I U with its bag out of the Carton Box 4445U002AA Take the I U out of the bag 4445U003AA Peel off the three pieces of tape and packing materials 1 2 2 3 1 Unpacking the I U Setting up the I U 2 Detailed Instructions for Indicator Lights Chapter 5 When an Indicator Lights Up 75 ...

Page 84: ... in the illustration 4 4488O001AA Align the I U with the Rails in the copier 5 1139O0540A Slide the I U all the way into the copier 6 4445U011AA Carefully pull the polyester tape from the I U 3 2 Detailed Instructions for Indicator Lights Chapter 5 When an Indicator Lights Up 76 ...

Page 85: ...on by pushing down on the portion marked with Push Down Here Only 8 An improperly installed I U could be a cause of copier malfunction NOTE 2 Detailed Instructions for Indicator Lights If the copier is equipped with an Automatic Document Feeder Slightly lifting up the Upper Half of the copier and unlock Stopper M2 Gently Swing down and lock the Upper Half of the copier Then close the Front Door 11...

Page 86: ...4445U007AA Peel off the tape from the Starter Bottle Align the markings on the Starter Bottle with the upper side of the Bottle Holder and slide the Bottle into position 3 4445U006AA Then swing in the Bottle Holder until it locks into position 4 Insert the Bottle all the way into the copier until the marking on the Bottle is aligned with the marking on the Bottle Holder NOTE Chapter 5 When an Indi...

Page 87: ...nification Ratio Indicator forming a 0 light up and go out one after another indicating that the copier is being charged with starter When the copier has been completely charged with Starter the indication on the Magnification Ratio Indicator changes to 100 and the cycle stops If E1 or E2 is indicated on the Magnification Ratio Indicator the tape has not been removed from the Starter Bottle Swing ...

Page 88: ...old the Bottle so that its Toner Port faces up 10 1139O1420A Align the markings on the Toner Bottle with the upper side of the Bottle Holder and slide the Bottle into position 11 1139O1400A Then swing in the Bottle Holder until it locks into position and close the Front Door Insert the Bottle all the way into the copier until the marking on the Bottle is aligned with the marking on the Bottle Hold...

Page 89: ...rk The copy is blurry The copy has lines The copy has dark specks or spots The edge of the copy is dirty The image on the copy is not aligned properly 2 The Copier is not functioning as designed p 86 None of the Control Panel Indicators light up Pressing the Start Key does not start the copy cycle The Copier is not activated when the Power Switch is turned ON Chapter 6 Troubleshooting 81 ...

Page 90: ...ed The Add Toner Indicator on the Monitor Display is lit up Add Toner Indicator The paper is damp The image is too dark The exposure level for the Auto Exposure Mode is set at one of the Dark levels The manual exposure level is set on the darker side The entire surface of the Original Glass is dirty The original is not held tightly on the Original Glass The copy is blurry The paper is damp 1139O32...

Page 91: ...oner Replenishing Key as many times as required to obtain the desired image density p 46 Replace the Toner Bottle with a new one p 62 Replace the paper p 64 Change the setting of the User s Choice Mode U 13 Default Auto Exposure Level p 49 Cancel the Auto Exposure Mode and select the Manual Exposure Mode to adjust the exposure level and obtain a lighter image p 35 Press the Exposure Control Key Li...

Page 92: ...r size larger than the original is loaded in the Drawer Zoom Ratio is set at full size 100 The original is not placed in the correct direction Zoom Ratio is set at full size 100 The reduction ratio selected is not in accordance with the copy paper size When doing manual reduction copying The image on the copy is not aligned properly The original is not placed in the correct position 1139O1670A 113...

Page 93: ...ey Lighter make the exposure level lighter p 35 Wipe the Original Pad clean with a soft cloth dampened with mild home detergent p 96 Load the same size copy paper as the original into the Drawer p 64 Load the same size copy paper onto the Manual Bypass Tray or the Multi Bypass Tray p 40 Reload the paper in the same direction as the original p 26 Select the zoom ratio according to the copy paper si...

Page 94: ...nking Orange Is any of the following Indicators lit up The Copier is not activated when the Power Switch is turned ON Is the power cord plugged into the power outlet Is the room circuit breaker open Turn the copier OFF immediately unplug the power cord and call your Technical Representative 1139O3910A 1139O3270A 1139O3930A 1139O3940A 2 The Copier is not functioning as designed Chapter 6 Troublesho...

Page 95: ...the Energy Saver Mode p 20 Turn the Power Switch ON The copier is now warming up Please wait p 19 Take the necessary steps for each Indicator p 60 Plug the power cord into the power outlet Close the room circuit breaker 2 The Copier is not Functioning as Designed Chapter 6 Troubleshooting 87 ...

Page 96: ...2 The Copier is not Functioning as Designed Chapter 6 Troubleshooting 88 ...

Page 97: ...Chapter 7 Specifications This Chapter gives complete specifications of the copier system and options 1 Copier p 90 2 Multi Bypass Tray p 92 Chapter 7 Specifications 89 ...

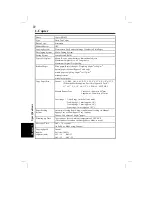
Page 98: ... A4C B5C A5L 8 13 L 8 1 2 13 L When the Marketing Area Switch is flipped to Inch 11 17 L 5 1 2 8 1 2 L LEGAL L LETTER L Manual Bypass Tray Crosswise 100mm to 297mm Lengthwise 140mm to 432mm Lost image 1 sided copy in the Full size mode Leading edge 3 mm approx 1 8 Trailing edge 3 mm approx 1 8 Front edge 1 mm approx 1 25 Paper Feeding System Automatic feeding from a drawer and manual feeding via M...

Page 99: ...py Up to 99 copies Count Down system Exposure Control Auto Manual and Photo Mode Power Requirements AC 115V 120V 127V AC 220V 240V 50 60Hz Power Consumption 1 3 kW Max Dimensions Width Depth Height 610mm Excluding Exit Tray 633mm 401mm Including Original Cover Weight 51 kg Excluding Copy Tray Starter Toner Copy Paper 1 Copier Chapter 7 Specifications 91 ...

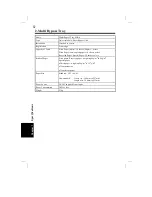
Page 100: ...paper 20 sheets or less Recycled Paper Special Paper 20 sheets or less Kinds of Paper Plain paper Recycled paper weighing 60g m2 to 90g m2 Special paper Thick paper weighing 90g m2 to 157g m2 Transparencies Translucent paper Paper Size Standard A3L to A6L Non standard Crosswise 100mm to 297mm Lengthwise 140mm to 432mm Power Source DC24V supplied from copier Power Consumption 30W or less Weight 2 7...

Page 101: ...e of the copier and the various possible combinations of functions 1 Care of the Copier Daily Checks p 94 Cleaning p 96 2 Description of Copy Paper Size p 100 3 Zoom Ratio Table Original Size to Copy Paper Size p 101 4 Index p 102 Chapter 8 Miscellaneous 93 ...

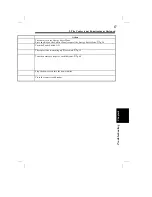
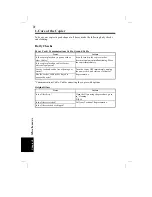
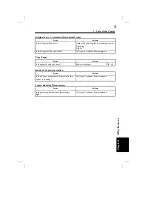
Page 102: ...on cables of other electrical equipment Are the cord and cables free of damage or cracks Turn the copier OFF immediately unplug the power cord and call your Technical Representative Has the cord or cable jacket frayed to expose the wires Communications Cable Cable connecting the copier with options Original Glass Item Action Is the Glass dirty Clean the Glass using the procedure given in Cleaning ...

Page 103: ...Representative Copy Paper Item Action Is the paper damp and wavy Replace the paper p 64 Sound of Copier Operation Item Action Is there any unusual noise heard while the copier is running Call your Technical Representative Copier Housing Temperature Item Action Is the housing temperature inordinately high Call your Technical Representative 1 Care of the Copier Chapter 8 Miscellaneous 95 ...

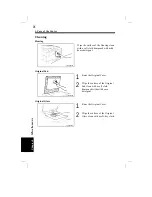
Page 104: ... 1 2 Original Pad 1139O1830A Raise the Original Cover Wipe the surface of the Original Pad clean with a soft cloth dampened with mild home detergent 1 2 Original Glass 1142O083AA Raise the Original Cover Wipe the surface of the Original Glass clean with a soft dry cloth 1 Care of the Copier Chapter 8 Miscellaneous 96 ...

Page 105: ...el clean with a soft dry cloth 1 2 NEVER use a glass cleaner or any other detergent to avoid damage to the control panel keys NOTE Front Door 1142O085AA Swing down the Front Door Wipe the inside of the Front Door clean with a soft cloth 1 2 1 Care of the Copier Chapter 8 Miscellaneous 97 ...

Page 106: ...9O1880A Gently slide the Cleaning Lever back into the original position 3 1139O1890A Gently slide out the Corona Unit Cleaning Lever Lower as far as it will go 4 1139O1900A Gently slide the Cleaning Lever back into the original position Repeat steps 2 to 5 two to three times 6 1 Care of the Copier 5 Chapter 8 Miscellaneous 98 ...

Page 107: ...1 Care of the Copier Chapter 8 Miscellaneous 99 ...

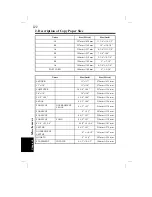
Page 108: ... 279 mm 356 mm COMPUTER 10 1 8 14 257 mm 356 mm 10 14 10 14 254 mm 356 mm 9 1 4 14 9 1 4 14 236 mm 356 mm LEGAL 8 1 2 14 216 mm 356 mm FOOLSCAP GOVERNMENT LEGAL 8 1 2 13 216 mm 330 mm FOOLSCAP 8 13 203 mm 330 mm FOOLSCAP 8 2 3 13 220 mm 330 mm FOOLSCAP FOLIO 8 1 4 13 210 mm 330 mm 8 1 4 11 3 4 8 1 4 11 3 4 210 mm 301 mm LETTER 8 1 2 11 216 mm 279 mm GOVERNMENT LETTER 8 10 1 2 203 mm 267 mm QUARTO ...

Page 109: ...Size Copy Paper Size Zoom Ratio 11 17 279 4 431 8 mm 11 14 82 Legal 77 Foolscap 76 Letter 64 Invoice 50 11 15 279 4 381 mm 11 14 93 Legal 77 Foolscap 77 Letter 73 Invoice 50 11 14 279 4 355 6 mm Legal 77 Foolscap 77 Letter 77 Invoice 50 Legal 8 1 2 14 215 9 355 6 mm Foolscap 92 Letter 78 Invoice 60 11 17 121 Foolscap 8 1 2 13 215 9 330 2 mm Letter 84 Invoice 64 11 17 129 11 14 107 Letter 8 1 2 11 ...

Page 110: ...tion p 47 Control Panel p 14 Copy Cycle Start p 39 Corona Unit Cleaning Lever p 98 Correcting the Number Entry p 38 D Daily Checks p 94 Default auto exposure level p 49 Default Exposure Mode Level pp 50 51 Description of Copy Paper Size p 100 Display p 16 Drum Dehumidifier Function p 47 E Energy Saver Mode p 20 Energy Saver ON Timing p 53 Enlargement Ratios p 31 F Fixed Zoom Ratios p 31 Full Size ...

Page 111: ...acement p 26 P Paper Add p 64 Panel Resetting p 22 Paper Size p 28 PC Drum p 47 Photo Mode pp 34 35 Power Switch p 19 R Reduction Ratios p 31 Replacing the Toner Bottle p 62 S Setting the Number of Copies p 38 Size Counter p 44 Stopping a Multi Copy Cycle p 39 T Toner Add p 62 Toner Replenisher Mode p 46 Total Counter p 44 Total Number of Copies Mode p 44 4 Index Miscellaneous Chapter 8 103 ...

Page 112: ...U User s Choice p 48 Z Zoom Ratios p 30 Zoom Ratio Table Original Size to Copy Paper Size pp 33 101 4 Index Miscellaneous Chapter 8 104 ...

Reviews: