background image

 minnkotamotors.com  |  7  

©2015 Johnson Outdoors Marine Electronics, Inc.

MOUNT INSTALLATION

2

1

INSTALLATION OF THE BOW-MOUNT

We recommend that you have another person help with this procedure.

1.  For installation,

 DO NOT REMOVE THE SHAFT/MOTOR FROM THE BOWGUARD

The Bowguard spring is 

under tension and must always remain secured.

2.  Place the mount, with the motor in the fully stowed (fl at) position, on the deck of the 

boat:

•  The motor should be mounted as close to the centerline of the boat as possible 

when it is deployed (see illustration).

•  Make sure bow area under the chosen location is clear and unobstructed for 

drilling.

•  Make sure the motor rest is positioned far enough beyond the edge of the 

boat. The motor, as it is lowered into the water or raised into the boat, must not 
encounter any obstructions

3.  Once in position, determine which bolt pattern to use (see below), mark at least 4 

of the holes (2 on each side) in the bow plate and drill through with a 9/32” drill bit. 
Either pattern may be used when installing the motor.

 -  Pattern 1:  Minnkota 3” bolt pattern standard motors.

 - Pattern 2:  Alternate 4” bolt pattern commonly used.

NOTE:

  If pattern 2 is to be used, the right side plate must be removed to access the mounting holes in the bow plate.

4.  Install hold down strap between the motor and deck of boat between second and third set of mounting holes.

5.  Mount the plate to the bow through the drilled holes using the provided (1/4-20 x 3-1/2”) bolts, nuts and washers.

NOTE:

 If possible, secure all sets of mounting bolts, nuts and washers.

6.  Install the bow mount stabilizer (if included). See next section for installation instructions.

WARNING:

  The gas assist lift mechanism in this unit is under HIGH SPRING PRESSURE when the motor is in the deployed 

position.  DO NOT remove the Bowguard assembly from the mount without disconnecting one end of the gas spring (see 
Removal of Bowguard section).  Failure to do this can create a condition where accidental pulling of the rope may cause the 
mount to spring open rapidly, striking anyone or anything in the direct path.

Hold Down Strap

Summary of Contents for FORTREX

Page 1: ...RIPTIDE FORTREX BOW MOUNT TROLLING MOTOR USER MANUAL ...

Page 2: ...the motor is used while water is present in the lower unit considerable damage to the motor can occur This damage will not be covered by warranty CAUTION Take care that neither you nor other persons approach the turning propeller too closely neither with body parts nor with objects The motor is powerful and may endanger or injure you or others While the motor is running watch out for persons swimm...

Page 3: ...ush to Test Battery Meter 10 Selecting the Correct Batteries 11 How to Connect Batteries 11 MotorWiringDiagram 12 Using AdjustingTheMotor 13 15 Stowing Deploying the Motor 13 Adjusting the Depth of the Motor 14 Controlling Speed and Direction with the Tiller 14 Adjusting the Tilt Extend Tiller 15 Service Maintenance 16 Propeller Replacement 16 General Maintenance 16 Troubleshooting Repair 17 Envir...

Page 4: ...ill such assistance extend or revive the warranty JOME will not reimburse the purchaser for any expenses incurred by the purchaser in repairing correcting or replacing any defective products or parts except those incurred with JOME s prior written permission JOME S AGGREGATE LIABILITYWITHRESPECTTOCOVEREDPRODUCTSISLIMITEDTOANAMOUNTEQUALTOTHEPURCHASER SORIGINALPURCHASE PRICEPAIDFORSUCHPRODUCT MINN K...

Page 5: ...ice This diagram is for reference only and may differ from your actual motor BowGuard 360 Breakaway Protection Battery Meter Lifetime Warranty Flexible Composite Shaft Propeller Mono Arm Design Cool Quiet Power Motor Lift Assist Depth Collar Knob Tilt Extend Tiller Controls On Off Speed Forward Reverse and Direction ...

Page 6: ...e the latch bar allowing the motor to fold into the flat position 6 Once in the stowed or flat position the gas spring pin can be installed Follow the steps below to install the gas spring pin and spacers Locate the upper gas spring pin and spacers in bag assembly Align the end of the gas spring with the holes in the outer arm Install pin spacers and Phillips flat head screws Tighten screws until the...

Page 7: ...gh with a 9 32 drill bit Either pattern may be used when installing the motor Pattern 1 Minnkota 3 bolt pattern standard motors Pattern 2 Alternate 4 bolt pattern commonly used NOTE If pattern 2 is to be used the right side plate must be removed to access the mounting holes in the bow plate 4 Install hold down strap between the motor and deck of boat between second and third set of mounting holes ...

Page 8: ...hown in illustration 4 Place the threaded end down onto the deck surface and mark the rod 3 4 above the top of the bracket 5 Cut the rod to the mark and round the cut edge with a file or sandpaper 6 Install the bottom bumper to the stabilizer rod and thread the rod into the bracket 7 Adjust the stabilizer rod up or down to so that the tip just touches the support surface See illustration below WAR...

Page 9: ...g place the motor in the deployed position 2 Remove the 5 16 cap screw and lock washer located on the top of the Bowguard in front of the pull rope 3 Lift motor Bowguard assembly straight up until Bowguard is free from mount NOTE Rope and latch bar should never be pulled with the motor removed as the assembly is under HIGH PRESSURE C RE ASSEMBLING THE BOWGUARD 1 Align the key ways on the inside of...

Page 10: ...ZING TABLE MotorThrust Model MaxAmpDraw CircuitBreaker WireExtensionLength 5feet 10feet 15feet 20feet 25feet 30 lb 30 50 Amp 12 VDC 10 AWG 10 AWG 8 AWG 6 AWG 4 AWG 40 lb 45 lb 42 10 AWG 8 AWG 6 AWG 4 AWG 4 AWG 50 lb 55 lb 50 60 Amp 12 VDC 8 AWG 6 AWG 4 AWG 4 AWG 2 AWG 70 lb 42 50 Amp 24 VDC 10 AWG 10 AWG 8 AWG 8 AWG 6 AWG 80 lb 56 60 Amp 24 VDC 8 AWG 8 AWG 8 AWG 6 AWG 6 AWG 101 lb 46 50 Amp 36 VDC...

Page 11: ...water If installing a leadwire plug observe proper polarity and follow instructions in your boat owner s manual See wiring diagram on following pages CAUTION Forsafetyreasons disconnectthemotorfromthebatteryorbatterieswhenthemotorisnotinuseorwhile thebattery batteriesarebeingcharged Improperwiringof24 36voltsystemscouldcausebatteryexplosion Keepleadwirewingnutconnectionstightandsolidtobatterytermi...

Page 12: ...rsal multi voltage diagram Double check your motor s voltage for proper connections Over Current Protection Devices not shown in this illustration 12v 24v 36v BLACK M RED M RED B MOTOR SPEED ADJUSTMENT SWITCH BATTERY GAUGE RED 12V BATT 1 12V BATT 1 12V BATT 2 12V BATT 1 12V BATT 2 12V BATT 3 BLACK BLACK B ...

Page 13: ... used to place pressure on the motor shaft to hold the lower unit tightly against the motor rest when stowed The pull grip and rope can be stored by placing the pull grip into the rope stow slot on the control box of the motor TO DEPLOY THE MOTOR Simply pull back and lift the motor off of the mount with the pull grip and rope Lower the motor into the water using the pull grip and rope The motor wi...

Page 14: ...churning or agitation of surface water The propeller must be completely submerged 1 Firmly grasp the motor shaft and hold it steady 2 Loosen steering tension knob 3 Open the lever arm to loosen the Quick Release Depth Collar 4 Vertically adjust the height of the motor to the desired position 5 Bring the depth collar to the top of the steering tension knob and close the lever arm to lock the depth ...

Page 15: ...edposition thespeedselector mustbeintheOFF STOWposition Failuretodo sowilldamagetheinternalmechanism First press the release button located on the left underside of the pivot handle then push the handle down until you feel the handle lock in to the stowed position This will be almost parallel to the motor shaft To extend the handle pull the handle towards you to the desired position The handle wil...

Page 16: ...sed silicone spray Do not spray water into the ventilation openings in the head of the motor The composite shaft requires periodic cleaning and lubrication for proper retraction and deployment A coating of an aqueous based silicone spray will improve operation The propeller must be inspected and cleaned of weeds and fishing line after every use Fishing line and weeds can get behind the prop damage...

Page 17: ... 227 6433 FOR FURTHER TROUBLESHOOTING AND REPAIR We offer several options to help you troubleshoot and or repair your product Please read through the options listed below FREQUENTLY ASKED QUESTIONS We have FAQs available on our website to help answer all of your Minn Kota questions Visit minnkotamotors com and click on Frequently Asked Questions to find an answer to your question CALL US FOR U S A...

Page 18: ... product indicates the product must not be disposed of with other household refuse It must be disposed of and collected for recycling and recovery of waste EEE Johnson Outdoors Inc will mark all EEE products in accordance with the WEEE Directive It is our goal to comply in the collection treatment recovery and environmentally sound disposal of those products however these requirement do vary withi...

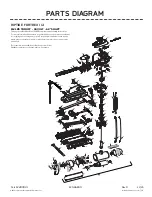
Page 19: ... cutters RIPTIDE FORTREX 112 112LBSTHRUST 36VOLT 62 SHAFT 425 260 255 220 225 235 215 230 420 240 200 205 210 400 395 265 410 390 360 365 370 375 380 385 250 245 415 405 208 700 720 721 980 710 815 725 730 735 740 745 750 760 765 810 830 835 820 825 845 860 865 870 875 880 940 975 885 890 910 920 915 925 935 930 932 905 900 895 770 775 780 785 790 795 800 850 855 515 520 525 535 530 540 550 555 56...

Page 20: ...CREW 10 24 X 2 SS 255 1 2061517 COLLAR C BOX ITEM QTY PART NUMBER DESCRIPTION 260 1 2333101 NUT 10 24 NYLOCK SS 265 1 2991521 CAM LOCK DEPTH COLLAR ASSY 310 1 2002015 TUBE COMPOSITE 62 1 2990957 HANDLE ASSY VARS 360 410 360 1 2990456 GRIP ASSY VARS 360 375 365 2 2060015 BEARING HANDLE 370 1 2063405 SCREW 6 PFH SS 375 1 2884092 YOKE SPIDER ASSY VARS 380 1 2302742 SPRING DETENT OFF 385 2 2060005 BEA...

Page 21: ...0 2 2263011 E RING 3 8 SHAFT 871 2 2280008 BEARING IGLIDE 875 2 2282720 SPRING EXTENSION 880 1 2773601 LATCH STRAP ASSEMBLY LONG 885 2 2261732 WASHER 8 NYLON 890 2 2373450 SCREW 8 18 X 3 8 1 2993916 SIDEPLATE ASSY LONG LEFT SW 895 1 2288625 SUPPORT LEFT SIDEPLATE 900 8 2283408 SCREW 8 X 3 8 905 1 2283916 SIDEPLATE LONG LEFT SW 910 2 2073408 SCREW 1 4 20 X 7 8 ITEM QTY PART NUMBER DESCRIPTION 915 2...

Page 22: ...gers can actually damage your battery over time creating shorter run times and shorter overall life Digitally controlled Minn Kota chargers are designed to provide the fastest charge that protect and extend battery life TALON SHALLOW WATER ANCHOR Talon deploys faster holds stronger and runs quieter than any other shallow water anchor Available in depths up to 12 and bold color options including ca...

Page 23: ...RIPTIDE FORTREX MOTEUR DE PÊCHE À LA TRAÎNE MONTÉ SUR L ÉTRAVE MANUEL DE L UTILISATEUR ...

Page 24: ...férieure ce dernier pourrait subir des dommages considérables Ces dommages ne seront pas couverts par la garantie ATTENTION veillez à ce que ni vous ni les autres personnes ne s approchent trop près de l hélice en rotation que ce soit seulement avec une partie du corps ou des objets Le moteur est puissant et pourrait provoquer des situations périlleuses ou des blessures pour vous ou les autres Lor...

Page 25: ...t Poussoir d essai de la batterie 32 Sélectionner une Batterie Adéquate 33 Comment raccorder la Batterie 33 SchémadeCâblageduMoteur 34 UtilisationetRéglageduMoteur 35 37 L arrimage et le Déploiment du Moteur 35 Pour Ajuster la Profondeur du Moteur 36 Contrôle de Vitesse et direction avec le Tiller 36 Réglage de la Barre d Inclinaison d Extension Tiller 37 ServiceetEntretien 38 Remplacement de l Hé...

Page 26: ...a garantie JOME ne remboursera aucune dépense encourue par l acheteur danslecadredelaréparation delacorrectionouduremplacementdepiècesoudeproduitsdéfectueux àl exceptiondesdépensesengagéessurconsentement écritpréalabledeJOME LARESPONSABILITÉGLOBALEDEJOMEÀL ÉGARDDESPRODUITSCOUVERTSPARLAGARANTIEESTLIMITÉE ÀUNMONTANTÉQUIVALENTAUPRIXD ACHATPAYÉPOURLEPRODUITENQUESTION INFORMATION SUR LE SERVICE MINN KO...

Page 27: ...férence seulement et peut différer de votre moteur actuel Protection BowGuard 360 Jauge de Batterie Arbre compositeFlexible Garanti à Vie Hélice Conception Mono Bras Moteur Cool Power Silencieux Mécanisme de levage assisté Bouton du Collier de Profondeur La poignée d inclinaison d extension contrôle la fonction marche arrêt la vitesse la marche avant arrière et la direction ...

Page 28: ...rayer la barre de blocage permettant ainsi de plier le moteur 6 Une fois le moteur à plat la goupille du vérin pneumatique peut être remontée Suivez les étapes ci dessous pour installer cette goupille Trouvez l épingle printanière supérieure du gaz dans l assemblage de sac Alignez l extrémité du vérin pneumatique par rapport aux trous du bras externe Remettez la goupille et la vis cruciforme à têt...

Page 29: ... Minnkota 3 po 76 2 mm pour moteurs standards Modèle 2 Modèle de boulonnage alternatif de 4 po 101 6 mm utilisé communément REMARQUE Si le modèle 2 doit être utilisé la plaque de droite doit être enlevée pour accéder les trous de fixation de la plaque de l arc 4 Installez la bande Velcro entre le moteur et le pont du bateau entre les deuxième et troisième jeux de trous de montage 5 Montez la plaqu...

Page 30: ...a tige au point marqué et arrondissez le bord coupé avec une lime ou de la toile émeri 6 Installez le butoir inférieur sur la tige du stabilisateur et vissez la tige dans le support 7 Réglez la tige de stabilisation de façon à ce que sa pointe touche à peine la surface de support Voyez la photo cidessus AVERTISSEMENT Appuyer la tige fermement contre la surface de support pourrait éliminer le jeu e...

Page 31: ...po et la rondelle de sûreté situées au haut du protège proue devant la corde 3 Levez l assemblage moteur protège proue tout droit jusqu à ce que le protège proue soit séparé du montant REMARQUE La corde et la barre de blocage ne devraient jamais être tirées quand le moteur est enlevé car l assemblage est sous GRANDE PRESSION C POUR REMONTER GARDE PROUE 1 Alignez la rainure à l intérieur du protège...

Page 32: ...ociés ABYC E 11 systèmes électriques CA et CC sur les embarcations TABLEAU DES DIMENSIONS DE GABARIT DES CONDUCTEURS ET DISJONCTEURS Modèle poussée dumoteur Courant Tiré Max Disjoncteur LongueurdelaRallonge 1 5mètres 3mètres 4 5mètres 6mètres 7 5mètres 30 lb 30 50 Amp 12 VDC 6 mm 6 mm 10 mm 16 mm 25 mm 40 lb 45 lb 42 6 mm 10 mm 16 mm 25 mm 25 mm 50 lb 55 lb 50 60 Amp 12 VDC 10 mm 16 mm 25 mm 25 mm...

Page 33: ...e 2 c Branchez le fil noir négatif à la borne négative de la batterie 1 4 Pour des raisons de sécurité n allumez pas le moteur jusqu à ce que l hélice soit dans l eau Si vous installez un raccordement en fil de plomb respectez les polarités appropriées et suivez les instructions qui se trouvent dans votre manuel du propriétaire du bateau Voir le schéma de câblage sur les pages suivantes CAUTION Po...

Page 34: ...uveau la tension du moteur afin de vous assurer que les raccordements sont appropriés Les dispositifs de protection contre la surintensité ne figurent pas dans cette illustration 12v 24v 36v NOIR M ROUGE M ROUGE B MOTEUR INTERRUPTEUR DE RÉGLAGE DES VITESSES JAUGE DE LA BATTERIE ROUGE 12V BATT 1 12V BATT 1 12V BATT 2 12V BATT 1 12V BATT 2 12V BATT 3 NOIR NOIR B ...

Page 35: ...ieure centrée sur le support du moteur La sangle de Velcro doit être utilisée pour faire de la pression sur l arbre du moteur afin de fixer solidement l unité inférieure au support du moteur lorsqu il est arrimé La poignée et corde de traction peut être entreposée en plaçant la poignée de traction dans la fente de rangement de la corde sur le boîtier de commande du moteur POUR DÉPLOYER LE MOTEUR V...

Page 36: ...est immergé à au moins 12 po 30 5 cm afin d éviter de faire tourbillonner ou d agiter l eau à la surface L hélice doit être complètement submergée 1 Saisissez fermement l arbre du moteur et tenez le immobile 2 Desserrez le bouton de serrage du gouvernail 3 Ouvrez le levier pour desserrer la bague de réglage de la profondeur à dégagement rapide 4 Réglez à la verticale la hauteur du moteur à la posi...

Page 37: ...equis pour l entreposage ou le transport IMPORTANT AVANTdetenterdemettrelapoignéeen positiond arrimage lesélecteurdevitessedoitêtre régléàlapositionARRÊT ARRIMAGE Nepasprocéder ainsiendommageralemécanismeinterne Appuyez d abord sur le bouton de déverrouillage situé sur la partie inférieure à gauche de la poignée de pivot puis poussez la poignée vers le bas jusqu à ce que vous sentiez la poignée ve...

Page 38: ...er de l eau dans les ouvertures de ventilation dans la tête du moteur L arbre composite nécessite un nettoyage périodique et de lubrification pour le retrait et le déploiement approprié Un revêtement d une pulvérisation aqueuse à base de silicone va améliorer le fonctionnement L hélice doit être inspectée et exempte d herbe et de ligne de pêche après chaque utilisation Les lignes de pêche et les h...

Page 39: ...uer avec notre service à la clientèle au 1 800 227 6433 POUR D AUTRES SERVICES DE DÉPANNAGE ET DE RÉPARATION Nousoffronsplusieursoptionsdedépannageet ouderéparationpourleproduit Veuillezparcourirlesoptionsénuméréesci dessous FOIRE AUX QUESTIONS Notre site Web présente FAQ visant à répondre à toutes vos questions au sujet des produits Minn Kota Veuillez visiter le site Web minnkotamotors com puis c...

Page 40: ...xclus de l exigence de la directive DEEE Ce symbole DEEE poubelle sur roues sur le produit indique que ce dernier ne doit pas être jeté avec les déchets domestiques Il doit être éliminé et collecté pour le recyclage et la récupération des DEEE Johnson Outdoors Inc marquera tous les produits EEE en conformité avec la directive DEEE C est notre but de nous conformer à la collecte au traitement à la ...

Page 41: ...REMARQUES minnkotamotors com 41 2015JohnsonOutdoorsMarineElectronics Inc ...

Page 42: ...vant entraîner une autonomie réduite et une durée de vie plus courte Les chargeurs Minn Kota à commande numérique assurent une charge rapide pour une protection et une durée de vie prolongée ANCRE POUR EAUX PEU PROFONDES TALON Les ancres Talon se déploient rapidement ont une force de retenue plus élevée et sont plus silencieuses que tout autre ancre pour eaux peu profondes Offerts en profondeurs a...

Reviews: