17
FIRMWARE UPDATE
General Guide
1
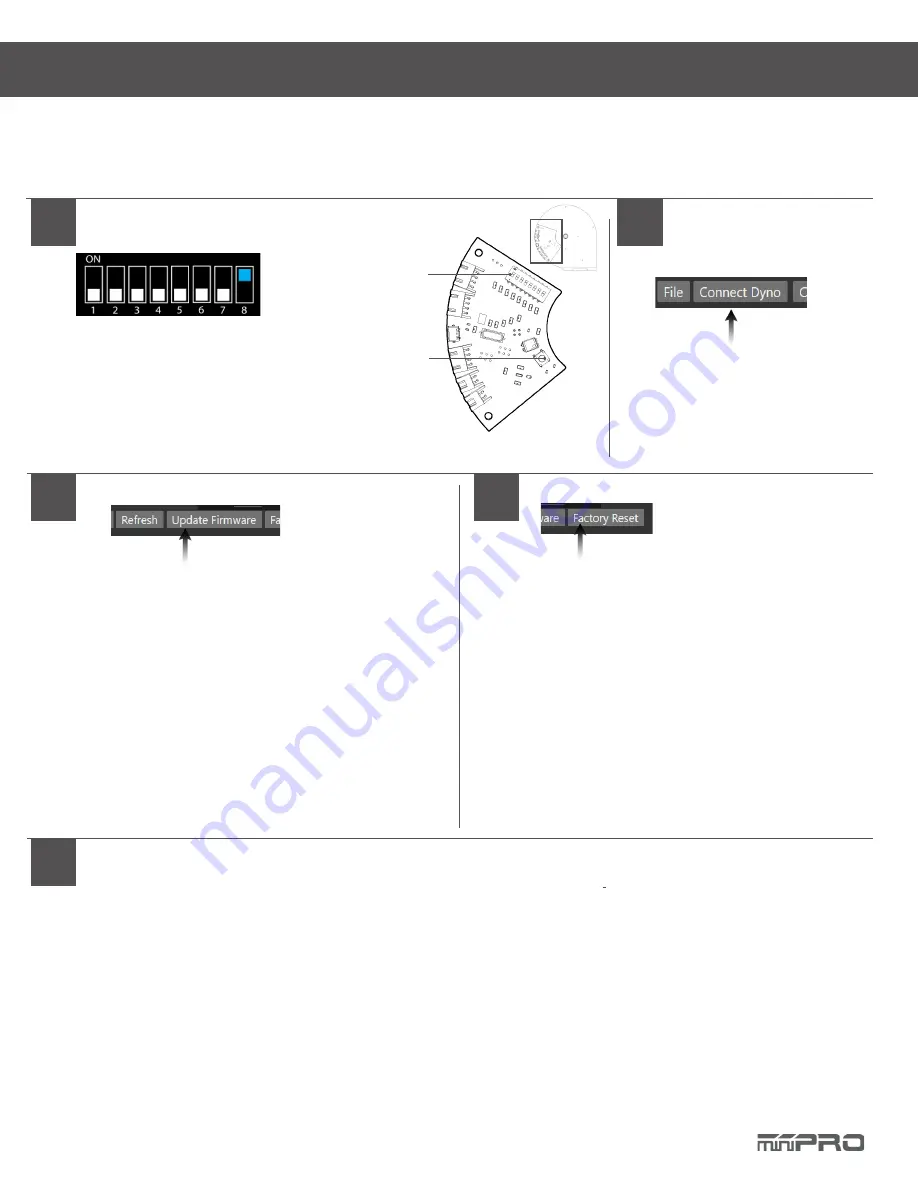
Enter Setup Mode
1.1. Change
only
Switch #8 to ON.
1.2. Press the Reset button on the board.
1.3. Open miniPRO Application.
1.4. Select “Dyno Settings”
3
4
Update the Firmware of your electronic
Perform a Factory Reset
Electronic Board
Switches
Reset Button
2
Establish a Connection
3.1. Select “Update Firmware.”
3.2. Locate the latest firmware you like to install.
3.3. Select “OK” to continue with the update.
3.4. Select “OK” after the update is completed.
3.5. A Factory reset must start automatically.
3.6. Modify your dyno settings.
3.7. Select “Save” to complete your settings.
3.8. Select “Disconnect.”
3.9. Change
only
Switch #8 to OFF, press the reset button and
close the application.
4.1. If the automatically factory reset from step 3.5
worked; then go to step no. 5.
4.2. Select “Factory Reset.”
4.3. Select “OK” to continue.
4.4. Select “OK” to after factory reset is completed.
4.5. Modify your dyno settings.
4.6. Select “Save” to complete your settings.
4.7. Select “Disconnect.”
4.8. Change
only
Switch #8 to OFF, press the reset button
and close the application.
NOTE:
Make sure you installed the latest application of
miniPRO Dyno before you continue.
5
Done!
If you have any questions, please open a support ticket in support.miniprousa.com
NOTE:
Make sure
only
Switch #8 is ON.
NOTE:
Make sure
only
Switch #8 is ON; otherwise, the factory
reset will not be successful.
Summary of Contents for Chassis Dyno V1
Page 1: ...CHASSIS DYNO V1 Instruction Manual REV2 0...
Page 2: ......
Page 4: ......
Page 6: ...5 Dyno Setup 16 General Settings 16 Firmware Update 17 CONTENTS...
Page 19: ......
Page 20: ......
Page 21: ...CHASSIS DYNO www minipro com 2018 miniPRO LLC All Rights Reserved...


