background image

25


MMRG Series

The MAX SPD setting determines the maximum motor speed when the 

speed adjust potentiometer or input voltage signal is set for maximum 

speed.
To calibrate MAX SPD:

1.  Set the MAX SPD trim pot full CCW.
2.  Set the speed adjust potentiometer or input voltage signal for 

maximum speed.

3.   Adjust MAX SPD until the desired maximum speed is reached.

Maximum Speed (MAX SPEED)

Acceleration and Deceleration (ACC-DEC)

The  ACC-DEC  trim  pot  setting  determines  the  time  the  motor  takes 

to accelerate to a higher speed or decelerate to a lower speed in the 

forward or reverse directions, within the limits of available torque. Turn 

the ACC-DEC trim pot CW to increase the acceleration and deceleration 

time or CCW to decrease the acceleration and deceleration time. The 

ACC-DEC  setting  is  factory  set  for  its  fastest  forward  acceleration  and 

deceleration rate (full CCW).

Summary of Contents for MMRG30U

Page 1: ...MMRG30U MMRG30U PCM MMRG31U MMRG31U PCM MMRG40U MMRG40U PCM USER MANUAL w w w m i n a r i k d r i v e s c o m MMRG SERIES...

Page 2: ...his document may be reproduced or transmitted in any form without written permission from Minarik Drives The information and technical data in this document are subject to change without notice Minari...

Page 3: ...I N G S Text in gray boxes denote important safety tips or warnings Please read these instructions carefully before performing any of the procedures contained in this manual It is possible for a drive...

Page 4: ...eed Adjust Potentiometer 14 Analog Input Signal MMRG models 15 Analog Input Signal MMRG PCM models 16 15 and 15 17 Direction Switch MMRG PCM models 17 Section 5 Operation 18 Before Applying Power 18 S...

Page 5: ...ng Potentiometers In Series 32 Independent Adjustable Speeds 33 Independent Adjustable Forward and Reverse Speeds 34 RUN JOG Switch Inhibit Connection 35 RUN JOG Switch Potentiometer Connection 36 Lea...

Page 6: ...iv MMRG Series List of Tables Table 1 Recommended Line Fuse Sizes 11...

Page 7: ...nal Location 22 Figure 13 Run Stop Switch 23 Figure 14 Recommended FORWARD TORQUE REVERSE TORQUE and IR COMP Setting 29 Figure 15 Forward Reverse Switch 30 Figure 16 Forward Stop Reverse Switch 30 Fig...

Page 8: ...faster than coasting to a lower speed Regenerative drives operate in two additional quadrants Quadrant II and Quadrant IV In these quadrants motor torque is in the opposite direction of motor rotatio...

Page 9: ...10 50 60 Hz single phase Acceleration Deceleration Time Range 0 5 6 seconds Analog Input Range 0 to 10 VDC 0 to 10 VDC Input Impedance S0 to S2 30K ohms Form Factor 1 37 at base speed Load Regulation...

Page 10: ...1 C507 C508 60HZ C501 PL2 S1 S2 C509 S0 C510 C505 50HZ 15V T501 15V C512 S3 C511 INHIBIT P505 P504 P503 SO501 TORQUE FORWARD IR COMP TORQUE REVERSE P502 P501 MAX SPD ACC DEC SW501 C513 C502 DC VOLTAGE...

Page 11: ...NCHES MILLIMETERS ACC DEC SPD MAX P501 P502 REVERSE TORQUE IR COMP P503 P504 FORWARD TORQUE INHIBIT P505 SO501 S3 S0 COMMON 0 99 25 1 75 44 3 72 94 0 96 24 3 375 86 4 30 109 4 42 112 3 80 97 FWD SIG A...

Page 12: ...5 MMRG Series 5 90 150 6 30 160 6 90 175 4 40 112 3 00 76 3 90 100 1 75 44 0 7 18 1 00 26 0 125 3 Figure 4 223 0159 Dimensions ALL DIMENSIONS IN INCHES MILLIMETERS...

Page 13: ...stall this product WARNING Models MMRG30U MMRG30U PCM MMRG40U and MMRG40U PCM require an additional heat sink when the continuous armature current is above 5 amps Use Minarik Drives heat sink kit part...

Page 14: ...the drive within the specified ambient operating temperature range Prevent loose connections by avoiding excessive vibration of the drive Mount the drive with its board in either a horizontal or vert...

Page 15: ...gure 5 Install the circular insulating disk between the panel and the 10K ohm speed adjust potentiometer Twist the speed adjust potentiometer wire to avoid picking up unwanted electrical noise If the...

Page 16: ...with circuit elements Do not disconnect any of the motor leads from the drive unless power is removed or the drive is disabled Opening any one motor lead while the drive is running may destroy the dri...

Page 17: ...drive end If noise is generated by a device on the drive ground the shield at the end away from the drive Do not ground both ends of the shield If the drive continues to pick up noise after grounding...

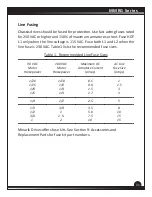
Page 18: ...230 VAC Table 1 lists the recommended fuse sizes Line Fusing 90 VDC Motor Horsepower 180 VDC Motor Horsepower Maximum DC Armature Current amps AC Line Fuse Size amps 1 20 1 15 1 8 1 6 1 10 1 8 1 4 1...

Page 19: ...the use of a single throw double pole master power switch The switch should be rated at a minimum of 250 volts and 200 of motor current Refer to Figure 6 on page 13 Motor Drives supply motor armature...

Page 20: ...R508 C505 MMRG SO504 L2 T502 T503 AC VOLTAGE AC VOLTAGE DC VOLTAGE DC VOLTAGE EARTH GND FUSE FUSE EARTH GROUND 115 VAC MMRG30U MMRG30U PCM MMRG31U MMRG31U PCM OR 230 VAC MMRG40U MMRG40U PCM 90 VDC MOT...

Page 21: ...connect the speed adjust potentiometer as shown in Figure 7 b For bidirectional operation connect the speed adjust potentiometer as shown in Figure 7 c The motor does not operate when the potentiomet...

Page 22: ...iometer can be used to scale the analog input voltage An interface device such as Minarik Drives model PCM4 may be used to scale and isolate an analog input voltage An analog input voltage range of 10...

Page 23: ...cale the analog input voltage Connections can be made to either the spade plug terminals or to cage clamp terminal TB501 An analog input voltage range of 10 to 10 VDC is required to produce an armatur...

Page 24: ...ge the drive WARNING C503 MMRG C506 PL1 C507 C508 S1 S2 C509 S0 C510 C505 15V 15V C512 S3 C511 DC VOLTAGE DC VOLTAGE COMMON DC VOLTAGE DC VOLTAGE 15V TERMINAL 15V TERMINAL A single pole single throw s...

Page 25: ...ull voltage and may cause damage to the transformer If the switches are improperly set to a higher voltage position the motor will overspeed which may cause motor damage or result in bodily injury or...

Page 26: ...itches Line Frequency Select SW501 Figure 11 Line Frequency Switch Location C503 MMRG C506 PL1 C507 C508 60HZ C501 PL2 S1 S2 C509 S0 C510 C505 50HZ 15V T501 15V C512 S3 C511 INHIBIT P505 P504 P503 SO5...

Page 27: ...age 3 Slowly advance the speed adjust potentiometer clockwise CW or increase the input voltage signal The motor slowly accelerates as the potentiometer is turned CW or as the input voltage signal is i...

Page 28: ...quent starting and stopping can produce high torque This may cause damage to motors especially gearmotors that are not properly sized for the application WARNING All drives automatically run to set sp...

Page 29: ...are longer than 18 inches 46 cm If shielded cable is used ground only one end of the shield to earth ground Do not ground both ends of the shield Minarik Drives offers two accessory plug harnesses for...

Page 30: ...or from a set speed to a stop at a deceleration rate determined by the ACC DEC trim pot Set the switch to the Run position to accelerate the motor to set speed Figure 13 shows the Run Stop switch with...

Page 31: ...te personal protection equipment BE ALERT High voltages can cause serious or fatal injury WARNING MMRG series drives have user adjustable trim pots Each drive is factory calibrated to its maximum curr...

Page 32: ...ximum speed is reached Maximum Speed MAX SPEED Acceleration and Deceleration ACC DEC The ACC DEC trim pot setting determines the time the motor takes to accelerate to a higher speed or decelerate to a...

Page 33: ...y lock the motor armature Be sure that the motor is firmly mounted 5 Apply line power The motor should be stopped 6 Slowly adjust the FORWARD TORQUE trim pot CW until the armature current is 120 of mo...

Page 34: ...y lock the motor armature Be sure that the motor is firmly mounted 5 Apply line power The motor should be stopped 6 Slowly adjust the REVERSE TORQUE trim pot CW until the armature current is 120 of mo...

Page 35: ...dspeed without load for example 900 RPM for an 1800 RPM motor A handheld tachometer may be used to measure motor speed 3 Load the motor armature to its full load armature current rating The motor shou...

Page 36: ...RQUE IR COMP REVERSE TORQUE FORWARD TORQUE IR COMP REVERSE TORQUE FORWARD TORQUE IR COMP REVERSE TORQUE FORWARD TORQUE IR COMP REVERSE TORQUE FORWARD TORQUE MMRG40U 2 HP 180 VDC 1750 RPM 10 ADC 1 HP 1...

Page 37: ...the motor Figure 15 If a Forward Stop Reverse switch is desired use a single pole three position switch Figure 16 The MIN SPD setting is in effect for either direction Direction Switch S1 S2 S0 CW 10K...

Page 38: ...ith a total series resistance of 10K ohms Figure 17 Add a single pole multi position switch with the correct number of positions for the desired number of fixed speeds Multiple Fixed Speeds R1 R2 R4 T...

Page 39: ...tiometers In Series Replace the speed adjust potentiometer with a series of resistors with a total series resistance of 10K ohms Figure 18 Add a single pole multi position switch with the correct numb...

Page 40: ...ds Replace the speed adjust potentiometer with a single pole multi position switch and two or more potentiometers in parallel with a total parallel resistance of 10K ohms Figure 19 shows the connectio...

Page 41: ...two independent forward and reverse speed adjust potentiometers that can be mounted at two separate operating stations Independent Adjustable Forward and Reverse Speeds S1 S2 S0 REV FWD REV 10K OHMS...

Page 42: ...ingle pole normally closed momentary operated pushbutton for the JOG pushbutton Connect the RUN JOG switch and JOG pushbutton to the inhibit terminals as shown in Figure 22 The motor coasts to a stop...

Page 43: ...to JOG the motor decelerates to zero speed Press the JOG pushbutton to jog the motor Return the RUN JOG switch to RUN for normal operation RUN JOG Switch Potentiometer Connection 10K OHM SPEED ADJUST...

Page 44: ...to monitor the speed of the leader motor Figure 24 The PCM4 isolates the leader motor from the follower drive and outputs a voltage proportional to the leader motor armature voltage The follower driv...

Page 45: ...ptional 10K Ohms 8 Figure 25 Single Speed Potentiometer Control of Multiple Drives Multipledrivescanbecontrolledwithasinglespeedadjustpotentiometer using a USIM 8 at the input of each drive to provide...

Page 46: ...ect AC line voltage from the drive 2 Check the drive closely for damaged components 3 Check that no conductive or other foreign material has become lodged on the printed circuit board 4 Verify that ev...

Page 47: ...r check for incorrectly aligned mechanical components or jams See pages 26 or 27 for information on adjusting the FORWARD TORQUE REVERSE TORQUE trim pot Line fuse does not blow but the motor does not...

Page 48: ...D Motor will not reach the desired speed 1 MAX SPD setting is too low 1 Increase MAX SPD setting 2 IR COMP setting is too low 2 Increase IR COMP setting 3 FORWARD TORQUE REVERSE TORQUE setting is too...

Page 49: ...Potentiometer Connector Pot Kit MMRG models 202 0082 Fuse 1 5 5 Amp Fuse Kit 050 0066 1 8 Amp Fuse Kit with Pico Fuse 050 0068 3 8 Amp Fuse Kit with Pico Fuse 050 0069 5 15 Amp Fuse Kit 050 0071 Logi...

Page 50: ...43 MMRG Series Notes...

Page 51: ...of Liability In the event of any claim for breach of any of Minarik Drives s obligations whether expressed or implied and particularly of any other claim or breach of warranty contained in Paragraph...

Page 52: ...www minarikdrives com 14300 DE LA TOUR DRIVE SOUTH BELOIT IL 61080 800 MINARIK 250 0240 Rev 7...

Reviews: