background image

OM-1319 Page 1

SECTION 1 – SAFETY PRECAUTIONS - READ BEFORE USING

som _nd_4/98

1-1.

Symbol Usage

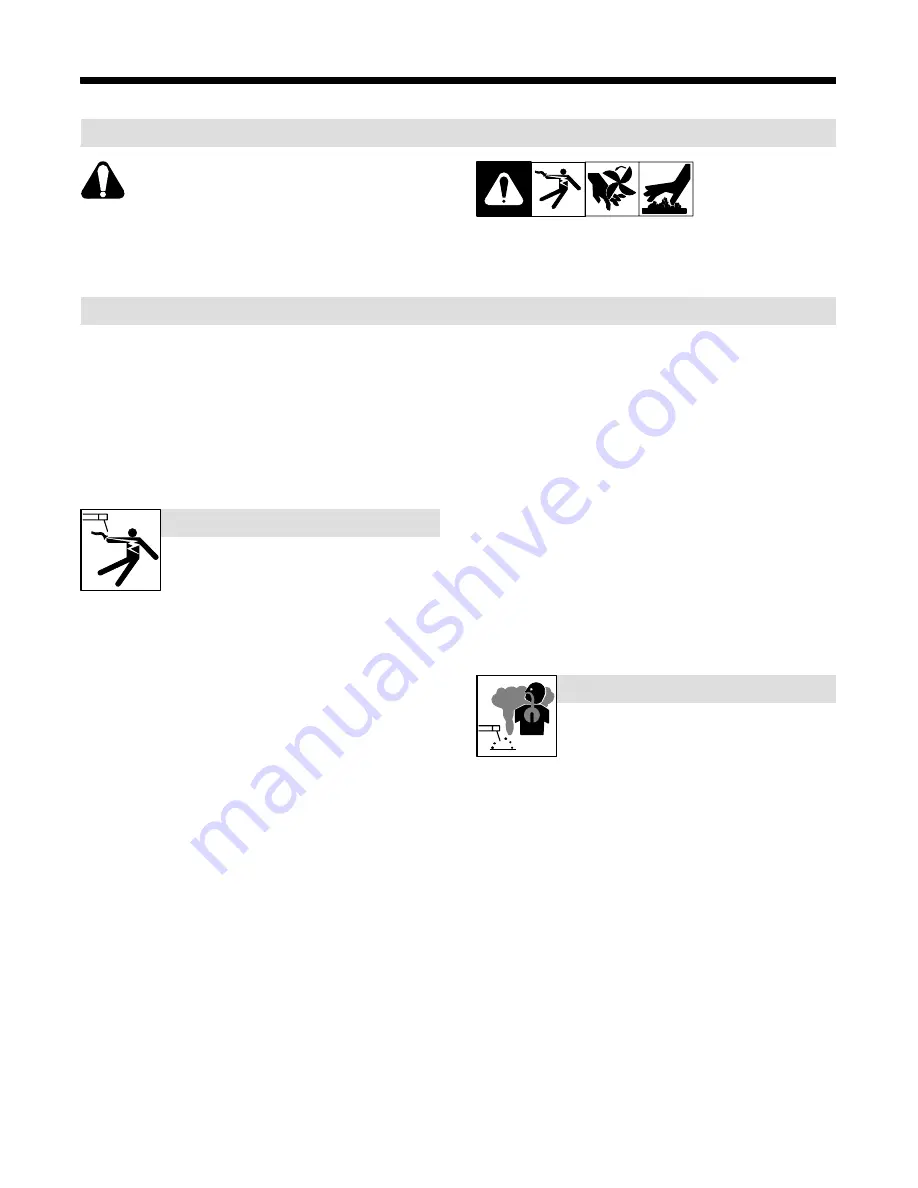
Means Warning! Watch Out! There are possible hazards
with this procedure! The possible hazards are shown in
the adjoining symbols.

Y

Marks a special safety message.

.

Means “Note”; not safety related.

This group of symbols means Warning! Watch Out! possible
ELECTRIC SHOCK, MOVING PARTS, and HOT PARTS hazards.
Consult symbols and related instructions below for necessary actions
to avoid the hazards.

1-2.

Arc Welding Hazards

Y

The symbols shown below are used throughout this manual to
call attention to and identify possible hazards. When you see
the symbol, watch out, and follow the related instructions to
avoid the hazard. The safety information given below is only
a summary of the more complete safety information found in
the Safety Standards listed in Section 1-4. Read and follow all
Safety Standards.

Y

Only qualified persons should install, operate, maintain, and
repair this unit.

Y

During operation, keep everybody, especially children, away.

ELECTRIC SHOCK can kill.

Touching live electrical parts can cause fatal shocks
or  severe burns. The electrode and work circuit is
electrically live whenever the output is on. The input
power circuit and machine internal circuits are also

live when power is on. In semiautomatic or automatic wire welding, the
wire, wire reel, drive roll housing, and all metal parts touching the
welding wire are electrically live. Incorrectly installed or improperly
grounded equipment is a hazard.

D

Do not touch live electrical parts.

D

Wear dry, hole-free insulating gloves and body protection.

D

Insulate yourself from work and ground using dry insulating mats
or covers big enough to prevent any physical contact with the work
or ground.

D

Do not use AC output in damp areas, if movement is confined, or if
there is a danger of falling.

D

Use AC output ONLY if required for the welding process.

D

If AC output is required, use remote output control if present on
unit.

D

Disconnect input power or stop engine before installing or
servicing this equipment. Lockout/tagout input power according to
OSHA 29 CFR 1910.147 (see Safety Standards).

D

Properly install and ground this equipment according to its
Owner’s Manual and national, state, and local codes.

D

Always verify the supply ground – check and be sure that input
power cord ground wire is properly connected to ground terminal in
disconnect box or that cord plug is connected to a properly
grounded receptacle outlet.

D

When making input connections, attach proper grounding conduc-
tor first – double-check connections.

D

Frequently inspect input power cord for damage or bare wiring –
replace cord immediately if damaged – bare wiring can kill.

D

Turn off all equipment when not in use.

D

Do not use worn, damaged, undersized, or poorly spliced cables.

D

Do not drape cables over your body.

D

If earth grounding of the workpiece is required, ground it directly
with a separate cable.

D

Do not touch electrode if you are in contact with the work, ground,
or another electrode from a different machine.

D

Use only well-maintained equipment. Repair or replace damaged
parts at once. Maintain unit according to manual.

D

Wear a safety harness if working above floor level.

D

Keep all panels and covers securely in place.

D

Clamp work cable with good metal-to-metal contact to workpiece
or worktable as near the weld as practical.

D

Insulate work clamp when not connected to workpiece to prevent
contact with any metal object.

D

Do not connect more than one electrode or work cable to any
single weld output terminal.

SIGNIFICANT DC VOLTAGE exists after removal of
input power on inverters.

D

Turn Off inverter, disconnect input power, and discharge input
capacitors according to instructions in Maintenance Section
before touching any parts.

Welding produces fumes and gases. Breathing
these fumes and gases can be hazardous to your
health.

FUMES AND GASES can be hazardous.

D

Keep your head out of the fumes. Do not breathe the fumes.

D

If inside, ventilate the area and/or use exhaust at the arc to remove
welding fumes and gases.

D

If ventilation is poor, use an approved air-supplied respirator.

D

Read the Material Safety Data Sheets (MSDSs) and the
manufacturer’s instructions for metals, consumables, coatings,
cleaners, and degreasers.

D

Work in a confined space only if it is well ventilated, or while
wearing an air-supplied respirator. Always have a trained watch-
person nearby. Welding fumes and gases can displace air and
lower the oxygen level causing injury or death. Be sure the breath-
ing air is safe.

D

Do not weld in locations near degreasing, cleaning, or spraying op-
erations. The heat and rays of the arc can react with vapors to form
highly toxic and irritating gases.

D

Do not weld on coated metals, such as galvanized, lead, or
cadmium plated steel, unless the coating is removed from the weld
area, the area is well ventilated, and if necessary, while wearing an
air-supplied respirator. The coatings and any metals containing
these elements can give off toxic fumes if welded.

Summary of Contents for Millermatic 250X

Page 1: ...Processes Description MIG GMAW Welding Flux Cored FCAW Welding Arc Welding Power Source and Wire Feeder OM 1319 188 913M October 2000 Millermatic 250X R Visit our website at www MillerWelds com...
Page 2: ...alue established in 1929 This Owner s Manual is designed to help you get the most out of your Miller products Please take time to read the Safety precautions They will help you protect yourself agains...

Page 3: ...0 2 5 Installing Welding Gun 11 2 6 Connecting A Spoolmatic 30A Gun 11 2 7 Setting Gun Polarity For Wire Type 11 2 8 Installing Gas Supply 12 2 9 Installing Wire Spool and Adjusting Hub Tension 12 2 1...

Page 4: ......

Page 5: ...that cord plug is connected to a properly grounded receptacle outlet D When making input connections attach proper grounding conduc tor first double check connections D Frequently inspect input power...

Page 6: ...lding wire at contact tip when not in use D Wear oil free protective garments such as leather gloves heavy shirt cuffless trousers high shoes and a cap D Remove any combustibles such as a butane light...

Page 7: ...aintained D Keep high frequency source doors and panels tightly shut keep spark gaps at correct setting and use grounding and shielding to minimize the possibility of interference ARC WELDING can caus...

Page 8: ...s a human health hazard However studies are still going forth and evidence continues to be examined Until the final conclusions of the research are reached you may wish to minimize your exposure to el...

Page 9: ...tation est bien raccord la borne de terre du sectionneur ou que la fiche du cordon est raccord e une prise correctement mise la terre D En effectuant les raccordements d entr e fixer d abord le conduc...

Page 10: ...r des v tements de protection d pourvus d huile tels que des gants en cuir une chemise en mat riau lourd des pantalons sans re vers des chaussures hautes et un couvre chef D Avant de souder retirer to...

Page 11: ...vrements et dispositifs de protection LE RAYONNEMENT HAUTE FR QUENCE H F risque de provoquer des interf rences D Le rayonnement haute frequence peut provoquer des interf rences avec les quipements de...

Page 12: ...champs magn tiques basse fr quence Le courant de soudage pendant son passage dans les c bles de sou dage causera des champs lectromagn tiques Il y a eu et il y a encore un certain souci propos de tels...

Page 13: ...min W 19 in 483 mm D 30 1 4 in 768 mm 95 kg While idling Operating Temperature Range 20C to 40C Storage Temperature Range 30C to 50C 2 2 Welding Power Source Duty Cycle And Overheating 4 Minutes Weld...

Page 14: ...g power source Curves of other settings fall be tween the curves shown 1 2 4 Installing Work Clamp 1 Work Cable 2 Boot Slide boot onto work cable Route cable out front panel opening from inside 3 Nega...

Page 15: ...Spoolmatic R 30A Gun The Spoomatic 30A welding gun connects directly to the 10 pin receptacle on the front of the welding power source no adapter required NOTE Two welding guns may be connected to th...

Page 16: ...Power Source Gas Hose Connection Connect customer supplied gas hose between regulator flowmeter gas hose connection and fitting on rear of welding power source 7 Flow Adjust Typical flow rate is 20 cf...

Page 17: ...cuit Breaker Rating In Amperes Circuit Breaker 1 Time Delay 2 60 50 30 25 20 Normal Operating 3 80 70 35 30 25 Min Input Conductor Size In AWG Kcmil 8 10 12 14 14 Max Recommended Input Conductor Lengt...

Page 18: ...Connect directly to line disconnect device if hard wiring is required 5 Line Disconnect Device See Section 2 11 Y Special installation may be required where gasoline or volatile liquids are present se...

Page 19: ...and hold wire cut off end Push wire thru guides into gun continue to hold wire Close and tighten pressure assembly and let go of wire Remove gun nozzle and contact tip Turn On Press gun trigger until...

Page 20: ...trol Turn control clockwise to increase voltage Scale around control is ac tual voltage 2 Wire Speed Control Turn control clockwise to increase wire feed speed Scale around con trol is actual wire fee...

Page 21: ...OM 1319 Page 17 3 2 Weld Parameter Table...

Page 22: ...l and carrier Apply light coat of oil or grease to drive motor shaft 4 2 Circuit Breaker CB1 1 Circuit Breaker CB1 If CB1 opens wire feeding stops 2 Welding Gun Check gun liner for blockage or kinks 3...

Page 23: ...oll Securing Nut Turn nut one click to secure drive roll Tools Needed 5 64 in 7 16 in ST 150 227 D 1 3 2 4 5 4 5 Aligning Drive Rolls and Wire Guide Y Turn Off power View is from top of drive rolls lo...

Page 24: ...t voltage or check for low line voltage see Section 2 12 Check input voltage jumper links and correct position if necessary see Section 2 10 Have Factory Authorized Service Agent check main control bo...

Page 25: ...OM 1319 Page 21 SECTION 5 ELECTRICAL DIAGRAM 188 901 A Figure 5 1 Circuit Diagram...

Page 26: ...OM 1319 Page 22 SECTION 6 PARTS LIST Ref 802 059 Hardware is common and not available unless listed Fig 6 2 1 Fig 6 5 3 4 5 6 7 8 9 10 11 12 14 15 Fig 6 3 2 13 17 18 19 Figure 6 1 Main Assembly...

Page 27: ...AMP spring thyristor rectifier 1 173 784 Heat Sink rectifier 2 C3 4 031 689 CAPACITOR rectifier 2 143 818 THYRISTOR SCR 325A 300V hockey puck 2 TP1 154 243 THERMOSTAT NC 1 171 405 Heat Sink rectifier...

Page 28: ...OM 1319 Page 24 ST 802 060 A Hardware is common and not available unless listed 1 2 3 4 5 6 7 8 9 10 12 13 14 11 15 16 17 18 19 20 21 22 23 24 25 26 Fig 6 4 27 28 Figure 6 2 Baffle Center w Components...

Page 29: ...16 PC1 194 103 CIRCUIT CARD control 1 PLG4 131 056 HOUSING RECEPTACLE SOCKETS 1 PLG6 115 092 HOUSING PLUG SOCKETS 1 17 R5 119 998 RESISTOR WW fxd 300W 5 ohm 1 18 TE1 188 910 TERMINAL ASSEMBLY pri 1ph...

Page 30: ...CKETS 1 7 RC7 190 363 RECEPTACLE w SOCKETS 1 8 186 470 PANEL logo 1 9 038 502 Cable Tie 1 10 186 472 PANEL louver Order Item 9 Cable Tie when ordering louver panel 1 11 PL1 157 958 LIGHT ind white len...

Page 31: ...5 ID x 740 OD 2 193 635 RING rtng ext 394 shaft x 1 15 079 633 FITTING hose brs barbed M 3 16tbg 1 16 601 966 SCREW 375 16 x 1 25hexhd 2 18 604 538 WASHER flat stl SAE 312 1 19 124 778 KNOB plstc T 1...

Page 32: ...ed Inlet 056 192 056 192 056 192 056 193 Wire Guide 1 16 in 062 1 6 mm 079 598 053 699 V Grooved 056 195 052 in 052 1 3 mm 079 597 053 698 V Grooved 056 193 Description Part No Dia Mkgs Item No Figure...

Page 33: ...ting Torches Remote Controls Accessory Kits Replacement Parts No labor Spoolmate 185 Spoolmate 250 Canvas Covers Miller s True Blue Limited Warranty shall not apply to 1 Consumable components such as...

Page 34: ...complete and retain with your personal records Always provide Model Name and Serial Style Number Call 1 800 4 A Miller or see our website at www MillerWelds com to locate a DISTRIBUTOR or SERVICE AGEN...

Reviews: