background image

Miles Research – User Guide for CRCS-FH4 Chinrest-Camera Support 

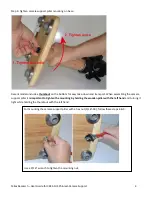
 The removable part of the quick-release is placed over the threaded mounting hole and the mounting bold is 
tightened (clockwise) using the fold-up handle: 


Make the part parallel to the lines on the bottom of the camera for best alignment. When the part is attached snugly 
and the handle is folded down, it should look like this: 


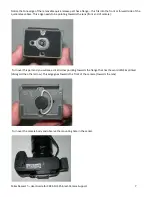
 With the quick-release plate firmly attached, hold the camera with your right hand and tilt it downwards to engage 
the front flange of the plate with the receiving (fixed) part of the quick release: 


Summary of Contents for CRCS-FH4

Page 1: ...ed by the use of a chinrest The design positions the camera so the center of gravity is typically directly over the camera support pillar for maximum stability An optional calibration bezel is availab...

Page 2: ...ing parts 1 Wooden tabletop base 2 Chinrest frame 3 Camera support pillar 4 Chinrest papers 5 Hex wrenches 2 5mm to attach chinrest frame to base 5 32 to adjust camera bracket mounting bracket Plus th...

Page 3: ...Miles Research User Guide for CRCS FH4 Chinrest Camera Support 3 Step 2 Insert Camera Support Pillar into base Step 3 attach thumbnut...

Page 4: ...om for easy take down and transport When assembling the camera support pillar it is important to tighten the mounting by holding the wooden pillar with the left hand and turning it tight while holding...

Page 5: ...5 Step 5 With the base on a tabletop insert the chinrest frame chinrest adjustment ought to be on the right as shown Step 6 With the chinrest firmly seated into the base use the 2 5mm hex wrench to t...

Page 6: ...plate to camera mount hole 1 4 20 bottom center of camera body Note if the chinrest is part of a camera order the camera will already have the quick release plate attached skip to page 8 First review...

Page 7: ...side of the quick release base This edge needs to be pointing towards the lens front end of camera Turn over this part and you will see a small arrow pointing towards the flange that has the word LENS...

Page 8: ...using the fold up handle Make the part parallel to the lines on the bottom of the camera for best alignment When the part is attached snugly and the handle is folded down it should look like this Wit...

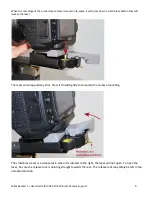
Page 9: ...button that will release the lever The lever will snap partway shut Press it closed tightly to complete the camera mounting The small brass lever is a release lock when it is rotated to the right the...

Page 10: ...Nikon 85mm lens at 1 1 maximum magnification closest focus For cameras with a longer lens such as the Nikon 105mm macro change the mounting hole of the camera bracket to the 1 inch longer setting usin...

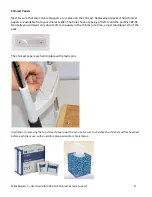
Page 11: ...st seller The holes have a spacing of 92mm and the part is CRP 92 Normally you will want only about 100 or so papers in the chinrest at a time so just load about 1 5 of the pack The chinrest papers ar...

Page 12: ...ably the clients own hand on that side The preferred method of lid retraction for those clients who cannot open the eyelids sufficiently is to use assisted lid retraction In this method the client is...

Reviews: