background image

20

20

5.0 Installazione de

i

 driver

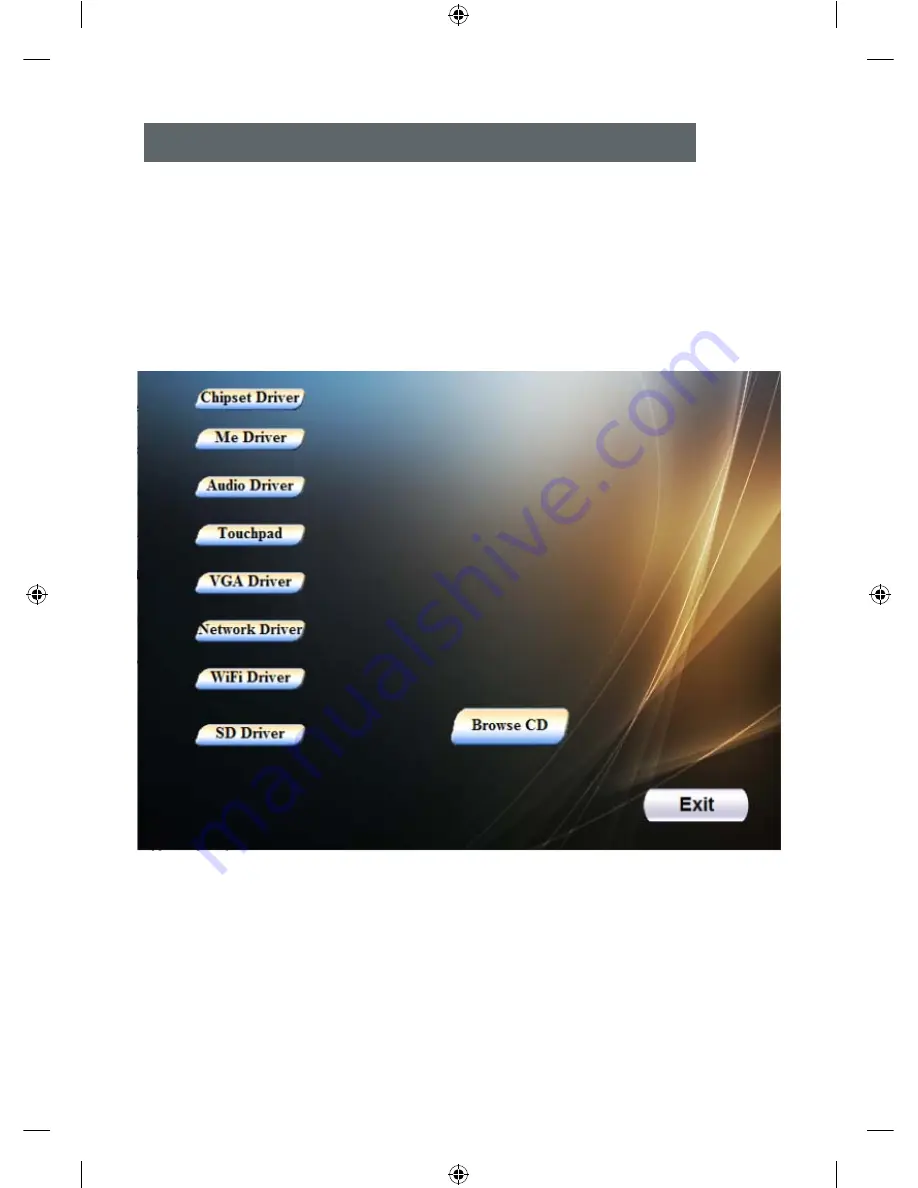
Il laptop supporta Windows 8

Aprire il CD-ROM con allocazione random; le procedure sono 

illustrate nel seguito:

Driver di installatione di WINDOWS 8

Fare clic sull'icona corrispondente e seguire i prompt per completare 

l'installazione.

Summary of Contents for MNB-14i3 Lightbook

Page 1: ...enter in miia dimension ENG Instruction manual ITA Manuale d uso MNB 14i3 Miia Lightbook Notebook 14...

Page 2: ...he sake of your safety and interests before using the products please carefully read the product specifications as well as all the materials attached to the PC If you don t operate and use the product...

Page 3: ...ce Pag 2 2 Product overviex Pag 12 3 Basic commn knowledge on computer operation Pag 13 4 Setup of BIOS Pag 16 5 Installation of driver program Pag 20 6 Fault analysis and elimination Pag 21 7 Product...

Page 4: ...that follows according to the following levels and special warning words These special warning words are expressed as follows Danger indicating cautions against high risks Warning indicating cautions...

Page 5: ...t or strong fluorescence Don t place any things between LCD screen and keyboard such as pencil documents and so on which will destroy or scratch LCD screen Please don t use corrosive detergent to wipe...

Page 6: ...sure to pull from the root of socket so as to guarantee safety Before cleaning the computer please remember to firstly plugging off the power socket and then remove the battery Please don t disconnec...

Page 7: ...should be placed in a dry place with good ventilation In order to prevent the computer from being disturbed and damaged by the magnetic field please keep it away from other household electric applian...

Page 8: ...be placed in the original packing box in case of transportation You should pile and place the packing box according to the symbol and indication of packing transportation diagram You should also use...

Page 9: ...er use and maintenance may shorten the battery lifespan In order to increase the battery lifespan and enhance the battery functions the battery should be fully and thoroughly discharged every 30 days...

Page 10: ...unnecessary peripherals from the computer socket 5 Q A Q How to fully discharge the battery A Let the computer run with the battery power until the computer automatically shuts off due to excessively...

Page 11: ...se don t expose the battery to a high temperature 7 Power Danger You need to use quality two core power plug and socket The power socket should be finally inserted into power If you replace standard p...

Page 12: ...eft side Please consider using document frame and place the document in a level near to your eyes Place the top part of screen in a level near to your eyes As for those with astigmatism it may be nece...

Page 13: ...the products 6 If you don t plan to use the product for a long period please pull off the power socket so as to avoid excessive transient voltage which can cause damages 7 Please don t splash any liq...

Page 14: ...12 12 2 0 Product overview...

Page 15: ...13 13 3 0 Basic common knowledge on computer operation 3 1 Stop the computer When you finish your work you can shut off the computer power or let the computer enter the mode of standby of hibernation...

Page 16: ...your laptop computer is equipped with LED LCD which supports high resolution and real color function It brings marvelous visual excitement To prolong the lifespan of lifespan of display screen To obey...

Page 17: ...uter is equipped with a built in Ethernet network card conforming to 10 100 1000 Base TX standard Insert one end of the LAN line into RJ 45 interface at the right side of your computer Then you can re...

Page 18: ...y be necessary for you to start the BIOS setup program BIOS can restrict the access by uses by setting up passwords This is important function because the laptop computer usually keeps a lot of materi...

Page 19: ...17 17 4 2 Main main setup System Date setup of the system data System Time setup of the system time System Information System Information Display 4 3 Advanced HDD Mode Select the hard disk mode...

Page 20: ...18 18 4 4 Security Set User Password Set User Password Set Supervisor Password Set Supervisor Password 4 5 Boot Set the boot device boot sequence Use and adjust the boot sequence...

Page 21: ...Changes Do not save your settings exit Load Setup Defaults Import the default settings Discard Changes Do not save your settings Save Changes Save Settings Protect your hearing To avoid possible dama...

Page 22: ...e laptop computer support Windows 8 Open the CD ROM with random allocation operation procedures illustrated as follows Driver installation of WINDOWS 8 Click on the corresponding chart icon and then f...

Page 23: ...rdware and software you may encounter In case of any problem you can firstly try to eliminate it according to the description in this chapter If the cases of error continue to emerge consult your dist...

Page 24: ...e time and then restart the computer The new HD need partitioning and re formatting The operating system and driver program also need to be re installed Please examine the indicator lamp of HD When yo...

Page 25: ...owing condition Ambient temperature 20 25 Light 300lx 700lx Distance for visual observation the visual line and screen surface form 90 degrees 6 4 Problems on memory 1 After you install more memories...

Page 26: ...4GB PC3 12800 1600Mhz DDR3 Memory Limit 8GB max HDD Inch Size 2 5 HDD Memory Capacity 500 GB 5400 RPM HDD Connector Serial ATA 2 3Gb s HDD RPM 5400 rpm HDD Feature HDD Multi Card Reader 2 in 1 Etherne...

Page 27: ...gations prevents possible negative effects on the environment and human health It also favours the recycling of the materials that the device is made of Improper disposal of the product by the user im...

Page 28: ...scopo di aiutare a utilizzare correttamente il prodotto e non rappresenta la configurazione del software e hardware del prodotto stesso Le illustrazioni contenute nel presente manuale qualora non corr...

Page 29: ...Speciale Pag 2 2 Descrizione del prodotto Pag 12 3 Conoscenze informatiche richieste Pag 13 4 Setup BIOS Pag 16 5 Installazione dei driver Pag 20 6 Analisi e soluzioni dei guasti Pag 21 7 Caratterist...

Page 30: ...nzione verso rischi limitati Divieto indica il divieto di eseguire operazioni pericolose Memo richiama l attenzione verso questioni di sicurezza o altri contenuti Il presente capitolo non contempla le...

Page 31: ...D a luce solare diretta o lampade fluorescenti Non posizionare alcun oggetto tra lo schermo LCD e la tastiera come matite documenti ecc per evitare di danneggiare o graffiare lo schermo LCD Non utiliz...

Page 32: ...i di sicurezza evitare di danneggiare la connessione della messa a terra Durante la rimozione dell alimentazione evitare di tirare il cavo Eseguire l operazione afferrando il connettore al fine di gar...

Page 33: ...nde esposizione diretta alla luce del sole ecc posizionare il computer in un luogo asciutto e ben ventilato Per evitare interferenze e danni al computer dovuti al campo magnetico tenerlo lontano da al...

Page 34: ...movimentazione del computer In caso di trasporto riporre il computer nella confezione originale Seguire le indicazioni e i simboli riportati sull imballaggio Sigillare le confezioni Nota In caso di co...

Page 35: ...idurre la durata della batteria Per aumentare la durata della batteria e migliorare le funzioni della stessa necessario scaricare completamente la batteria ogni 30 giorni e ricaricarla al 100 3 Indica...

Page 36: ...ie 5 Domande e risposte D Come fare per scaricare completamente la batteria R Lasciare acceso il computer alimentato a batteria fino allo spegnimento automatico dello stesso dovuto al livello di caric...

Page 37: ...7 Alimentazione Pericolo Utilizzare un connettore spina presa bipolare di buona qualit Collegare la spina all alimentazione La sostituzione non autorizzata dei cavi di alimentazione standard pu provoc...

Page 38: ...chermo possibile posizionare i documenti direttamente di fronte a s lasciando lo schermo leggermente a sinistra Considerare l eventuale utilizzo di un leggio e posizionare i documenti all altezza adeg...

Page 39: ...o Assicurarsi che nessun oggetto venga posizionato sul cavo 5 Seguire tutte le avvertenze e le indicazioni riferite ai prodotti 6 In caso di non utilizzo del computer per un periodo prolungato rimuove...

Page 40: ...12 12 2 0Descrizione del prodotto Nota le immagini che seguono sono diagrammi puramente schematici fare riferimento agli oggetti reali...

Page 41: ...3 13 3 0 Conoscenze informatiche richieste 3 1 Arresto del computer Una volta terminato il lavoro possibile spegnere il computer oppure lasciare che il computer entri in modalit standby di ibernazione...

Page 42: ...olo Muovendo il dito sulla superficie del touchpad il cursore si sposter in maniera corrispondente 3 4 Schermo Per garantire la comodit visiva il laptop dotato di uno schermo LCD a LED che supporta l...

Page 43: ...minosa interna potr assorbire una minore quantit di energia 3 5 Scheda di rete Il laptop dotato di una scheda di rete Ethernet integrata conforme allo standard 10 100 1000Base TX Inserire un estremit...

Page 44: ...are il programma di setup del BIOS possibile limitare l accesso al BIOS mediante la configurazione di password Si tratta di una funzione importante in quanto solitamente vengono archiviati numerosi co...

Page 45: ...cipale System Date impostazione della data del sistema System Time impostazione dell ora del sistema System Information Visualizzazione delle informazioni di sistema 4 3 Avanzate HDD Mode Selezionare...

Page 46: ...rezza Set User Password Impostare la password utente Set Supervisor Password Impostare la password amministratore 4 5 Boot Impostare la sequenza di boot del dispositivo Utilizzare e per definire la se...

Page 47: ...hanges Uscire e non salvare le impostazioni Load Setup Defaults Importare le impostazioni di default Discard Changes Non salvare le impostazioni Save Changes Salvare le impostazioni Proteggere l udito...

Page 48: ...Il laptop supporta Windows 8 Aprire il CD ROM con allocazione random le procedure sono illustrate nel seguito Driver di installatione di WINDOWS 8 Fare clic sull icona corrispondente e seguire i prom...

Page 49: ...le Fare doppio clic sull icona dell altoparlante nell angolo in basso a destra della barra delle attivit e verificare che il volume dell altoparlante non sia stato disattivato Premere Option e selezio...

Page 50: ...ale in assoluto Per maggiori dettagli consultare GB T9813 2000 La normativa nazionale prevede quanto di seguito illustrato Il collaudo deve essere condotto alle seguenti condizioni Temperatura ambient...

Page 51: ...hz Memoria Limite 8GB max HDD 2 5 HDD Capacit memoria 500 GB 5400 RPM HDD Connettore Serial ATA 2 3Gb s HDD RPM 5400 rpm HDD Feature HDD Multi Card Reader 2 in 1 Porta Ethernet 1x RJ 45 10 100 1000Mbi...

Page 52: ...ad evitare possibili effetti negativi sull ambiente e sulla salute e favorisce il riciclo dei materiali di cui composta l apparecchiatura Lo smaltimento abusivo del prodotto da parte dell utente compo...

Reviews: