background image

Correct use

Caution. Danger of burning.
The oven interior will become very
hot when operating with functions
which do not use microwave power
and also combination programmes
which do use microwave power.

~

Use oven gloves when placing food

in the oven, turning or removing it and
when adjusting the rack etc. in a hot
oven.
The top heat/grill element gets very hot
when the oven is being used on the
Conventional, Grill, Fan grill, MW+Grill
and MW+Fan grill functions. Danger of
burning.

~

Plastic containers must ony be used

with Microwave Solo. These melt at
high temperatures and if used with any
other function, the appliance could be
damaged the appliance.

~

Always ensure that food is

sufficiently cooked or reheated. Many
factors will affect the overall cooking
time, including the size and amount of
food, its initial temperature, changes to
recipe and the shape and size of
cooking container.
Some foods may contain micro-
organisms which are only destroyed by
thorough cooking, therefore when
cooking or re-heating foods, e.g.
poultry, it is particularly important that
food is fully cooked through (at
temperatures of over 70°C for more
than 10 minutes). If in doubt, select a
longer cooking or reheating time.

~

It is important that the heat is

allowed to spread evenly throughout
the food being cooked. This can be
achieved by stirring and/or turning the
food, and by observing a sufficiently
long standing time, which should be
added to the time needed for cooking,
reheating or defrosting.

~

Please be aware that using

microwave power will shorten cooking,
reheating and defrosting times
considerably compared to when using
functions without microwave power.
Make sure that you keep to the
recommended grilling times when
using the Grill and Fan grill functions.
Excessively long cooking times can
lead to food drying out and burning or
could even cause the food to catch fire.

– Do not use the microwave function to

dry breadcrumbs, flowers, herbs,
grain etc.

– Do not use any functions which use

the grill to heat and crisp up rolls or
bread, or to dry flowers, herbs, grain
etc.

Use the Fan plus function for these
types of procedure and do not leave
the oven unattended.

Warning and Safety instructions

9

Summary of Contents for H 5080 BM

Page 1: ...structions Microwave combination oven H 5080 BM H 5088 BM To avoid the risk of accidents or damage to the appliance it is essential to read these instructions before it is installed and used for the first time M Nr 07 650 220 en GB ...

Page 2: ...2 ...

Page 3: ...t use microwave energy 24 Combination programmes 25 Suitable containers for microwave ovens 26 Material and shape 26 Testing dishes for their suitability 29 Placing the dish in the oven 29 A cover 30 Controls 31 Sensors for 31 Display 32 Main menu 32 Symbols 33 Before using for the first time 35 To enter basic settings 35 Cleaning and heating up for the first time 36 Operation 37 To use an Automat...

Page 4: ...ging or deleting an entered cooking time 44 Food probe 45 To use the food probe 45 Time left display 46 Using the residual heat Energy save phase 46 User programmes 47 The User programmes menu 47 To create a User programme 48 Set a programme name 48 Settings 49 Language J 49 Time 50 Display 50 Clock format 50 To set the time 50 Light 50 Main menu 51 Quick MW 51 Keeping warm MW only 51 Cooling fan ...

Page 5: ...timer 57 Quick MW 58 Cleaning and care 59 Oven interior 59 Door interior and door seal 62 Appliance front 62 Accessories supplied 63 Problem solving guide 64 After Sales Guarantee 68 Optional accessories 69 Electrical connection 71 Installation 72 Appliance dimensions and unit cut out 72 Installation in a tall unit 72 Installation in a base unit 72 Front dimensions 73 Installation 73 Contents 5 ...

Page 6: ...g and residential environments such as Shops Offices and showrooms and by residents in establishments such as Hostels and guest houses This microwave combination oven is not intended for outdoor use It is intended for domestic use only to cook food and in particular to defrost reheat bake roast and grill Any other use is not supported by the manufacturer and could be dangerous Miele cannot be held...

Page 7: ...s and other work by unqualified persons could be dangerous and the manufacturer will not be held liable Ensure current is not supplied to the appliance until after installation maintenance or repair work has been carried out Before installation check the appliance for visible signs of damage Do not install or use a damaged appliance It could be dangerous Do not use the microwave function of the ap...

Page 8: ... is under guarantee repairs should only be undertaken by a service technician authorised by the manufacturer Otherwise the guarantee will be invalidated During installation maintenance and repair work the appliance must be disconnected from the mains electricity supply Faulty components must only be replaced by genuine Miele original spare parts The manufacturer can only guarantee the safety of th...

Page 9: ...ing or re heating foods e g poultry it is particularly important that food is fully cooked through at temperatures of over 70 C for more than 10 minutes If in doubt select a longer cooking or reheating time It is important that the heat is allowed to spread evenly throughout the food being cooked This can be achieved by stirring and or turning the food and by observing a sufficiently long standing...

Page 10: ...in injury or damage If smoke occurs in the oven to avoid fuelling any flame do not open the door Cancel the cooking process by switching the appliance off switch off at the socket and remove the plug Do not open the oven door until the smoke has dispersed Moisture in food could lead to corrosion in the oven interior and corrosion damage of the control panel worktop or housing unit Always cover foo...

Page 11: ...ems can get extremely hot and there is a danger of burning when the item is removed Before serving remember to allow a sufficient standing time and then always check the temperature of the food after taking it out of the oven The temperature of the container is not an indication of the temperature of the food or liquid in it This is particularly important when preparing food for babies children an...

Page 12: ...tructions given in Suitable containers for microwave ovens Ovenproof earthenware can retain a considerable amount of moisture Earthenware and porcelain containers with hollow handles and lid knobs must only be used with microwave power if they have vent holes which allow the moisture to escape Without vent holes there can be a pressure build up causing the container to crack or shatter with the da...

Page 13: ...emperature of the food first interrupt the cooking process Only use a thermometer specifically approved for food use to measure the temperature of the food Never use a thermometer containing mercury or liquid as these are not suitable for use with very high temperatures and will break very easily Accessories Only use genuine Miele original spare parts and accessories with this appliance If spare p...

Page 14: ...appliance Electrical and electronic appliances often contain materials which if handled or disposed of incorrectly could be potentially hazardous to human health and to the environment They are however essential for the correct functioning of your appliance Please do not therefore dispose it with your household waste Please dispose of it at your local community waste collection recycling centre or...

Page 15: ...aControl panel bOven interior lighting cTop heat grill element dConnection socket for the food probe eShelf levels fDoor Guide to the appliance 15 ...

Page 16: ...isplay b C Sensors c 0 9 Numerical key pad d K ON OFF sensor e W Quick MW sensor quick start for microwave function f U Clear sensor g N Minute minder egg timer sensor See Controls for further details Guide to the appliance 16 ...

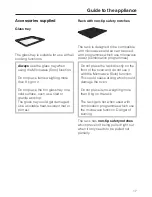
Page 17: ...The rack is designed to be compatible with microwaves and so can be used with programmes which use microwave power combination programmes Do not place the rack directly on the floor of the oven and do not use it with the Microwave Solo function This could cause arcing which could damage the oven Do not place items weighing more than 8 kg on the rack The rack gets hot when used with combination pro...

Page 18: ...wave the boiling rod provided should always be placed in the container It helps liquids to heat evenly Food probe The food probe enables the roasting process to be monitored simply and reliably See Food probe for details User instructions The User instructions supplied with your appliance in addition to these Operating and installation instructions contains detailed information about the following...

Page 19: ...on transmitted from communication enabled appliances can be received accoustically and optically by a mobile InfoControl unit in the vicinity of the house You can use both the SuperVision appliance and the InfoControl unit at the same time Optional accessories Required Communication module XKM 2000 SV a Optional Mobile InfoControl XIC 2100 unit e Both of these are supplied with their own installat...

Page 20: ... ß Sabbath programme This programme can be set to operate for 72 hours for the purposes of religious observance Microwave Solo For defrosting reheating and cooking food quickly Functions without microwave For cooking food when a crisp finish is required Combination programmes with microwave For reheating or cooking food quickly when a crisp finish is required In the combination programmes microwav...

Page 21: ...ally by children for example see Settings Safety Safety switch off A function without microwave can be started without selecting a cooking duration To prevent overuse and the consequent danger of fire the appliance switches off automatically after a certain length of time This can be between 1 hour and 10 hours depending on the function and temperature chosen If a combination programme is followed...

Page 22: ...ng programme the oven heating switches off automatically providing the heat in the oven is sufficient to finish the cooking process If heat is lost e g because the door has been opened the heating elements in the oven will switch on again automatically Lighting The oven lighting is set to switch off 15 seconds after the start of a cooking programme default setting See Settings Lighting Energy save...

Page 23: ...gorously The friction caused caused by this vibration creates heat which first starts developing around the outside of the food and then slowly penetrates towards the centre The moisture fat and sugar content of food will affect the speed at which it is cooked As heat is produced directly in the food food can generally be cooked without adding much liquid or cooking oil cooking reheating and defro...

Page 24: ...ially to a high temperature 230 C which seals the meat to keep it succulent and tasty As soon as this temperature has been reached the oven temperature automatically drops back down to the pre selected setting Defrost P For gently defrosting frozen food Fan heat U Only one shelf level can be used with Fan heat Intensive bake O This function lends itself to recipes which require a moist topping and...

Page 25: ...ven browning results The MW Fan plus combination programme is the most effective because the heat reaches the food im mediately giving the greatest savings in both time and energy In general when using the combination programmes you should not set the microwave power level higher than 150 W for baking and not higher than 300 W for cooking roasting and grilling Functions 25 ...

Page 26: ...s with hollow handles and lid knobs must only be used in this oven if they have vent holes which allow the moisture to escape Without vent holes there can be a pressure build up causing the container to crack or shatter with the danger of injury Metal Metal containers aluminium foil metal cutlery and china with metallic decoration such as gold rims or cobalt blue must not be used with microwave po...

Page 27: ...avoid overcooking unevenly shaped cuts of meat poultry or fish small pieces of aluminium foil may be used to mask wing tips or other thin parts for the last few minutes of the process Make sure that the aluminium foil is at least 2 cm from the oven walls at all times Metal meat skewers or clamps should only be used if they are very small in comparison to the size of the cut of meat Glassware Heat ...

Page 28: ...Melamine absorbs microwave energy and gets hot When purchasing plasticware make sure that it is suitable for use in a microwave oven Do not leave the oven unattended when reheating or cooking food in disposable containers made of plastic paper or other inflammable materials Disposable containers such as trays made from polystyrene can only be used for very short timed warming and reheating of food...

Page 29: ...h is hot it would be unwise to use the dish If a cracking noise is heard accompanied by sparks during the test switch the appliance off imme diately Any crockery which causes this reaction is unsuitable for use with microwave power If any doubt exists about the suitability of a container please contact the supplier This test cannot be used to check whether items with hollow knobs or handles are su...

Page 30: ...ey are placed in the oven Do not attempt to heat them up unopened Do not use a cover if food coated with breadcrumbs is being cooked cooking food which requires a crisp finish using a combination programme which uses microwave power The cover supplied may only be used in Microwave Solo mode The cover can only withstand temperatures of up to 110 C Higher temperatures generated by grilling or fan he...

Page 31: ...for these sensors appear in the display Sensors which can be used in a programme are lit up c 0 9 Numerical keypad This lights up if there is the option to enter a temperature or cooking duration d K ON OFF sensor For switching the appliance on and off e W Quick MW sensor The microwave starts straight away at maximum power with a cooking duration of 1 minute these are the factory default settings ...

Page 32: ...he Main menu appears in the display with a list of options available An option is selected by touching the illuminated sensor C next to the option required Main menu ß Microwave ß Fan plus ß Conventional heat ß Grill ß Auto roast ß Defrost ß MW Auto roast ß MW Grill ß MW Fan plus ß MW Fan grill ß Fan heat ß Intensive bake ß Fan grill ß Bottom heat ß Automatic ß Slow cooking ß User programmes ß Set...

Page 33: ...line By scrolling down further you reach the beginning of the list again For increasing the time temperature or power level shown in the display These can also be entered using the numerical keypad Back Selecting this option and confirming with OK returns you to the previous list of options A tick will appear beside the option which is currently selected A will not appear in front of this symbol T...

Page 34: ...me finished R Rapid heat up phase Rapid searing phase 3 Heating up phase Searing phase Q Core temperature when using the food probe _ Microwave L MW Auto roast b MW Grill a MW Fan plus M MW Fan grill U Fan plus Fan heat O Intensive bake Auto roast V Conventional heat X Bottom heat P Defrost Y Grill Fan grill c Automatic programme Slow cooking Controls 34 ...

Page 35: ... beside the clock format you have selected Confirm with OK Setting the time of day You will then be asked to enter the time of day The hour is highlighted Using the numerical keypad enter the hour confirm with OK and then enter the minutes in the same way Time of day display Finally you will be asked when you want the time of day to show in the display see Settings Time Display ß On The time is al...

Page 36: ...witch on and the main menu will appear in the display Touch the sensor next to Fan plus The recommended temperature of 160 C will appear highlighted Increase the temperature to 250 C the highest temperature To do this you can either use the sensor next to or the numerical keypad Touch the sensor next to OK Heat the empty oven for at least an hour Please ensure the kitchen is well ventilated during...

Page 37: ...ooklet supplied with your appliance in addition to these Operating and installation instructions If you do not wish to use the Automat ic defrost reheat cooking programmes you can carry out these processes manually by selecting the appropriate settings Selecting a function Switch on the appliance Select the function you want After selecting an oven function options which can be entered or changed ...

Page 38: ...after a few seconds or you can confirm by touching the OK sensor If the recommended power level is not suitable for your recipe you can change it just for this particular cooking programme You can also set the recommended power level to suit your personal cooking practices See Settings MW power levels Duration or total duration Now set the cooking duration for a programme using Microwave solo the ...

Page 39: ...200 C Fan plus 160 C Intensive bake 170 C Fan grill 200 C Bottom heat 190 C The initial boosted temperature is approx 230 C which then drops down to 160 C for continued roasting If the recommended temperature grill level is suitable for your recipe confirm it with OK If it is not suitable you can change it just for this particular cooking process You can also set the recommended temperature to sui...

Page 40: ...produced during the heating up phase It is only necessary to pre heat the oven in a few instances With Fan plus pre heat the oven for foods which cook in less than 20 minutes and for foods such as puff pastries and yeast mixtures where instant heat is required to make them rise quickly for roasting beef fillet With Conventional heat pre heat the oven when baking cakes and biscuits with a baking ti...

Page 41: ...will appear in the display the oven will start heating up the cooling fan will switch on The cooling fan also switches on on the Microwave function even though the oven interior does not heat up Switch the oven off at the end of the programme After a Microwave cooking programme or when using the food probe the oven switches off automatically Programme finished and the O symbol appear in the displa...

Page 42: ...cook Once this time has elapsed the oven heating switches off automatically The maximum duration that can be entered is 12 hours The Duration cannot be entered if the food probe is being used as in this case the length of the cooking programme depends on the core temperature being reached ß Start time By entering the Start time you specify the time you want cooking to start The oven will switch on...

Page 43: ...g However do not delay the start for too long when baking as the cake mixture or dough will dry out and the raising agents will lose their effectiveness To switch a programme on and off automatically you have various options Enter the Duration and Finish time Enter the Start time and the Duration Enter the Start time and the Finish Example The time is 11 30 Your dish will take 30 minutes to cook a...

Page 44: ... Fan setting has been chosen At the end of the cooking programme The hot air fan switches off depending on the cooking function being used The message Programme finished and the O symbol appear in the display A tone will sound provided this is activated see Settings Volume Buzzer tones After the programme has finished The cooling fan will continue to run for a while after the oven has been switche...

Page 45: ...robe right into the middle of the food Insert the plug of the food probe into the socket until you feel it engage Close the door Select the function you want Alter the recommended temperature microwave power level if necessary Alter the recommended core temperature if necessary The core temperature required depends on the type of food being cooked For the correct core temperature refer to the char...

Page 46: ... while If the door is opened during an auto matic programme the time remaining will continue to show in the display Using the residual heat Energy save phase This feature works with Auto roast Fan plus Conventional heat and Fan grill The heating in the oven switches off shortly before the end of the cooking programme The residual heat in the oven is sufficient to complete the cooking process Using...

Page 47: ...ready been created and saved the following will appear ß Select For calling up and starting an existing User programme You choose whether the programme should Start now or Start later ß Create This is used to create a new User programme ß Change For altering an existing programme ß Delete Individual programmes can be deleted You can also delete all User programmes at the same time see Settings Fac...

Page 48: ... the procedure described above Finally set the shelf level to be used A summary of the entries will appear in the display If you wish to change any of the stages listed you can select them now Do a final check of all settings and then select Continue to confirm your selection Set a programme name After confirming with Continue either select an existing name from the list in the display or enter yo...

Page 49: ...tory default Select and confirm the one you want to change If a setting is not confirmed within a certain time the display will revert to the Settings list Currently selected settings are indicated by a L and without a next to them Settings cannot be altered while a cooking programme is in progress Language J You can set the language you want the display to appear in After selecting and confirming...

Page 50: ...n is switched on Clock format The time can be displayed as a 24 hour or a 12 hour clock ß 12 h 12 hour clock display ß 24 h 24 hour clock display Factory default To set the time The time of day is set using either the numerical keypad or the and sensors First enter the hours and confirm with OK Then enter the minutes and confirm with OK Light ß On The oven interior lighting remains on during the e...

Page 51: ...nd a cooking duration of 1 minute are the default settings for the quick start microwave programme The microwave power level can be changed to 80 W 150 W 300 W 450 W 600 W or 850 W The cooking duration can also be changed The maximum duration that can be set depends on the power level selected Keeping warm MW only The Keeping warm function is activated as standard with the mirowave solo programme ...

Page 52: ...e leading to condensation forming on the control panel and surrounding kitchen furniture and drops of moisture collecting under the worktop Condensate can damage the housing unit worktop lead to corrosion in the oven Heating up phase The heating up phase parameters can be altered with the following functions Fan plus Auto roast Conventional heat MW Auto roast and MW Fan plus ß Rapid Factory defaul...

Page 53: ...altered MW power levels The recommended power levels for the various cooking functions are displayed and can be altered Display Contrast The contrast is represented by a bar with seven segments P P P P G G GM Factory default Four illuminated segments To change the contrast touch the sensor next to Lower or Higher Brightness The brightness is represented by a bar with seven segments P P P P P P GM ...

Page 54: ...ency P G G G G G G G G G G G G G GM To change the frequency touch the sensor next to the or symbol If the segment on the far left is the only one illuminated factory default a brief signal will sound after a short while four times at 15 second intervals If more than one segment is illuminated a continual signal will sound after a short while for approx 8 minutes on the frequency set Keypad tone Th...

Page 55: ...s unlocked and can be operated 1 appears in the display The minute minder can still be used The system lock continues to be active even after a power cut In operation lock depending on model The In operation lock is not available with the microwave solo function and combination programmes which use microwave power The In operation lock prevents the appliance from being switched off inadvertently a...

Page 56: ...nuous loop Touch one of the sensors next to the display and follow the instructions Demo mode Touch one of the sensors next to the display and follow the instructions Factory default ß All settings Any settings that you have altered will be reset to the factory default setting ß User programmes All saved user programmes will be deleted ß Main menu Only the main menu will be reset to the factory de...

Page 57: ...6 minutes 20 seconds enter 0 06 20 Confirm your entry with the OK sensor If you use the or to enter the time you must confrim each part of the entry with the OK sensor The time counts down in the display At the end of the time set for the minute minder The N symbol will flash A tone will sound provided this is activated see Settings Volume Buzzer tones The display will show the time counting upwar...

Page 58: ... the sensor several times The maximum duration that can be set depends on the power level selected The cooking process starts straight away The time remaining counts down in the display When the programme finishes the appliance switches off automatically the message Programme finished and the O symbol appear in the display A tone will sound provided this is activated see Settings Volume Buzzer ton...

Page 59: ...if soiling is not removed after each use and allowed to build up If the oven is used frequently without being cleaned it may become very difficult or even impossible to get clean again Normal soiling Do not use too much water on the cloth or sponge and do not let water or any other substance find its way into any openings Clean the surfaces with hot water and a little washing up liquid applied wit...

Page 60: ... on for too long Spot cleaning using mechanical cleaning agents Note Soiling such as spilt juices and cake mixtures are best removed whilst the oven or tray is still warm Excercise caution and make sure the oven is not too hot danger of burning Spilt fruit juices may cause lasting discolouration to the surfaces This discolouration is permanent but will not affect the efficiency of the finish Clean...

Page 61: ...ents are switched off and cool Danger of burning To lower the grill element the nut needs to be unscrewed Lower the grill element gently Do not use force to lower it as this can cause it to break After cleaning the grill element raise it gently back up again Refit the nut and tighten to secure the grill element back in position Cleaning and care 61 ...

Page 62: ...ified by a service technician Glass surfaces are susceptible to scratches Scratches can cause glass surfaces to break When cleaning glass surfaces do not use abrasive cleaning agents e g powder cleaners and cream cleaners hard abrasive sponges and brushes e g pot scourers sharp metal scrapers Appliance front Remove any soiling on the front of the appliance straight away Soiling that is left too lo...

Page 63: ...ing agents dishwasher cleaner oven sprays glass cleaning agents hard abrasive sponges and brushes e g pot scourers eraser blocks sharp metal scrapers Accessories supplied Rack The surface has been treated with PerfectClean and should be cleaned according to the cleaning instructions for PerfectClean described in Cleaning and care oven interior Glass tray The glass tray can be washed in hot water a...

Page 64: ...e for unauthorised work Problem Possible cause and remedy The display is dark Check whether the time of day is set so that it does not show in the display or so that it switches off after 60 seconds see Settings Time Display Check that the appliance is plugged is switched on at the mains supply Check whether the mains fuse has tripped If it has contact a qualified electrician or Miele A programme ...

Page 65: ...noise This is not a fault If the door is opened during a programme the door contact switch causes the oven heating and the fan if on Fan setting to be switched off A noise is heard after a programme has finished The cooling fan continues to run for a while after a programme has finished to prevent any humidity building up in the oven on the control panel or on the oven housing unit Depending on th...

Page 66: ...d the lamp cover securely when removing it so that it does not fall Place a tea towel over the floor of the oven and the open door to protect them Remove the screw from the lamp cover using a T20 Torx screwdriver and then take the cover off Pull the halogen lamp out Replace the halogen lamp Specification 12 V 10 W heat resistant to 300 C cap G4 Osram type 64418 Do not touch the halogen lamp with b...

Page 67: ...ay Possible cause and remedy Fault 54 The food probe is defective Remove the probe from its socket and the message will disappear Another fault code shown in the display as F numbers Contact Miele Problem solving guide 67 ...

Page 68: ...uote the model and serial number of your appliance These are given on the data plate which is located on the front of the oven cavity N B A call out charge will be applied for service visits where the problem could have been resolved as described in these instructions Please note that telephone calls may be monitored and recorded to improve our service Guarantee Please see the guarantee card suppl...

Page 69: ...se microwave power The dish has an anti stick coating Place it on the glass shelf on the lowest shelf level in the oven It is available in two sizes HUB 61 22 HUB 62 22 Depth 22 cm HUB 61 35 Depth 35 cm Gourmet oven dish lid A lid is available separately Important The HUB 61 35 gourmet oven dish cannot be placed in the oven with the lid on This exceeds the height of the oven cavity When ordering a...

Page 70: ...s ideal for items which need a well baked base such as pizza quiche bread bread rolls and savoury snacks The pizza stone is made from heat retaining fire brick and is glazed Place it directly on the rack A paddle made of untreated wood is supplied with it for placing food on the pizza stone and taking it off Miele E Cloth Removes grease and stains and leaves no smearing Suitable for cleaning surfa...

Page 71: ...nding on country an additional means of disconnection must be provided for all poles Switches with a minimum all pole contact gap of 3mm are suitable for isolating the appliance These include circuit breakers fuses and protective devices For extra safety it is advisable to protect the appliance with a suitable residual current device RCD Please contact a qualified electrician for advice If the cab...

Page 72: ... unit Appliances with glass front Appliances with metal front Installation in a base unit If fitted underneath a hob the installation instructions for the hob must also be taken into account Appliances with glass front Appliances with metal front Installation 72 ...

Page 73: ...The appliance must not be operated until it has been correctly installed in its housing unit Otherwise it poses an electric shock hazard Connect the appliance to the electricity supply Place the oven into the oven housing unit as far as the oven trim and align Open the door and with two screws secure the appliance to the side walls of the furniture unit through the holes in the oven trim Installat...

Page 74: ...74 ...

Page 75: ...75 ...

Page 76: ...Alteration rights reserved 22 1311 H 5080 BM H 5088 BM M Nr 07 650 220 02 ...

Reviews: