Operating instructions
for G 891 dishwasher
To prevent accidents andmachine damage, read
ö]
the Operating Instructionsbefore installing or usingthe machine.
M.-Nr. 05 255 651
Page 1: ...Operating instructions for G 891 dishwasher To prevent accidents and machine damage read ö the Operating Instructions before installing or using the machine M Nr 05 255 651 ...
Page 2: ...2 Water softener 13 Programming and setting the water hardness level 14 Programming and changing the water hardness level 14 Setting the water hardness level selector in the wash cabinet 15 Before using for the first time 16 Filling the salt reservoir 16 Salt indicator 17 Rinse aid 18 Adding rinse aid 18 Rinse aid indicator 19 Setting the dosage 20 Loading the dishwasher 21 Loading examples 22 Upp...
Page 3: ...lay start 36 Unloading the dishwasher 38 Cleaning and care 39 Filter indicator light 39 Cleaning the filters in the wash cabinet 39 Cleaning the spray arms 41 Cleaning the wash cabinet 42 Cleaning the door and the door seal 42 Cleaning the control panel 42 Cleaning the door panel 42 Problem solving guide 43 Solving problems 51 Cleaning the water intake filter 51 Cleaning the drain pump and non ret...
Page 4: ...er basket 4 Water feed for middle spray arm 5 Middle spray arm 6 Water hardness selector 7 Lower spray arm 8 Four heigh adjustable feet 9 Filter combination 10 Salt reservoir 11 Dual compartment detergent dispenser 12 Rinse aid reservoir with dosage selector 13 Data plate Guide to the appliance 4 ...
Page 5: ...nce display 16 On Off button 17 Program selector buttons 18 Time remaining Delay start display 19 Time display 20 Delay Start buttons 21 Top Solo button 22 Start Stop button 23 Child safety lock 24 Door release 25 Vent for drying fan Guide to the appliance 5 ...
Page 6: ...g or trip the circuit breaker This dishwasher should only be in stalled under a continuous countertop secured to adjacent cabinetry The dishwasher must be electri cally grounded Install the dish washer as outlined in the included In stallation instructions Only use detergents and rinse aids recommended for residential dish washers Do not use the dishwasher unless all panels are in place Do not all...
Page 7: ...remove the front door and cut off the power cord This will help protect children from injury and accidentally locking themselves in Under certain conditions hydrogen gas may be produced in a hot wa ter system that has not been used for two weeks or more HYDROGEN GAS IS EXPLOSIVE If the hot water system has not been used for such a period turn on all hot water faucets and let the water flow from ea...
Page 8: ...mer le disjoncteur Installer uniquement ce lave vaisselle sous un comptoir continu qui est fixé à des meubles adjacents Vous devez mettre le lave vaisselle à la terre Installer le lave vaisselle en observant les instructions pour l installation ci jointes Utiliser uniquement des détersifs et des produits de rinçage recommandés pour les lave vaisselle domestiques Ne pas utiliser le lave vaisselle à...
Page 9: ...er la porte et couper le cor don du lave vaisselle avant de l enlever aux déchets afin d empêcher les enfants de se blesser ou de s enfermer dans l appareil par accident Dans certaines conditions un système d eau chaude qui n a pas été utilisé pendant plus de deux semaines peut dégager de l azote L AZOTE EST EXPLOSIF Si le système d eau chaude n a pas été utilisé pen dant une telle période de temp...
Page 10: ...heat wa ter to the temperatures required by the wash program This capability allows the option of connecting the machine to either a hot or cold water source For lowest energy consumption and the gentlest washing of china and crystal connect the dishwasher to a cold water source For fastest possible wash times yet higher energy consumption connect the dishwasher to a hot water source Make full use...
Page 11: ...art for pro gram descriptions Add correct detergent amount Generally 1 tablespoons 25 ml of detergent is enough for most normally soiled loads Not enough or too much detergent can lead to poor wash re sults See Adding detergent Cleaning results vary among detergent brands If you are not satisfied with the wash results try another brand of de tergent Load dishes correctly Load dishes so that water ...
Page 12: ...l it clicks into position Child Safety Lock The yellow key for the Child Safety Lock is shipped on one of the spikes at the front of the upper basket Remove the key before using the dishwasher The Child Safety Lock is designed to prevent children from opening the dish washer Use the provided key to lock or un lock the Child Safety Lock Horizontal the door is locked Vertical the door can be opened ...
Page 13: ...must still be pro grammed to correspond to the water hardness level in your area Where the water hardness fluctuates e g between 9 17 gr gal 160 310 ppm always program the machine to the higher value 17 gr gal 310 ppm in this example If there is a fault it will help the service technician to know the hardness of your local water supply Enter the water hardness below gr gal ppm Settings gr gal ppm ...
Page 14: ...h program but ton The value corresponding to the pro grammed water hardness level e g 22 will appear in the time display The water hardness level is 22 gr gal 400 ppm If the water hardness level in memory is correct Turn off the dishwasher with the On Off button To program in a different water hard ness level Press the Top Solo button repeat edly until the value corresponding to your water hardnes...
Page 15: ... dishes and cutlery Use a screwdriver to take the cover off the water hardness level selector in the wash cabinet Use a coin or screwdriver to adjust the water hardness level selector in the wash cabinet There is a click as each setting is reached gr gal ppm Selector setting level 1 7 20 130 3 8 10 140 180 2 11 14 200 250 1 15 70 270 1260 0 The water hardness selector is preset to setting 3 Exampl...
Page 16: ...eactivation salt of the proper grain size is used To fill the salt reservoir Remove the lower basket Unscrew and remove the salt reser voir cap Before adding salt for the first time fill the reservoir with approximately 2 quarts 2 l of water Place the provided funnel over the salt reservoir Carefully fill with salt grain size of 1 4 mm The salt reservoir holds ap proximately 4 lbs 2 kg of salt de ...
Page 17: ...o been designed so that future program up dates can be entered into the dish washer See the After Sales Service Bypassing the Salt indicator To bypass the salt indicator you will need a screwdriver and needle nose pliers Remove the salt reservoir cap Looking into the salt reservoir you will see the top of the float chamber on the right hand side b Using a screwdriver carefully pivot the float cham...
Page 18: ...e aid reservoir with detergent will damage the reservoir Only pour rinse aid formulated for residential dishwashers into the reservoir Adding rinse aid Add rinse aid before the first use and when ever the Rinse aid indicator lights Press the button in the direction of the arrow until the flap springs open Before using for the first time 18 ...
Page 19: ...he dis penser Press on the flap until you hear it click shut Failure to close it all the way will allow water to enter the res ervoir during the wash program Wipe up any spilled rinse aid The flap will remain closed during nor mal operation Rinse aid indicator The rinse aid indicator on the control panel will light when the rinse aid reser voir needs refilling There will be enough rinse aid left f...
Page 20: ... dispenses approximately 3 ml of rinse aid per program It can be adjusted from 1 to 6 depending on your needs Use a higher setting if spots appear on dry glassware Use a lower setting if streaking appears on dishes or glasses Before using for the first time 20 ...
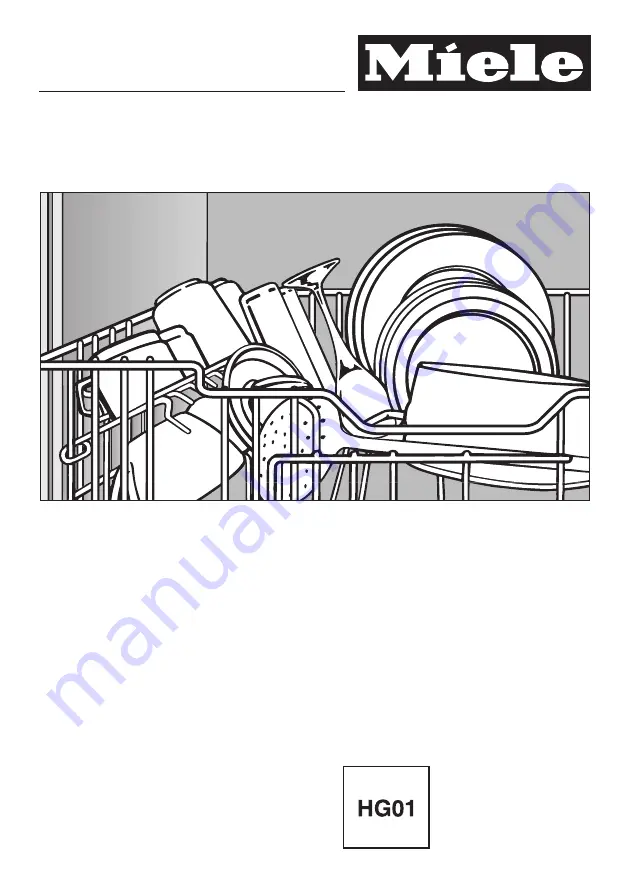
Page 21: ...d and placed in the upper basket Concave based items should be placed at an angle on top of the coffee bar so that water does not pool To ensure good water coverage tall narrow hollow pieces should be placed in the center of the basket rather than in the corners Small cups and glasses should be placed on the cup racks Taller mugs and glasses can be placed under neath the rack The spray arms must n...
Page 22: ...ing Top Solo If Top Solo has been selected for use with a wash program all items must be loaded into the upper basket and cut lery tray If your machine has a cutlery basket space the items so that water can reach all sides of the cutlery Lightly soiled plates or platters can also be placed in the lower basket if they are spaced Do not place dishes pans or other hollow items in the lower bas ket wh...
Page 23: ...stack smaller pieces Coffee bar select models To allow water to run off the bottom of coffee mugs place slanted on top of the coffee bar The bar can also be used to separate two rows of glasses to protect them from leaning against each other To stack wide items flip the bar to the right Loading the dishwasher 23 ...
Page 24: ...s will block the middle spray arm Slide the upper basket out Pull up the levers at the sides of the upper basket and adjust the basket height Release the levers and the basket will lock in place Depending on the setting of the upper basket the following plate dimensions can be accommodated Upper Basket position Plate diameter Upper basket Lower basket Upper 7 3 4 20 cm 11 30 cm Middle 8 1 2 22 cm ...
Page 25: ...ed in the lower basket Do not place thin delicate glassware in the lower basket unless a special glass ware insert or lower basket is installed Height limit The guide at the front of the upper bas ket determines the maximum height for items placed in the lower basket so that the middle spray arm is not blocked Loading the dishwasher 25 ...
Page 26: ...ses can be held more securely by the vertical supports Bottle holder The bottle holder e g for milk or baby bottles can be inserted into the bottom basket in more than one place Position in any area marked white in the illustra tion Do not position in areas marked X water cannot properly cover bottles in these areas Loading the dishwasher 26 ...
Page 27: ... handles between the hold ers Longer items such as soup ladles mix ing spoons and long knives should be placed lengthwise in the indentation in the middle of the cutlery tray The upper spray arm must not be blocked The cutlery tray insert is removable select models Spoon heads should be placed so that water runs off freely If the spoon handles do not fit between the holders then position them like...
Page 28: ...an immersion dip is usually dry at the end of a program but may tarnish If let to dry foods containing sulfur can discolor silver These include egg yolk onions mayonnaise mus tard legumes fish fish brine and marinades Color painted over the glaze of dishes may fade over time Clouding or etching may occur on glasses after frequent washing Miele recommends Wash delicate glassware using the Economy p...
Page 29: ...rewash cycle should be se lected Add an extra tablespoon 15 ml of detergent to compartment I or place directly on the inner door panel Dishwasher detergents contain irri tant and corrosive ingredients They can cause burns in the mouth and throat if swallowed or inhibit breath ing Keep children away from deter gent and from the dishwasher when the door is open To prevent children from coming into c...
Page 30: ...al features Energy Saver Program Approximately 0 20 kWh of electricity is used during this cycle Use this program for light to normally soiled dishes The water is not heated in this program The dishwasher must be connected to hot water of at least 45 C 115 F for this program to clean well The drying result may not match that of a program with a full drying cycle The higher the temperature of the i...
Page 31: ... next to the Start Stop button comes on The running time of the program selected appears in the time display 19 in hours and minutes The Time Left indicator lights Note Delay start or Top Solo must be se lected before the program is started see Additional features Press the Start Stop button 22 The indicator light next to the Start Stop button goes out The pro gram cycle begins Do not end a progra...
Page 32: ...nt the new conditions and calculates the time re quired This figure is shown in the time display At the end of a program A program has finished when the End indicator light is on in the program sequence display 15 and a 0 shows in the time display 19 The indicators illuminate for the se lected program just finished and any additional functions which were chosen These will go out when the dishwashe...
Page 33: ... until it clicks into place Changing a program If you have not yet started the selected program by pressing the Start Stop button Press button 17 for the desired pro gram Select Delay Start or Top Solo again if needed see Additional fea tures Press the Start Stop button 22 The indicator light next to the Start Stop button goes out The pro gram cycle resumes If the selected program is already runni...
Page 34: ...ry may be placed in the cutlery basket if there are large spaces between pieces Do not place dishes bowls or other hol low containers in the bottom basket Because a smaller load is being washed the amount of detergent rec ommended can be reduced to 2 3 the total amount for a full load When reducing the amount of detergent make sure that the cleaning result is not affected Using Top Solo will save ...
Page 35: ...19 in hours and minutes and the Time left indicator lights Press the Top Solo button 21 The Top Solo indicator lights The running time shown in the time dis play 19 for the program selected will be adjusted by the electronic Note Delay Start can now be selected see next page Press the Start Stop button 22 The program begins The Start Stop indicator light goes out and the pro gram sequence indicato...
Page 36: ...the Start Stop button light The running time of the program se lected appears in the time display 19 in hours and minutes and the Time left indicator light comes on Press or 20 The last delay start time used will show in the time display 19 The Time left indicator light goes out and the Delay start indicator light comes on Press button or 20 to reduce or increase the delay start time Note The Top ...
Page 37: ... i e before pressing the Start Stop button and activate the child safety lock When using the delay start function make sure that the compartment is dry before adding detergent Wipe dry with a cloth if necessary To start a program before the delay start period has elapsed Proceed as follows Press the Start Stop button 22 for at least one second While it is pressed in the indicator light next to it ...
Page 38: ... dle before unloading Dishes will cool much faster if the dishwasher door is opened a few inches after a program has finished First unload the lower basket then the upper basket and cutlery tray This will prevent water drops from the upper basket and cutlery tray from falling on dishes in the lower basket Operating the dishwasher 38 ...
Page 39: ...t serves as a re minder to check the filters in the wash cabinet Check the filter combination whenever the Filter indicator light comes on and clean if necessary Press the Start Stop button for at least one second the Filter indica tor light will then go out The Filter indicator light will also go out when the dishwasher is turned off Cleaning the filters in the wash cabinet Turn off the dishwashe...
Page 40: ...ning water using a nylon brush if necessary Then close the flap so that the clip engages Important After cleaning make sure that the clip has properly engaged Return the filter combination so that it lies flat in the base of the wash cabi net Secure the filter by turning the han dle clockwise Cleaning and care 40 ...
Page 41: ...the top spray arm upwards to engage the inner ratchet and un screw the spray arm Lift up the middle spray arm b to engage the ratchet and unscrew the spray arm c Remove the lower basket Pull the lower spray arm firmly up wards to remove Use a pointed object such as a toothpick to push food particles into the spray arm jets Rinse thoroughly under running water Return the spray arms and check that t...
Page 42: ...uids should be wiped from the sides of the dish washer door These are outside of the wash cabinet and are not cleaned by water from the spray arms Cleaning the control panel Clean the control panel with a damp cloth and mild detergent Do not use abrasive all purpose or glass cleaners they may damage plastic surfaces Cleaning the door panel Plastic laminate panels should be cleaned using a non abra...
Page 43: ...art The door is not properly closed Close the door firmly The machine is not plugged in Insert the plug The fuse is defective or has tripped Reset the circuit breaker The dishwasher stops during a program The fuse has tripped Reset the circuit breaker The Spray arm indica tor light is flashing Something is blocking the middle spray arm Open the door and rear range items blocking the spray arm The ...
Page 44: ...k professional advice Contact a plumber The filter in the water inlet is blocked Before fixing the problem Press the Start Stop button for at least 1 second All indicator lights next to the program buttons light Turn off the dishwasher with the On Off but ton Clean the water inlet filter The Water intake indi cator lights during the Energy Saver pro gram The intake water has not reached the requir...
Page 45: ...the kink Knocking noise in the wash cabinet The spray arm is hitting an item in the basket Interrupt the program re arrange items blocking the spray arms Rattling noise Items are not secure in the wash cabinet Interrupt the program and rearrange loose pieces A whistling noise is heard during the pro gram The circulation pump seal sometimes makes a whis tling noise This may be caused by detergent T...
Page 46: ...but ton a few seconds later Turn the dishwasher on using the On Off but ton Select the program again Press the Start Stop button to start the pro gram If the horizontal bars ap pear again at the end of the program there is a technical problem Call the Miele Service Department Despite the problem the dishwasher can be used in all programs but the water will not heat The Energy Saver program only wo...
Page 47: ... loaded correctly Dishes were placed inside other pieces water could not access all surfaces See notes in Loading the dishwasher The outlet of the water feed for the middle spray arm was covered An in sufficient amount of water flowed into the middle spray arm Make sure that dishes in serted in the rear of the upper basket do not cover the water feed tube The program was not powerful enough Select...
Page 48: ...chlorine White residue is visible on cutlery and dishes clouding occurs on glassware film can be wiped off Not enough rinse aid was used Increase the dosage see Before using for the first time There is no salt in the salt reservoir Add reactivation salt see Before using for the first time The salt reservoir cap was not correctly screwed on Replace it making sure it screws back on correctly The wat...
Page 49: ...fect was not strong enough to deal with natural dyes Use detergent containing chlorine Use more deter gent see Adding deter gent Discoloration is perma nent There are rust stains on cutlery The salt reservoir cap was not screwed on prop erly Reseat and screw the cap on firmly The affected items are not corrosion resistant There is no remedy Only purchase dish washer safe cutlery Detergent residue ...
Page 50: ...at least 1 second Turn off the dishwasher using the On Off button The filter combination in the wash cabinet is clogged Clean the filters see Cleaning and Care The drain pump or the non return valve may be blocked Clean the drain pump and the non return valve see Cleaning and care The drain hose is kinked Remove the kink Problem solving guide 50 ...
Page 51: ... electricity unplug it or trip the circuit breaker Turn off the main shutoff valve and unscrew the intake hose Carefully remove the rubber seal Remove the filter using needle nose pliers and rinse under running water Return the filter and seal Make sure they are seated correctly Screw the intake hose back on the water valve checking that it is not cross threaded Slowly turn on the valve and test f...
Page 52: ...splinters may be caught in the bottom of the wash cabinet If the dishwasher is not completely drained at the end of a program the drain pump or non return valve may be blocked To clean them Remove the combination filter Use a jug or bowl to scoop water out of the wash cabinet Tilt the locking clamp to the side Solving problems 52 ...
Page 53: ...rn valve see arrow Before returning the non return valve check to make sure that the drain pump is not obstructed Spin the pro peller several times in both direc tions it should turn smoothly Carefully refit the non return valve and secure it with the locking clamp Refit and secure the combination filter Solving problems 53 ...
Page 54: ...le These can be found on the data plate on the upper inside edge of the dishwasher door Program update function PC The PC indicator has the function of Program Correction PC This allows a technician to update the programming of the dishwasher to make use of new technological developments For example if a detergent that gives good wash results using only cold wa ter were to become available the was...
Page 55: ...o wash bottles e g milk or baby bottles a bottle holder to wash a large number of glasses a glassware insert for the bottom basket to wash larger plates an insert for plates up to 12 32 cm diameter to wash long stemmed glassware a glassware insert for the upper basket Special accessories 55 ...
Page 56: ...oose parts e g hoses cables cutlery baskets Transport the dishwasher in the up right position If unavoidable it may be transported on its back Do not transport it on its side or on the door because residual water in the machine will leak This residual water could get into the electronic unit and cause damage Transport 56 ...
Page 57: ... 7 16 57 cm Depth with door open 47 7 16 120 5 cm Weight approx 123 lbs 56 kg Voltage 110 120 V AC Rated load 12 5 A 1500 W Fuse rating 15 A Water pressure 15 150 psi 0 3 10 bar Water connection max 140 F 60 C Drain height max 39 1 m Drainage length max 13 ft 4 m Connection cable approx 4 ft 1 2 m Capacity 14 place settings Technical data 57 ...
Page 58: ...pans with dried on food 120 20 100 China Crystal 45 C 115 F Gentle program for lightly soiled and heat sensitive tableware 50 50 Short 45 C 115 F Quick program for lightly soiled dishes e g dishes are need during a party 50 50 Rinse Hold For rinsing dishes when a complete cycle is not needed Energy Saver for lightly to normally soiled dishes only select Energy Saver if the dishwasher is connected ...
Page 59: ... 1 14 3 7 131 110 X 55 C 130 F X X 55 C 130 F X 1 30 0 75 14 3 7 120 90 X X X 75 C 170 F X X 65 C 150 F X 1 96 1 4 24 6 3 154 130 X X 45 C 115 F X X 55 C 130 F X 1 08 0 55 19 5 93 68 X 45 C 115 F X X 55 C 130 F 1 11 0 55 14 3 7 62 34 X 0 06 0 06 5 1 3 11 11 X X X X X X 0 1 24 6 3 63 When washing a full load in the Normal program the Sani Wash program the Light Wash program or the Economy program a...
Page 60: ...Alteration rights reserved G891 002 2100 These instructions are printed on 100 recycled paper and are completely Biodegradable ...