OPTIONS MENU
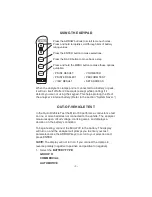
To display the Options menu, press and hold the MENU button. To
select an option, use the ARROW buttons and press ENTER.
IMPORTANT:
The last test result in the analyzer’s memory will be
erased when you connect to a battery and start a new test.
PRINT RESULTS
The Micro700 prints the last test result using the IR output at the top
of the analyzer and the Midtronics printer’s IR receiver below the
MODE button.
IMPORTANT:
If you are using the Midtronics printer for the first time,
charge the printer battery for 16 hours before beginning your test
session. Refer to the printer manual for more information.
Turn on the printer and align the IR transmitter on the top of the
analyzer with printer’s IR receiver. Press the MENU button and scroll
to
PRINT RESULTS
. When you are ready to print, press ENTER.
If the IR transmitter and receiver are not aligned, all the data may not
print. Press MENU to cancel the print job. Verify alignment between
the analyzer and printer, then try to print the test results again.
PRINTER SELECT
Select
IRDA
or
HP 82240B
. IRDA is compatible with the IRDA Mode
setting in the Midtronics printer (P/N 182-003A). The IRDA Mode
described in the printer’s user guide is called IRDA PHYSICAL
LAYER in the printer’s self-test printout.
HP 82240B is compatible with the printer’s HPIR Mode setting. The
HPIR Mode setting described in the printer’s user guide is called
INFRARED 33kHZ ENCODED in the printer’s self-test printout.
Refer to the IR/RS232 Thermal Printer User Guide included with the
Midtronics printer.
VIEW RESULTS
Use the ENTER and BACK buttons to scroll through the last test
results.
•
14
•

