4
Midtronics B.V. Hoofdveste 6 3992 DG HOUTEN
www.midtronics.com
CHAPTER 2:
OVERVIEW
CAPABILITIES
The tester tests 6 and 12-volt regular flooded, AGM flat plate,
AGM spiral, and GEL batteries. It displays the test results in
seconds and features a built-in printer to provide customers
with a copy of the results.
Additional features include the ability to:
•
test the Starting and Charging system
•
test batteries from rated from 100 to 1200 CCA
•
detect bad cells
•
protect against reverse polarity
•
test discharged batteries
•
test multiple rating systems
•
provide a multi-lingual user interface.
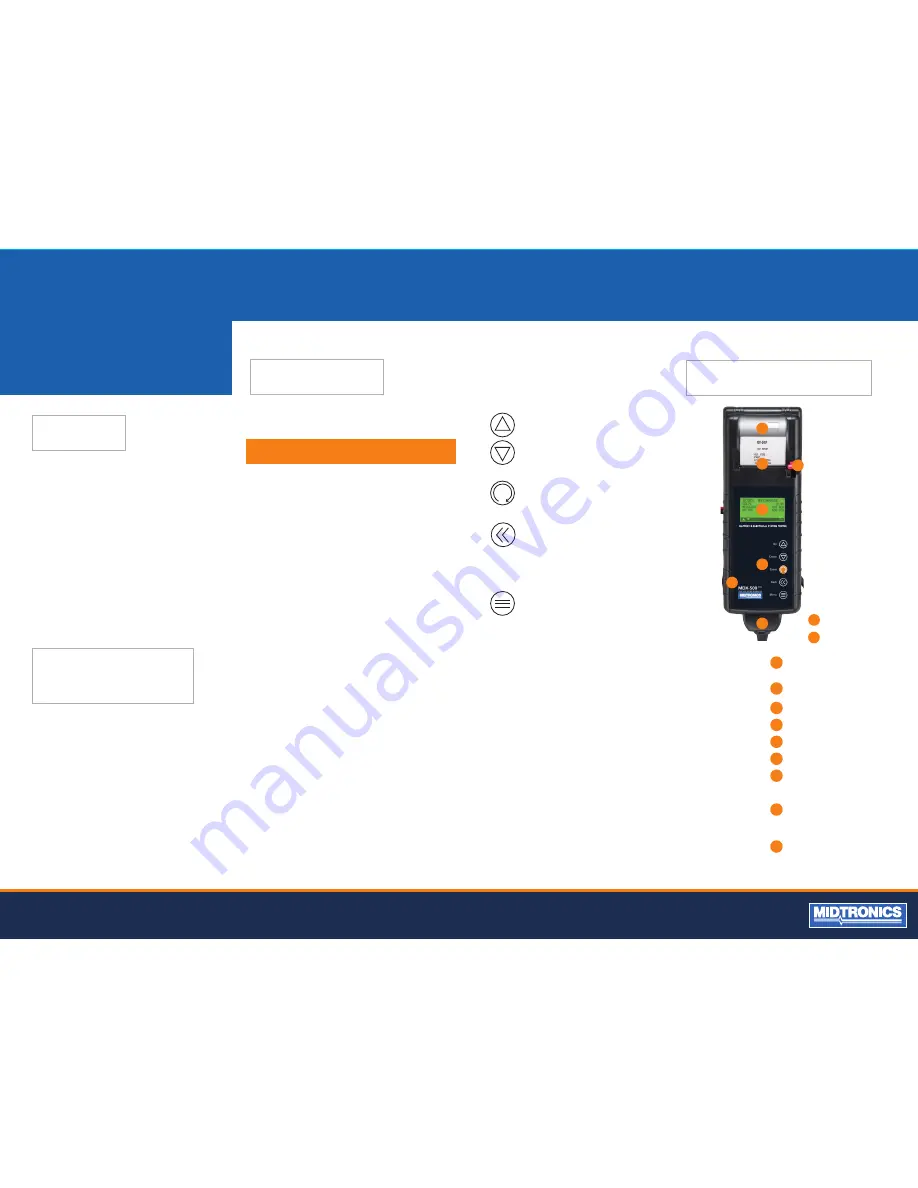
1
3
2
4
5
6
7
8
9
Integrated thermal
printer
Release lever for the
paper compartment
Paper slot
LCD screen
Keypad
Battery test cable
Spring-loaded data card
slot for test data storage
and software upgrades.
Infrared temperature
sensor with a range of
-28 °C to +93 °C (-20 °F to
+200 °F)
Data transmitter: sends
results to a PC using an
optional hardware and
software kit.
1
2
3
4
5
6
7
8
9
CONNECTIONS AND DATA PORTS
REMOVING AND INSERTING
THE DATA CARD
The analyzer ships with a plastic insert in the data card slot to
protect it from dust and debris. To remove the plastic insert
or a data card, push briefly on its edge to release it and pull it
from the slot.
When inserting a card, push it into the slot until it locks.
The card is correctly inserted when it is not protruding from
the slot. To protect the card slot and enable the analyzer to
read and write to the card, leave the card in the slot.
When you first connect the tester to a battery, it functions as
a voltmeter until you press the
ENTER
button.
IMPORTANT:
If you connect the tester to a voltage source
greater than
30 Vdc
, you may damage the tester’s circuitry.
The menu-driven display will then guide you step by step
through the test process. Use the keypad buttons to scroll to
and select options in the menu.
To turn off the tester when not connected to the battery,
briefly press and hold the
MENU
button.
DISPLAY AND KEYPAD
UP
and
DOWN ARROWS
Use these keys to choose test parameters
and scroll to menu options.
ENTER
Button
Use this button to make selections.
BACK/PRINT
Button
Use this button to move to the previous
screen or move back one space when
creating custom headers. You can also
use this button to printout test results
using the built-in printer.
MENU
Button
Use the
MENU
button to access the Main
Menu options of the tester.
For information about the options, see
“Options Menu”.


