background image

5

Midtronics B.V.     Hoofdveste 6     3992 DG  HOUTEN

www.midtronics.com

CHAPTER 2: 

OVERVIEW

DATA ENTRY METHODS

To perform a particular test or function, the tester will ask for 
different types of information. This means that the methods 
you  use  to  enter  information  will  change  depending  on 
the  type  of  information  requested.  The  four  types  of  entry 
methods are described below. 

Typically,  the  soft  key  below  the  right  half  of  the  screen 
confirms your choice, although the word above it may vary. In 
a similar fashion, the soft key below the left half of the screen 
cancels  your  choice  or  returns  you  to  the  previous  screen, 
although the word above it may also vary. 

MENU ICONS

A menu icon is a graphical representation of a function you 
can select. To select an icon, use the 

LEFT

 or 

RIGHT ARROW


key  to  highlight  it.  Highlighting  changes  the  icon  to  a  white 
picture  on  a  black  background.  To  confirm  your  selection, 
press the appropriate soft key.

OPTION BUTTONS

Some  lists  have  option  buttons  before  each  item.  To  select 
an item, use the 

UP/DOWN ARROW

 keys to move the dot 

into the button next to the item you want. You can also use 
the  alphanumeric  keypad  to  enter  the  number  preceding 
the  option  button.  To  confirm  your  selection,  press  the 
appropriate soft key.

SCROLLING LISTS

Scrolling lists contain items that extend above and below the 
screen  or  the  selection  box  that  contains  them.  To  indicate 
that there are more items, the symbols 

UP/DOWN

 appear to 

the right of the first visible or highlighted item on the list. 

To select from this type of list, use the 

UP/DOWN ARROW


keys  to  scroll  to  the  item,  or  use  the  keypad  to  enter  your 
choice, and press the appropriate soft key.

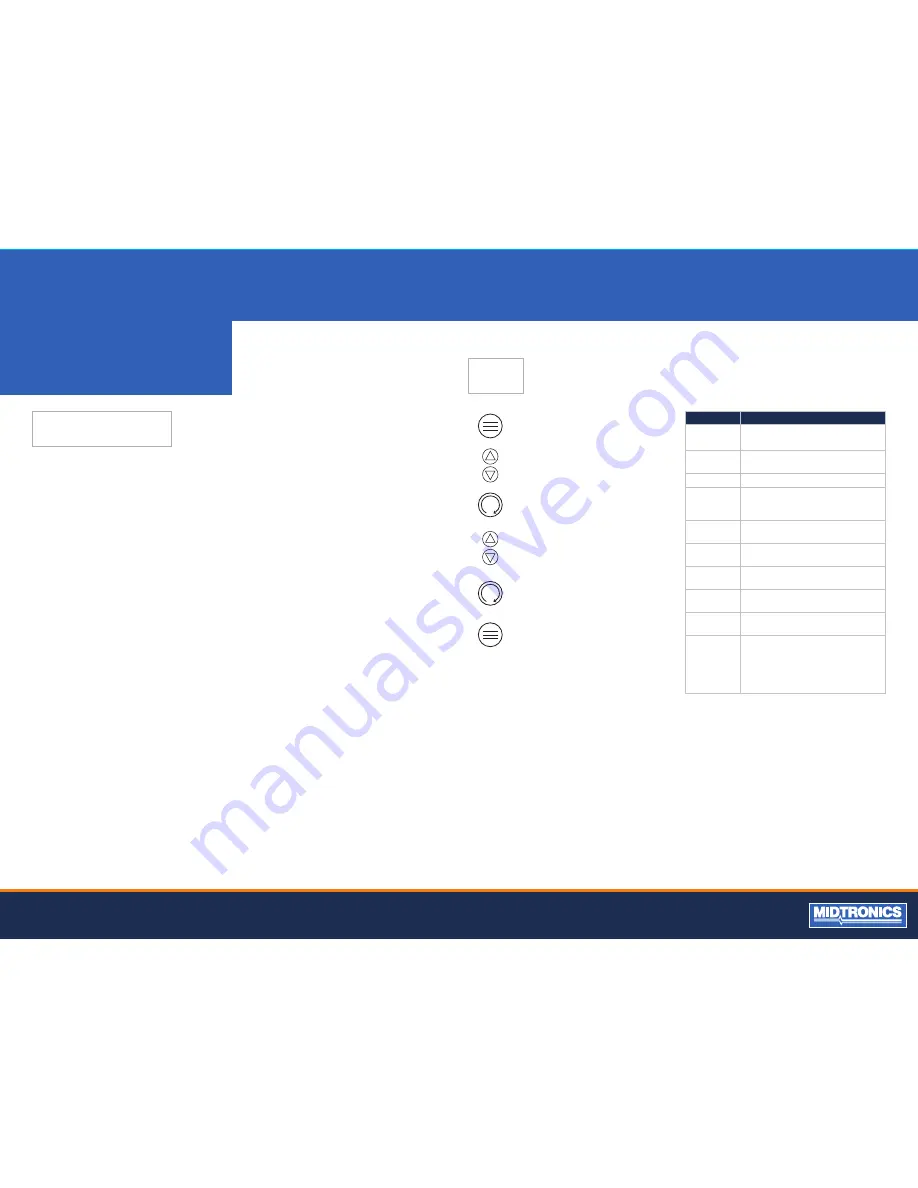
Press the 

MENU

  button  to  access 

the Options Menu.

Use the 

UP

  and

  DOWN 

arrows  to 

move to the line you want to edit.

Press the 

ENTER

  button  to  make 

highlighted line editable.

Use the 

UP

  and 

DOWN

  arrows  to 

select  the  character  for  that  cursor 
location.

Press the 

ENTER 

button to move to 

the next location.

Press the 

MENU

 button to return to 

the Options Menu.

MENU

ALPHANUMERIC ENTRIES

Even though the tester does not use an alphanumeric keypad 
it is possible to enter alphanumeric  values. When applicable 
the alphanumeric values appear on the display. Use the 

UP/

DOWN

  or 

LEFT/RIGHT ARROW

  keys  to  scroll  and  confirm 

this with the > key. To return one or more steps use the < key. 

Option

Explanation

VIEW/PRINT

Display the previous test result. Press the 

PRINT

 button to print the results.

PERFORM 
TEST

Begin the Battery Test procedure.

LANGUAGE

Select a language for the tester.

SET 
ADDRESS

Enter the address to display on the top of 
the printout. (Limit: 8 lines, 21 characters 
per line)

SET TIME

Select 24-hour or AM/PM and set the 
time.

SET DATE

Select the date format as well as set the 
correct date.

COUNTER

Clear or display battery and system test 
by results. 

CONTRAST

Adjust the contrast setting of the tester 
display. 

TEMP. UNITS

Select the temperature units Degrees F or 
Degrees C

VOLTMETER

Automatically test battery voltage 
when the clamps are first connected to 
the battery terminals. Press 

ENTER

 to 

continue testing the battery. Press 

BACK


to return to return oto the menu. 

Summary of Contents for MDX-500 SERIES

Page 1: ...INSTRUCTION MANUAL MDX 500 SERIES FOR 12 VOLT AUTOMOTIVE STARTING BATTERIES AND STARTING CHARGING SYSTEMS Battery Conductance and Electrical System Analyzer A...

Page 2: ...TS CAPABILITIES REMOVING AND INSERTING THE DATA CARD DISPLAY AND KEYPAD DATA ENTRY METHODS MENU ICONS OPTIONS BUTTONS SCROLLING LISTS ALPHANUMERIC ENTRIES MENU BATTERY TEST RESULTS NEW BATTERY TEST RE...

Page 3: ...charging or jump starting it CHAPTER 1 BEFORE YOU BEGIN PERSONAL PRECAUTIONS Batteries can produce a highly explosive mix of hydrogen gas and oxygen even when the battery is not in operation Always wo...

Page 4: ...t and debris To remove the plastic insert or a data card push briefly on its edge to release it and pull it from the slot When inserting a card push it into the slot until it locks The card is correct...

Page 5: ...t visible or highlighted item on the list To select from this type of list use the UP DOWN ARROW keys to scroll to the item or use the keypad to enter your choice and press the appropriate soft key Pr...

Page 6: ...CONNECTING TO THE BATTERY CAUTION DO NOT CONNECT THE TESTER TO A VOLTAGE SOURCE GREATER THAN 30 VDC Connect the clamps to the battery the red clamp to the positive terminal and the black clamp to the...

Page 7: ...ays your selected battery rating and the rating units 8 The temperature question is asked only if it can impact the test result Decision Interpretation GOOD BATTERY Return the battery to service GOOD...

Page 8: ...dable contact the battery manufacturer EN DIN SAE IEC JIS Decision Interpretation GOOD BATTERY Return the battery to service GOOD RECHARGE Fully charge the battery and return it to service CHARGE RETE...

Page 9: ...and the rating units 7 The temperature questions is asked only if it can impact the test result START STOP TEST RESULTS Decision Interpretation GOOD BATTERY Return the battery to service GOOD RECHARG...

Page 10: ...n to the battery If the connection is loose or heavily corroded clean or replace the cable and retest If the belts and connections are in good working condition replace the alternator Older vehicles u...

Page 11: ...ttery has been charged SURFACE CHARGE DETECTED Remove the surface charge before it begins testing Testing will resume after charge has been removed CHECK CONNECTION One or both clamps are not making p...

Page 12: ...Y Tester is not connected to the battery LOW INTERNAL AA BATTERIES REPLACE AA BATTERIES SOON Internal AA batteries are low and need to be replaced See Maintenance Troubleshooting section NON 12 VOLT S...

Page 13: ...ake sure that the clamps are connected properly red clamp to the positive terminal and the black clamp to the negative terminal Check that both sides of the clamps are making contact with the terminal...

Page 14: ...s including owner misuse Midtronics is not liable for any incidental or consequential damages for breach of this warranty The warranty is void if owner attempts to disassemble the unit or to modify th...

Reviews: