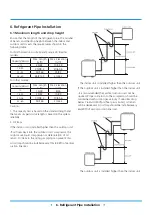
6. Refrigerant Pipe Installation
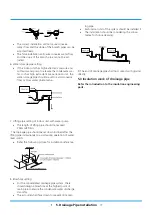
6.2 The procedure of connecting pipes
1.Choose the pipe size according to the specification table.
2.Confirm the cross way of the pipes.
3.Measure the necessary pipe length.
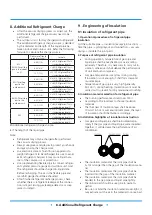
4.Cut the selected pipe with pipe cutter
•
Make the section flat and smooth.
Oblique
Rough
Warped
90
5. Insulate the copper pipe
•
Before test operation, the joint parts should not be
heat insulated.
6. Flare the pipe
•
Insert a flare nut into the pipe before flaring the
pipe
•
According to the following table to flare the pipe.
Pipe diameter
(inch(mm))
Flare dimension A (mm/inch)
Flare shape
Min
Max
1/4" (6.35)
8.4/0.33
8.7/0.34
R0.4~0.8
45
°±
2
90
°
±
4
A
3/8" (9.52)
13.2/0.52
13.5/0.53
1/2" (12.7)
16.2/0.64
16.5/0.65
5/8" (15.9)
19.2/0.76
19.7/0.78
3/4" (19)
23.2/0.91
23.7/0.93
7/8" (22)
26.4/1.04
26.9/1.06
•
After flared the pipe, the opening part must be seal
by end cover or adhesive tape to avoid duct or exog-
enous impurity come into the pipe.
7. Drill holes if the pipes need to pass the wall.
8. According to the field condition to bend the pipes so
that it can pass the wall smoothly.
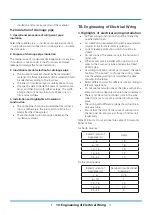
9. Bind and wrap the wire together with the insulated pipe
if necessary.
10. Set the wall conduit
11. Set the supporter for the pipe.
12. Locate the pipe and fix it by supporter
•
For horizontal refrigerant pipe, the distance be-
tween supporters should not be exceed 1m.
•
For vertical refrigerant pipe, the distance between
supporters should not be exceed 1.5m.
13. Connect the pipe to indoor unit and outdoor unit by
using two spanners.
•
Be sure to use two spanners and proper torque to
fasten the nut, too large torque will damage the
bellmouthing, and too small torque may cause
leakage. Refer the following table for different pipe
connection.
Pipe Diameter
Torque
Sketch map
N.
m(lb.ft)
1/4" (6.35)
15~16
(11~11.8)
3/8" (9.52)
25~26
(18.4~19.18)
1/2" (12.7)
35~36
(25.8~26.55)
5/8" (15.9)
45~47
(33.19~34.67)
3/4" (19)
65~67
(47.94~49.42)
7/8" (22)
75-85
(55.3-62.7)
Summary of Contents for MUEU-18HRFNX-QRD0W
Page 1: ...LIGHT COMMERCIAL INVERTER SERIES SM_LC GA _R410A_R32_3D INV_EU_NA_1811 SERVICE MANUAL...
Page 2: ......
Page 5: ......
Page 6: ...Contents 1 Precautions 2 2 Information servicing For flammable materials 3 Safety Precautions...
Page 12: ...Contents 1 Model Reference 2 2 External Appearance 3 Model Reference...
Page 15: ...Model Reference 4 2 2 Outdoor Unit Outdoor Unit...
Page 19: ...IDU Compact Cassette 4 2 Dimensional Drawings...
Page 21: ...IDU Compact Cassette 6 4 Service Place...
Page 44: ...Outdoor Unit 3 Panel Plate B30...
Page 45: ...Outdoor Unit 4 Panel Plate BA30...
Page 46: ...Outdoor Unit 5 Panel Plate CA30...
Page 47: ...Outdoor Unit 6 Panel Plate D30...
Page 48: ...Outdoor Unit 7 Panel Plate E30...
Page 49: ...Outdoor Unit 8 Panel Plate 590...
Page 50: ...Outdoor Unit 9 2 Service Place...
Page 62: ...Outdoor unit printed circuit board diagram 17122000002718...

