


69
6). Disconnect the charge set and the charging
cylinder, and open the 2-way and 3-way valves
Be sure to use a hexagonal wrench to operate
the valve stems.
7). Mount the valve stems nuts and the service
port cap.
Be sure to use a torque wrench to tighten the
service port cap to a torque 18N.m.
Be sure to check for gas leakage.
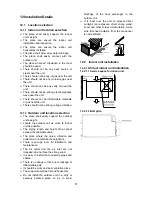
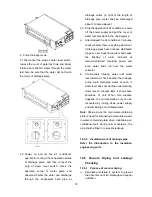
12.4.6 Re-Installation When the Outdoor
Unit Requires Repairs
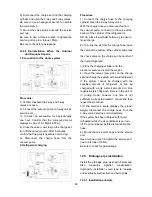
1. Evacuation for
the whole system
Procedure:
1).Confirm that both the 2-way and 3-way
valves are open.
2). Connect the vacuum pump to 3-way valve’s
service port.
3). Conduct an evacuation for approximately
one hour. Confirm that the compound meter
displays a value of -0.1Mpa(14.5Psi).
4). Close the valve (Low side) on the charge set,
turn off the vacuum pump. After 5 minutes,
confirm that the gauge needle is not moving.
5). Disconnect the charge hose from the
vacuum pump.
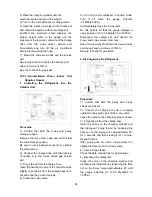
2. Refrigerant charging
Procedure:
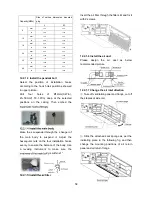
1). Connect the charge hose to the charging
cylinder. Open the 2-way 3-way valve.
With the charge hose you disconnected from
the vacuum pump, connect it to the valve at the
bottom of the cylinder. If the refrigerant is
R410A, place the cylinder bottom-up to ensure
liquid charge.
2). To purge the air from the charge hose, open
the valve at the bottom of the cylinder and press
the check valve on the charge set (be careful of
the liquid refrigerant).
3) Place the charging cylinder onto the
electronic scale and record the weight.
4). Open the valves (Low side) on the charge
set and charge the system with liquid refrigerant
If the system cannot be charged with the
specified amount of refrigerant, or can be
charged with a only a small amount at a time
(approximately 150g each time),turn the unit on
in cooling mode; however, one time is not
sufficient, wait approximately 1 minute and then
repeat the procedure.
5).If the electronic scale displays the proper
weight, disconnect the charge hose from the
3-way valve’s service port immediately.
If the system has been charged with liquid
refrigerant while the air conditioner is on, turn
off the air conditioner before disconnecting the
hose.
6). Mount the valve stem caps and the service
port.
Use a torque wrench to tighten the service port
cap to a torque of 18N.m.
Be sure to check for gas leakage.
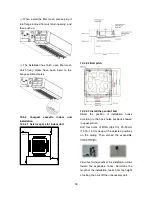
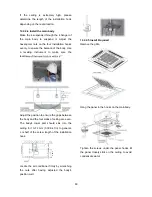
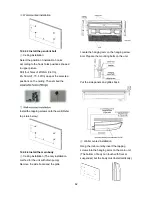
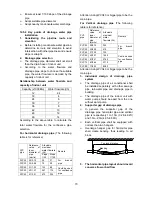
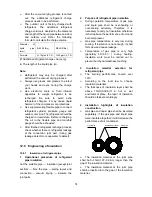
12.5 Drainage pipe installation
Install the drainage pipe as shown below and
take
measures
against
condensation.
Improperly installation could lead to leakage
and eventually wet furniture and belongings.
12.5.1 Installation principle
Summary of Contents for MCHSU-09PHH2
Page 7: ...5 2 2 Part names of Indoor Outdoor units Cassette Unit...
Page 8: ...6 Duct Units...
Page 9: ...7 Console...
Page 10: ...8 Ceiling floor Units...
Page 28: ...26 Console Unit Ceiling floor Units 39 37 39 37in 3 94in 39 37in 1 38in...
Page 32: ...30 MEHSU 09CHN2 MEHSU 12CHN2 MEHSU 36CSC2 MEHSU 48CSC2...
Page 33: ...31 MEHSU 36CSD2 MEHSU 48CSD2...
Page 34: ...32 MEHSU 18CHF2 MEHSU 24CHF2 MEHSU 36CSF2...
Page 35: ...33 MEHSU 48CSF2 MEHSU 36CSF2 MEHSU 48CSF2...
Page 36: ...34 6 2 Outdoor Unit MCHSU 09PHH2 MCHSU 12PHH2 MCHSU 18PHH2...
Page 37: ...35 MCHSU 24PHH2...
Page 38: ...36 MCHSU 36CSH2...
Page 41: ...39 For MCHSU 48CSH2...
Page 44: ...42 MEHSU 09CHD2 Code 0 Code 1 Code 2 Code 3 Code 4...
Page 45: ...43 MEHSU 12CHD2 Code 0 Code 1 Code 2 Code 3 Code 4...
Page 46: ...44 MEHSU 18CHD2 Code 0 Code 1 Code 2 Code 3 Code 4...
Page 47: ...45 MEHSU 24CHD2 Code 0 Code 1 Code 2 Code 3 Code 4...
Page 48: ...46 MEHSU 36CSD2 Code 0 Code 1 Code 2 Code 3 Code 4...
Page 49: ...47 MEHSU 48CSD2 Code 0 Code 1 Code 2 Code 3 Code 4...
Page 58: ...56 12 Field Wiring 36K 48K...